10 Insanely DIY Halloween Classroom Door Decorations

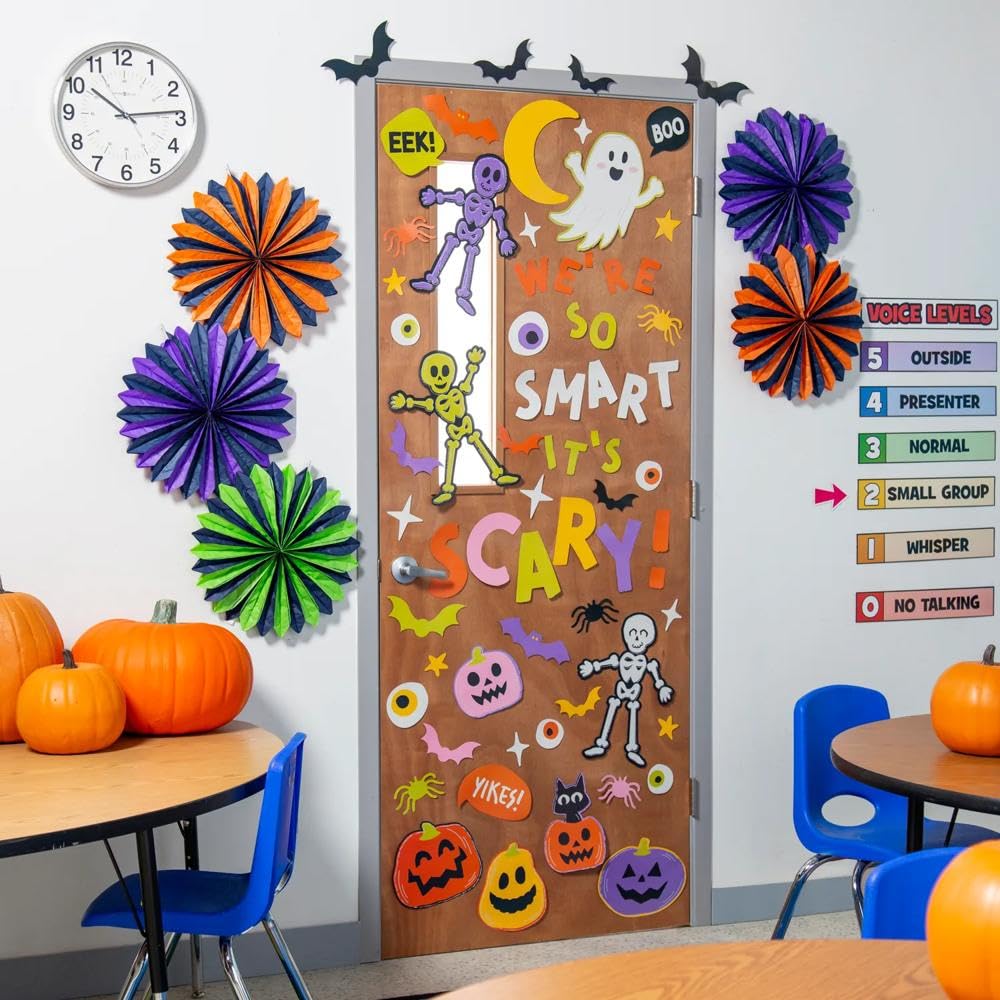
October is a great month to give your classroom door a spooky makeover.
It’s the time to give students something exciting to discover each morning.
A simple design with the right handmade details makes the entrance stand out.
To be honest your student involvement could make these projects much more enjoyable because everyone gets a small part in creating the final display.
Below, I’m going to share DIY Halloween classroom door decorations you can actually finish in no time.
Materials That Make Halloween Door Decorations Stand Out
Black cardstock, construction paper, and poster board handle the basics, from spooky silhouettes to oversized lettering.
For texture, crepe paper, tissue paper, and velvet ribbon bring movement and dimension to ghosts, mummies, pumpkins, and gothic designs.
Small details make a big difference too. Googly eyes, metallic stickers, artificial spiders, and adhesive gems give simple characters extra personality.
Removable adhesive strips are useful for securing larger decorations without leaving permanent marks on the door.
For displays that include lighting, battery operated string lights add a Halloween glow.
Keep scissors, glue, double sided tape, and a black marker close by for last-minute adjustments.
1. Unleashing a Cauldron of Bats
Materials you need:
- Black cardstock
- Purple construction paper
- Orange cardstock
- Black crepe paper
- White chalk marker
- Scissors
- Double-sided tape
How to Make It:
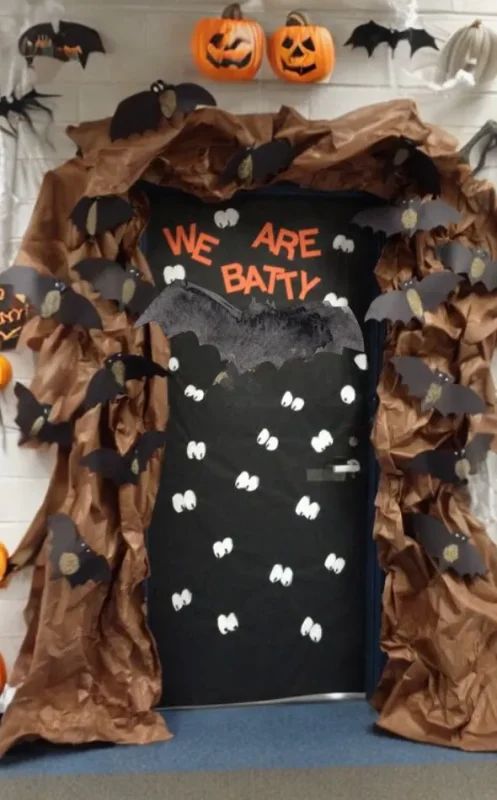
Turn the top half of the door into a bubbling cauldron using black cardstock, then layer purple and orange paper around the opening to suggest colorful potion fumes.
Cut dozens of black bats in different sizes. Next, arrange them as if they are bursting out of the cauldron and flying across the doorway.
Add a few curling strips of black crepe paper around the edges to give the scene extra movement.
Finish with a short phrase such as “Something Wicked This Way Comes” in white chalk lettering across the cauldron.
Helpful Tip: Angle the bats in different directions and vary their sizes so the swarm looks lively instead of arranged in a straight pattern.
2. Whimsical Pumpkin Parade
Materials you need:
- Orange tissue paper
- Green pipe cleaners
- Brown cardstock
- Black adhesive vinyl
- Glue
How to Make It:
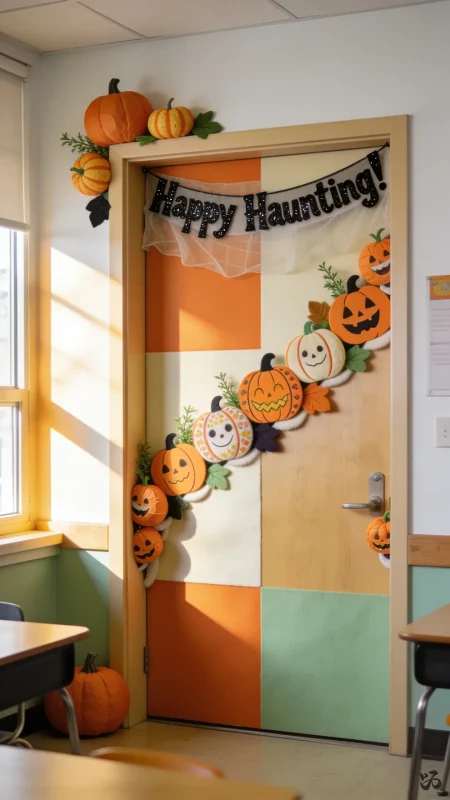
Turn the door into a cheerful pumpkin parade by shaping orange tissue paper into plump pumpkins with slightly different sizes.
Twist green pipe cleaners into curling vines and attach them above each pumpkin, then add small brown cardstock stems.
Give every pumpkin its own personality with simple eyes, smiles, or surprised expressions cut from black adhesive vinyl.
Arrange the pumpkins from the bottom corner toward the opposite side so the display looks like the characters are marching across the door.
Add a small Halloween greeting above the parade to complete the scene.
Quick Tip: Leave enough space between a few pumpkins so the individual expressions remain easy to see from the hallway.
3. Witch Cauldron Door
Materials you need:
- Black poster board
- Purple cellophane
- Green tissue paper
- Silver wrapping paper
- Chalk marker
- Fishing line
- Tape
How to Make It:
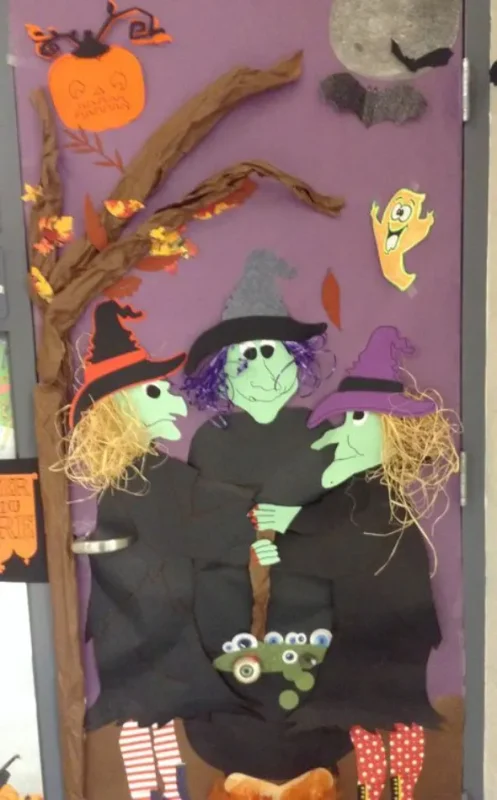
Cut a large cauldron from black poster board and place it across the lower half of the door as the main focal point.
Shape purple cellophane and green tissue paper into curling potion smoke that rises toward the top of the doorway.
Cut witch silhouettes from the remaining black poster board, including pointed hats, broomsticks, and flowing capes.
Use silver wrapping paper to give the cauldron rim a metallic edge, then write a short potion-themed message in chalk marker.
Display Tip: Suspend a few small witch silhouettes from fishing line above the cauldron so they appear to float through the potion smoke.
4. Craft Little Ghosts and Candy Corn
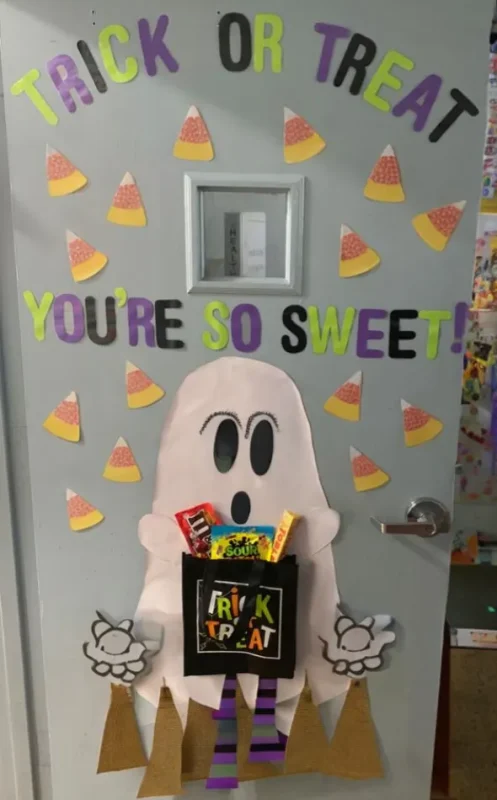
Materials you need:
- White coffee filters
- Orange cardstock
- Yellow cardstock
- Black marker
- Glue
How to Make It:
Flatten several white coffee filters and gather the centers slightly to form lightweight little ghosts with softly ruffled edges.
Draw different facial expressions with a black marker, giving each character its own personality.
Cut simple candy corn shapes from orange and yellow cardstock, then layer them with white sections to complete the familiar Halloween treat.
Scatter the ghosts and candy corn across the door in a loose pattern, leaving enough open space for the shapes to stand out.
Finish with a small “Boo!” sign near the center to tie the two elements together.
Crafting Tip: Ask students to draw the ghost faces before assembling the display so each character has a different expression.
5. Gothic Glam Door with Velvet Ribbons
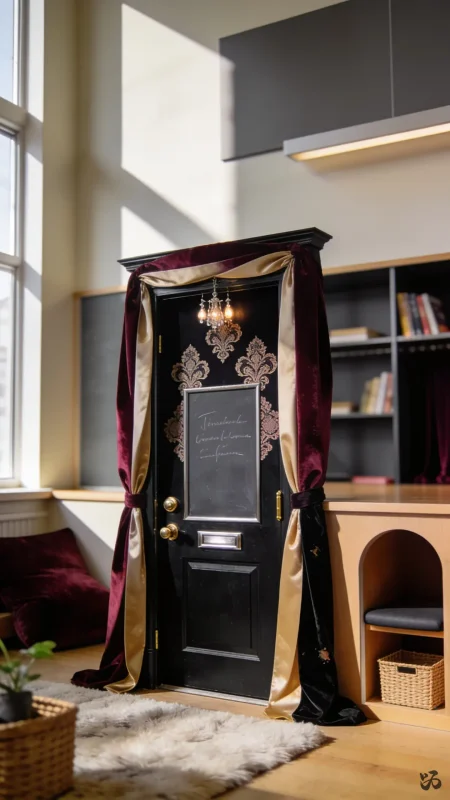
Materials you need:
- Black velvet ribbon
- Deep red satin ribbon
- Artificial black roses
- Gold ornament picks
- Black lace
- Adhesive hooks
How to Make It:
Run black velvet ribbon around the outer edges of the door to establish a dramatic frame.
Layer narrow strips of deep red satin ribbon across selected corners, then tuck black lace behind the ribbons for an ornate finish.
Cluster artificial black roses at one upper corner and balance the opposite side with a smaller floral arrangement.
Insert a few gold ornament picks among the flowers to give the dark palette a polished Halloween accent.
Leave the center relatively open for a short greeting or the classroom name.
Styling Tip: Gather the velvet ribbon into soft loops near the corners instead of stretching every strip completely flat.
6. Pair Stars with Scary Skeletons
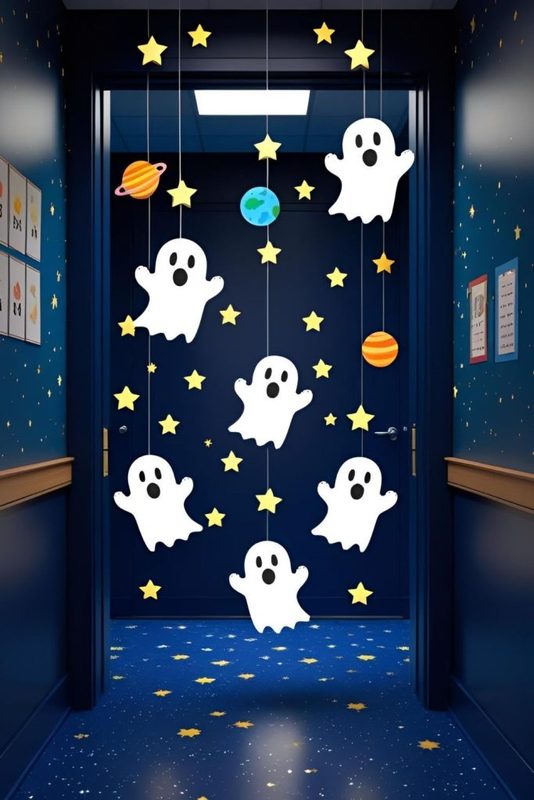
Materials you need:
- Black poster board
- White butcher paper
- Silver star stickers
- White chalk marker
- Black yarn
- Scissors
- Glue
How to Make It:
Cut skeleton shapes from white butcher paper and position them at different angles across a black poster board background.
Use black yarn to sketch simple joints and bone details, giving each skeleton a slightly different pose.
Scatter silver star stickers around the figures to create a spooky night-sky effect.
Add small white chalk details to the background, such as tiny dots or wispy clouds, then write a short phrase such as “Reach for the Stars” above the skeletons.
Classroom Tip: Give each student a small star to decorate with their name or a personal goal, then add the finished stars around the skeletons.
7. Day of the Dead Inspired Door
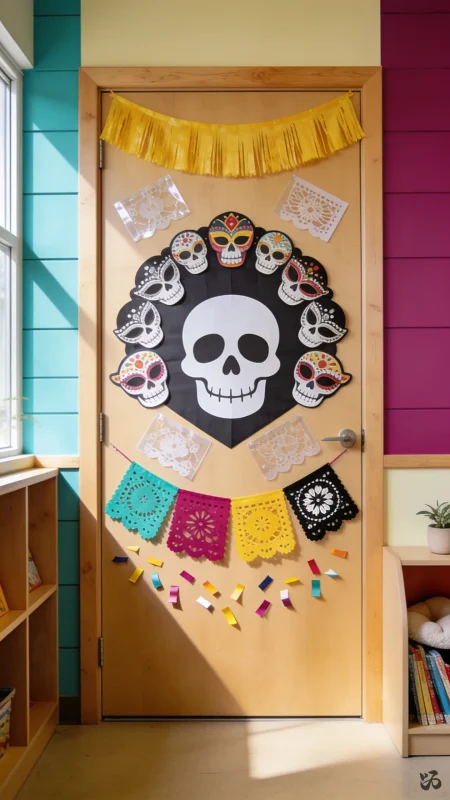
Materials you need:
- Black bulletin board paper
- Bright tissue paper
- White cardstock
- Colored markers
- Paper flowers
- Glue
- Scissors
How to Make It:
Cover the door in black paper to give the colorful decorations a strong background.
Cut large white skulls from cardstock and decorate each one with bright patterns around the eyes, cheeks, and forehead.
Layer tissue paper into small flowers and arrange them around the skulls in curved clusters.
Add colorful paper petals along the border, then write a short greeting across the top using decorative lettering.
Design Tip: Keep the skull patterns varied so each one has its own personality instead of repeating the same design across the door.
8. “Bloody” Red Handprints
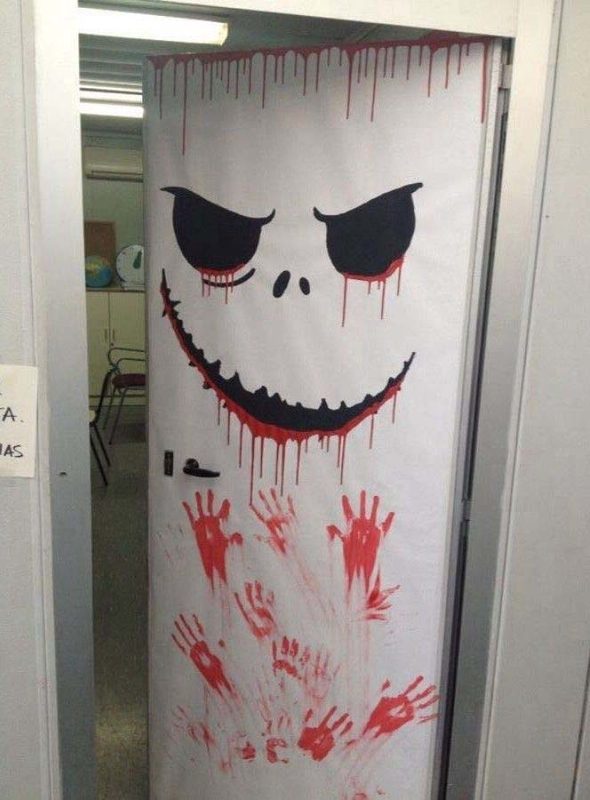
Materials you need:
- Red washable paint
- White butcher paper
- Black construction paper
- Black marker
- Sponge
- Scissors
How to Make It:
Cover the door with white butcher paper to give the handprints a stark background.
Coat a sponge lightly with red washable paint and use it to stamp handprints across the surface in different positions.
Cut a large black title from construction paper and place it near the top with a phrase such as “Keep Out” or “Beware.”
Add a few red paint drips beneath selected handprints using a thin brush for a theatrical Halloween effect.
Classroom Tip: Use washable paint and check your school’s decorating rules before placing the display on the door.
9. Mummy Door Cover
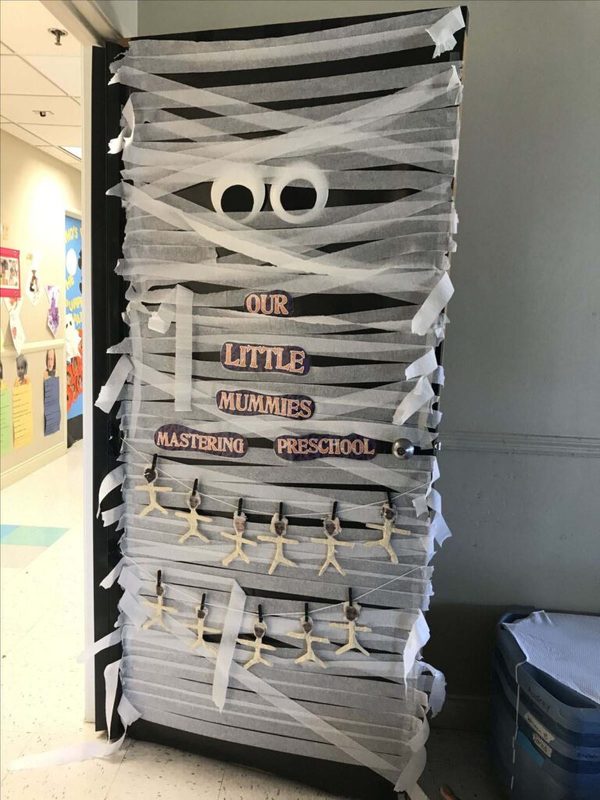
Materials you need:
- White crepe paper
- Black cardstock
- White cardstock
- Double-sided tape
- Scissors
How to Make It:
Cover the entire door with overlapping strips of white crepe paper, leaving small gaps so the layers resemble aged mummy wrappings.
Cut two large circular eyes from white cardstock and add oversized black pupils from cardstock.
Place the eyes between the strips near the upper third of the door, then continue wrapping the paper around them.
Tear a few edges slightly so the covering looks uneven and gives the mummy a more weathered appearance.
Crafting Tip: Avoid pulling the crepe paper too tightly because a little looseness gives the strips their characteristic wrapped texture.
10. Monster Face Door with Googly Eyes
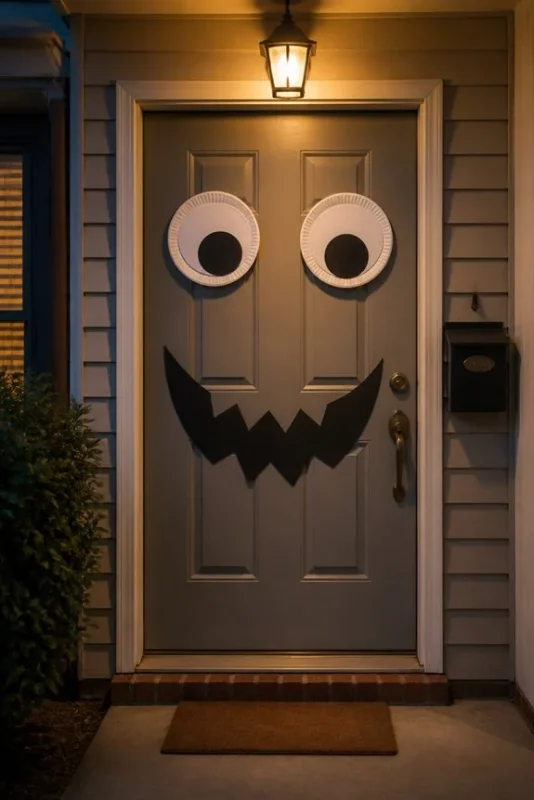
Materials you need:
- Colored bulletin board paper
- Large googly eyes
- White foam sheets
- Black felt
- Colored felt
- Glue
- Scissors
How to Make It:
Cover the door with one bold color to form the monster’s face and choose a second shade for the mouth.
Cut a huge jagged mouth from black felt and fill it with uneven white foam teeth.
Arrange large googly eyes across the upper half of the door, giving the monster a funny expression by varying their sizes and positions.
Add felt eyebrows, ears, horns, or a few strands of wild hair to give the character extra personality.
Fun Detail: Let students vote on the monster’s expression before you attach the facial features.
11. Spooky Students Caution
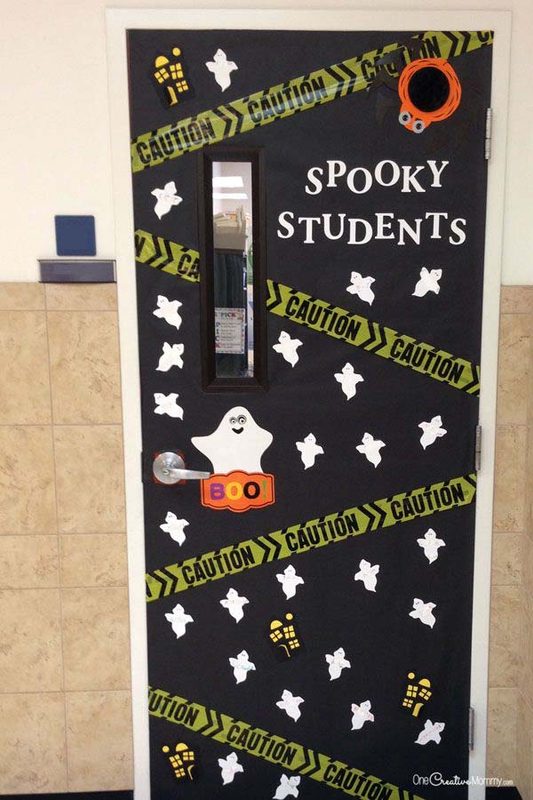
Materials you need:
- Yellow poster board
- Black cardstock
- Student photographs
- Black marker
- Yellow caution tape
- Double-sided tape
How to Make It:
Create a large yellow caution sign across the top of the door with bold black lettering reading “Spooky Students Ahead.”
Print student photographs in a consistent size and mount each one on black cardstock to give the portraits a Halloween-style frame.
Arrange the photos down the door like a playful warning board, then add small labels such as “Too Spooky” or “Enter at Your Own Risk.”
Finish the edges with yellow caution tape to reinforce the construction-zone theme.
Teacher Tip: Let students choose their own spooky pose for the photographs so the display becomes a class activity.
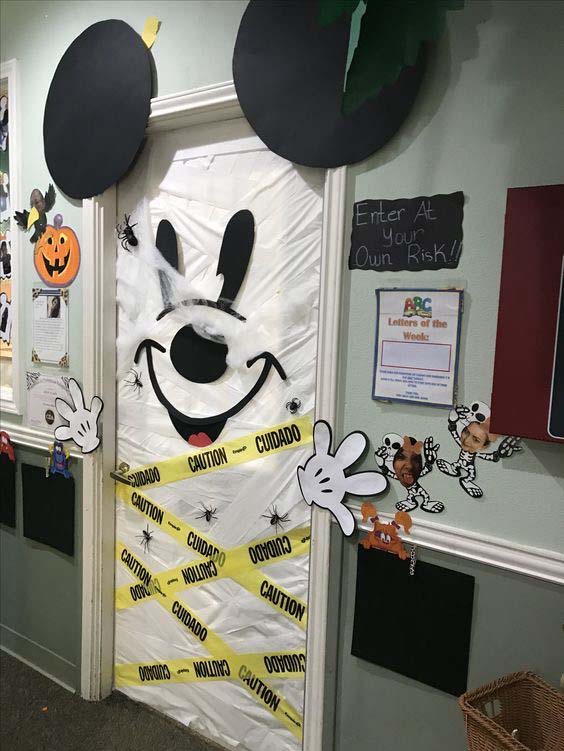
12. A Mickey Mouse Halloween Door
Materials you need:
- Black cardstock
- Orange cardstock
- Purple cardstock
- White cardstock
- Black bulletin board paper
- Glue
- Scissors
How to Make It:
Cover the door in black paper, then create a large Mickey Mouse silhouette using black cardstock for the familiar ears and head shape.
Dress Mickey in a Halloween-inspired orange and purple outfit cut from cardstock, then add white details for the gloves and shoes.
Surround the character with small pumpkins, stars, and bats cut from the remaining paper.
Place a cheerful “Happy Halloween” message above Mickey in large lettering to complete the scene.
Display Tip: Make Mickey’s head noticeably larger than the surrounding decorations so the character remains recognizable from the end of the hallway.
FAQs
How can I make a Halloween door decoration student-friendly?
Choose a design with simple pieces students can safely cut, color, or decorate. Ghost faces, pumpkins, stars, and paper bats are easy to personalize and fit into many classroom themes.
How do I keep Halloween door decorations from damaging the door?
Check your school’s decorating rules first, then choose removable adhesive strips or approved hanging methods. Avoid heavy decorations that could pull on the door or interfere with handles, windows, or safety equipment.
When should I take down Halloween classroom door decorations?
Take the display down soon after Halloween so the classroom can transition to the next seasonal theme. Save durable pieces in a labeled container if you plan to reuse them next year.