13 Halloween Mailbox Decorating Ideas Everyone is DYIng

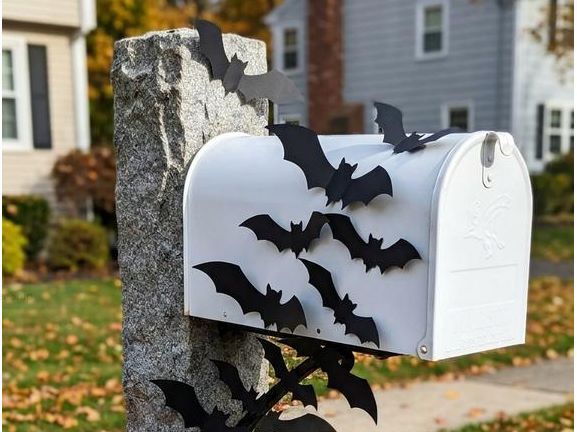
Halloween is getting closer.
And somehow, the mailbox has ended up on my decorating list.
It is easy to forget this little spot when the porch, windows, and front door are taking shape.
But once I started looking at it differently, I realized how much personality a mailbox can have in October.
Let the mailbox add one more spooky detail to your outdoor Halloween décor
Just a creepy detail there, and suddenly the mailbox becomes part of the celebration.
If your front yard is ready for Halloween, these 10 ideas will give the mailbox its own moment.
How To Style Your Mailbox For Halloween
1. Pose a Skeleton around the Mailbox
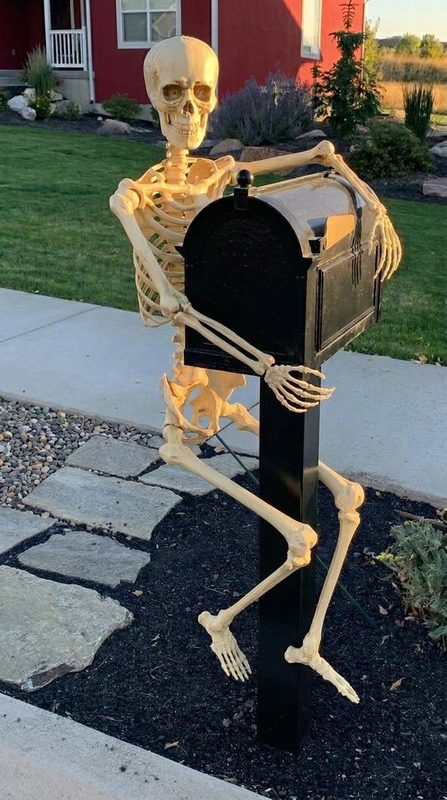
Give the mailbox a creepy character by posing a skeleton beside the post as though it has stopped to check the mail.
A life-size poseable skeleton makes the main display easy to shape, so bend its arms and legs into a relaxed sitting or leaning position.
Place one skeleton hand near the mailbox door for an eerie detail that catches attention from the street.
Skeleton hand stakes around the base extend the scene into the surrounding lawn.
After sunset, LED skeleton lights add an eerie glow that makes the display stand out.
Secure everything firmly so wind does not shift the setup.
Supplies You Need:
- Life-Size Poseable Skeleton Decoration: Create a creepy mailbox scene with a flexible skeleton that can be posed beside the post.
- Skeleton Hands Lawn Stakes: Add an eerie detail around the mailbox with skeletal hands reaching up from the ground.
- LED Skeleton Lights: Give the display a spooky nighttime glow with small skeleton-shaped lights.
2. Cover Your Mailbox with Fake Cobwebs

Turn an ordinary mailbox into a creepy little corner of the yard with a thick layer of fake cobwebs.
Stretch the material across the mailbox and post, pulling some sections outward so the webbing looks loose and naturally tangled.
Add plastic spiders in different spots to make the scene more convincing.
Outdoor weather-resistant tape comes in handy for securing the webbing where wind might loosen it.
Keep the mailbox opening clear so the decoration does not interfere with daily use.
Items to Do the Trick
- Fake Cobweb Decoration: Cover your mailbox with stretchy webbing to create an eerie Halloween scene.
- Plastic Halloween Spiders: Scatter creepy spiders across the cobwebs for a more convincing haunted look.
- Outdoor Weather-Resistant Tape: Secure the cobwebs and other lightweight decorations firmly against the mailbox.
3. Use Glowing Eyes on Your Mailbox
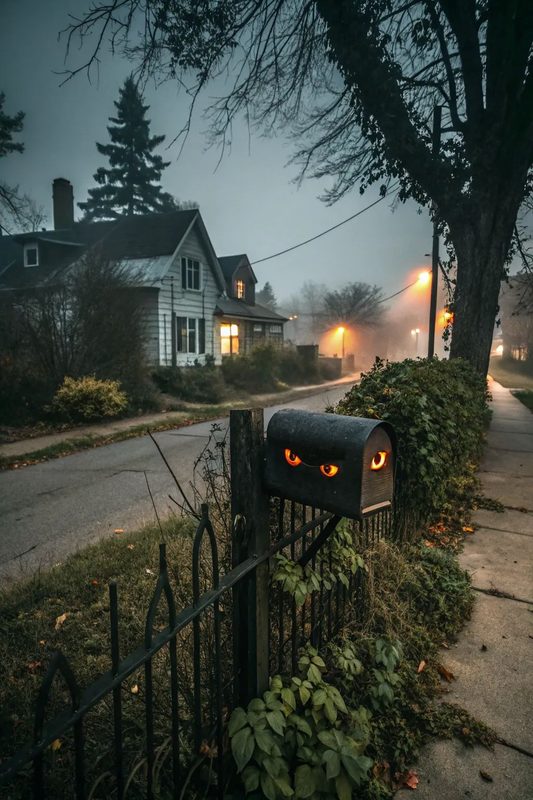
Make the mailbox look as though something spooky is watching from the curb.
Glowing eye stickers are an easy way to create the effect on a dark mailbox where the shapes stand out after sunset.
For a stronger nighttime display, place LED Halloween eye lights inside or around the mailbox area.
Halloween eye decals offer another simple option when you want the creepy effect to remain subtle during daylight.
I have used glowing eyes on an outdoor Halloween display, and the effect is much more striking after dark.
Keep the eyes at different heights so the mailbox looks less predictable.
Items to Do the Trick
- Glowing Eyes Stickers: Give your mailbox an eerie appearance with spooky eyes that glow after dark.
- LED Halloween Eye Lights: Add a haunting glow with LED eyes designed for Halloween displays.
- Halloween Eye Decals: Create a creepy watching effect with easy-to-apply eye designs.
4. Wrap the Mailbox in a Giant Spider

Turn the mailbox into the center of a creepy spider scene with one oversized arachnid crawling across the post.
Position the giant spider so its legs extend around the mailbox and create a dramatic silhouette.
Wrap spider webbing around the post, then pull sections across the mailbox to make the spider look as though it has just spun its web.
Glow-in-the-dark spiders scattered around the base add another surprise after sunset.
Choose lightweight decorations that will not put unnecessary strain on the mailbox or post.
Secure the larger spider carefully since its wide legs may catch strong wind.
Items That You Need
- Plastic Spider Decorations: Create a dramatic Halloween scene with oversized spiders crawling across your mailbox.
- Spider Webbing: Cover the mailbox and post with stretchy webbing for a creepy effect.
- Glow-in-the-Dark Spiders: Add eerie details that become visible after dark.
5. Adorn Your Mailbox with Vampire Fangs
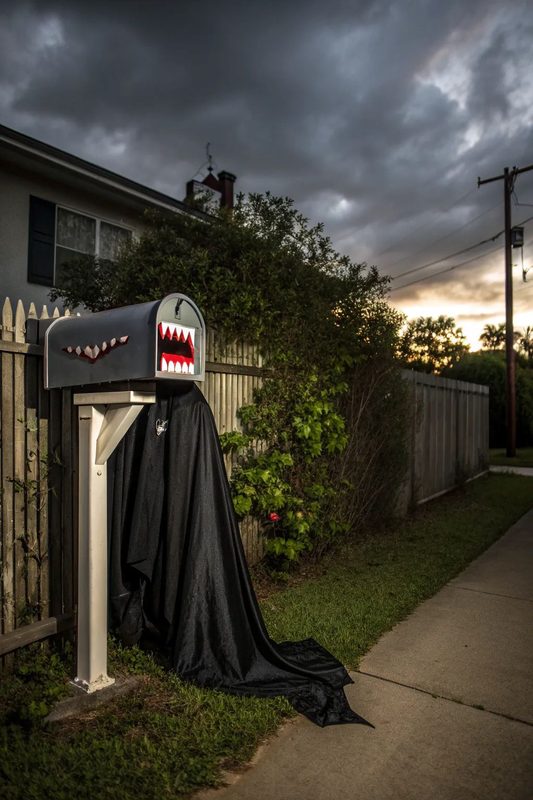
Give your mailbox a vampire-inspired makeover by turning the front into a creepy set of teeth.
Attach decorative vampire fangs beneath the mailbox opening so they look as though the box has grown a sinister smile.
A black cape draped around the post completes the character and gives the display a mysterious appearance.
Add small LED Halloween lights around the base to make the vampire theme visible after dark.
Red accents work well here, especially against black fabric and a darker mailbox.
The trick is keeping the details recognizable from the street without covering the address or mailbox handle.
The Most Helpful Options:
- Vampire Fangs for Decorations: Give your mailbox a sinister vampire smile with decorative plastic fangs.
- Black Halloween Cape: Drape a dark cape around the mailbox post for an instant vampire-inspired look.
- LED Halloween Lights: Add a subtle glow that brings the vampire display to life after sunset.
6. Add Black Crows and Ravens
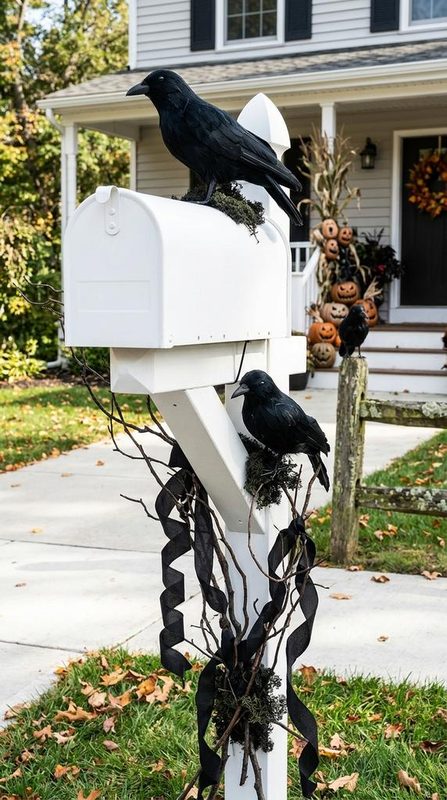
Black crows and ravens give a mailbox an eerie presence that suits Halloween beautifully.
Place a large faux raven on top of the mailbox, then position smaller birds along the post to create the impression of a gathering.
A few birds facing different directions make the scene look more natural.
I’ve used faux ravens in Halloween displays before, and the darker birds looked striking against a white mailbox.
Secure each bird with outdoor adhesive, floral wire, or another suitable fastener so gusty weather does not send them flying.
Keep the arrangement focused around the mailbox rather than filling the entire yard.
Items That May Come in Handy:
- Black Crow and Raven Decorations: Create a spooky gathering around your mailbox with realistic-looking faux birds.
- Outdoor Adhesive Hooks: Secure lightweight birds to the mailbox or post without complicated installation.
- Black Floral Wire: Fasten larger raven decorations firmly where extra support is needed.
7. Stack Pumpkins around the Mailbox Post

Turn the area around your mailbox into a cheerful Halloween pumpkin display with a simple layered arrangement.
Start with larger pumpkins near the ground, then stack smaller ones higher around the base of the post.
Mix traditional orange pumpkins with a few white or black varieties for stronger contrast.
I arranged pumpkins at different heights around an outdoor post, and the display looked much fuller than a row of identical pumpkins.
Choose lightweight faux pumpkins if the mailbox sits in an exposed area where wind is common.
Secure stacked pieces with removable outdoor adhesive or hidden supports so they remain stable.
Items to Do the Trick:
- Mini Artificial Pumpkins: Build a colorful pumpkin display around the mailbox with lightweight seasonal pieces.
- Black Halloween Pumpkins: Add darker accents that give the arrangement a distinctly spooky character.
- Outdoor Mounting Adhesive: Help secure lightweight pumpkins and decorations against the mailbox post.
9. Turn the Mailbox into a Witch

Give your mailbox a witchy personality with a few clever details that make it look like a tiny Halloween character.
Start with a black mailbox cover, then add a pointed witch hat over the top.
A pair of faux witch legs tucked beneath the box creates the funniest part of the display, making it look as though a witch has landed headfirst.
Add a black cape around the post to complete the costume.
Purple or orange accents bring some color to the darker setup.
I’ve seen character-style decorations work best when the features stay large enough to recognize from the sidewalk.
Items to Do the Trick:
- Witch Mailbox Cover: Give the mailbox an instant Halloween character with a spooky witch-themed design.
- Witch Hat Decoration: Add a pointed hat that makes the mailbox look like a tiny witch.
- Witch Legs Lawn Decoration: Create the illusion of a witch stuck beneath the mailbox with funny faux legs.
10. Place a Jack-O’-Lantern on Top of Your Mailbox

A glowing jack-o’-lantern perched on the mailbox creates a classic Halloween moment that looks great from the street.
Choose a lightweight pumpkin that fits securely on top of the box without interfering with the door.
A faux carved pumpkin works particularly well because it will not rot or attract insects during the season.
For nighttime impact, use an LED candle inside the pumpkin to create a soft orange glow.
A few small bats attached to the post can reinforce the Halloween theme without crowding the display.
Make sure the pumpkin sits firmly before leaving it outdoors.
Items Needed:
- Lighted Jack-O’-Lantern Decoration: Add a classic Halloween centerpiece with a pumpkin that glows after sunset.
- LED Flameless Tea Lights: Illuminate the jack-o’-lantern safely without using a real flame.
- Outdoor Mounting Putty: Help keep the lightweight pumpkin stable on top of the mailbox.
11. Create a Creepy Skull on Mailbox
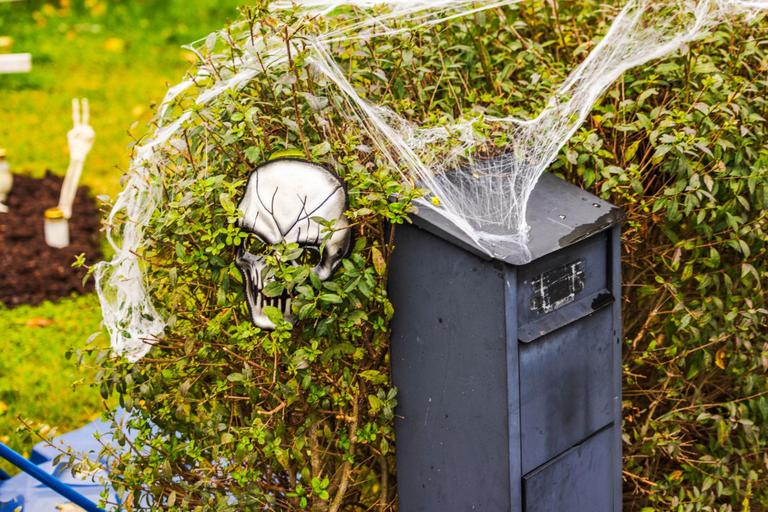
Give the mailbox a sinister makeover with a skull that looks as though it has taken over the space.
Position a realistic faux skull on top of the mailbox, then surround it with dark fabric or black gauze.
Red LED lights placed nearby create an eerie glow after sunset and make the skull stand out.
For extra texture, stretch a small amount of faux cobwebbing around the skull and mailbox post.
Choose lightweight pieces that will not interfere with the mailbox door.
A weather-resistant skull is the better choice for an outdoor setup that needs to survive changing conditions.
Items You Need:
- Realistic Skull Decoration: Create a creepy focal point with a detailed skull designed for Halloween displays.
- Black Gauze Fabric: Wrap the mailbox with dark, tattered fabric for a haunted appearance.
- Red LED Halloween Lights: Cast an eerie red glow around the skull after dark.