12 DIY Fall Classroom Door Décor Students Won’t Forget

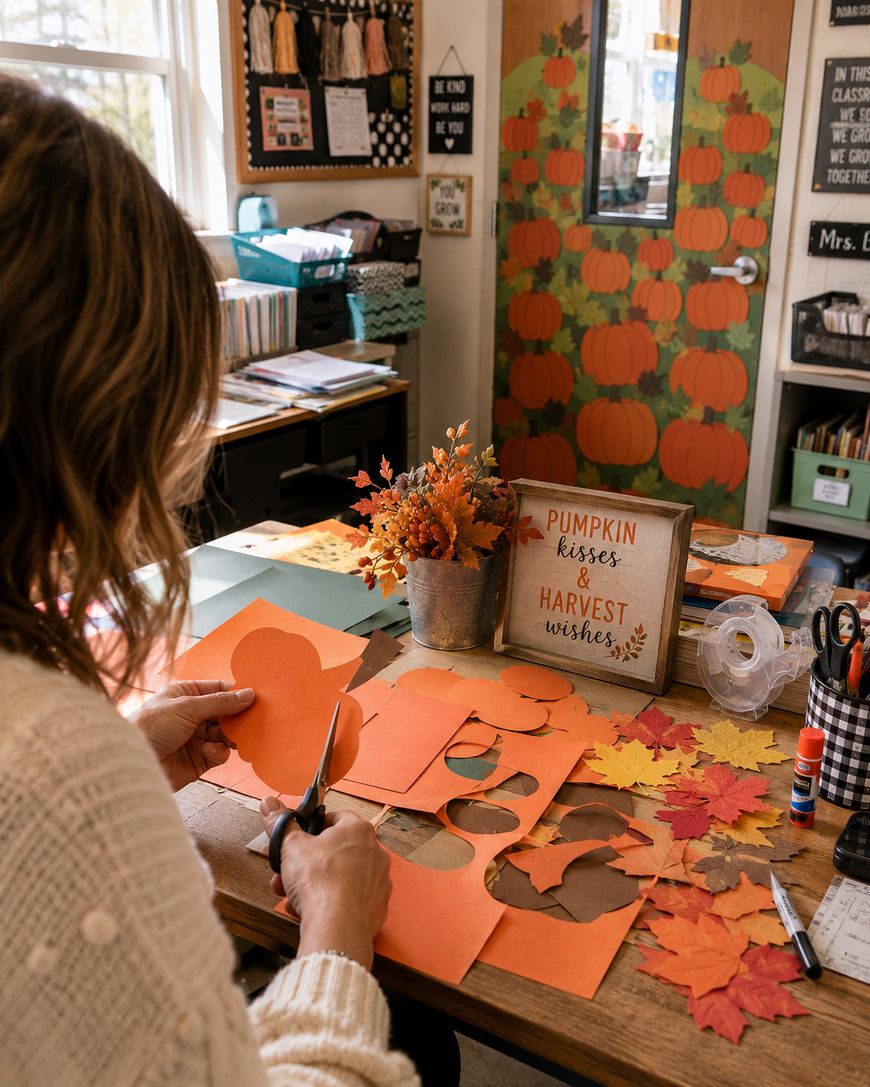
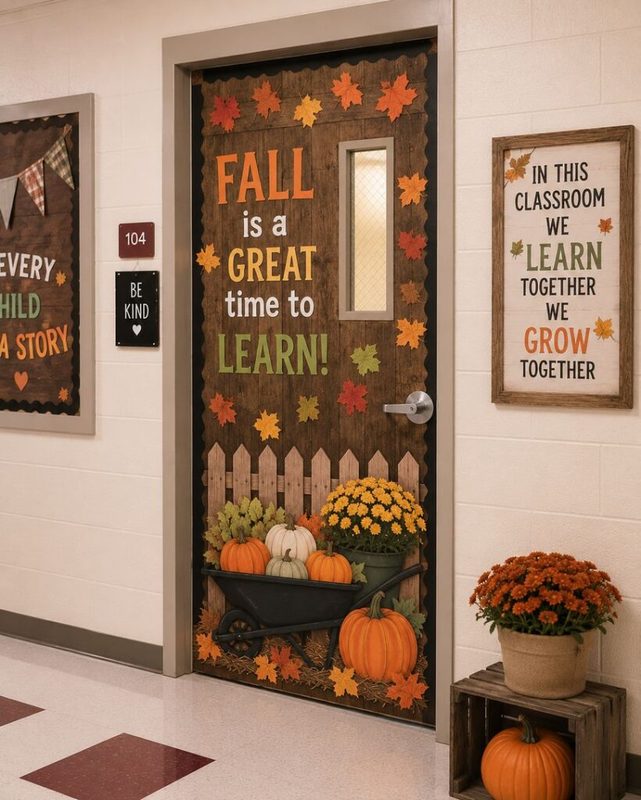
Nothing says “new season” quite like a classroom door covered in fall colors.
It’s the first thing students see before they walk inside, so a little creativity goes a long way.
Paper leaves, pumpkins, and hand-cut letters turn an ordinary door into part of the classroom experience.
There’s something special about seeing students stop in the hallway to admire a door they helped decorate.
Here, I will share a list of DIY fall classroom door décor ideas that every student will recognize.
Materials and Supplies That Make Fall Classroom Door Decoration Easy
You don’t need a huge craft stash to create a memorable fall classroom door.
Construction paper, butcher paper, and double sided tape cover many of the basic decorating jobs, from making large backgrounds to attaching lightweight shapes.
For extra patterns and texture, scrapbook paper gives pumpkins, leaves, letters, and other details a more interesting finish.
A paper cutter is worth having nearby if your project involves lots of repeated shapes or lettering.
For decorations you want to bring back next fall, felt or fabric leaves offer a sturdy alternative to paper.
Removable adhesive strips make hanging decorations easier and simplify the cleanup once the season ends.
Keep a few extra supplies nearby during the month so damaged pieces are easy to replace.
Battery powered string lights bring a soft glow to the doorway, and a glue gun is useful for attaching heavier pieces such as felt pumpkins or fabric scarecrows.
Now I will break down what you need, how to make it, and tips to keep every idea stand out all season long.
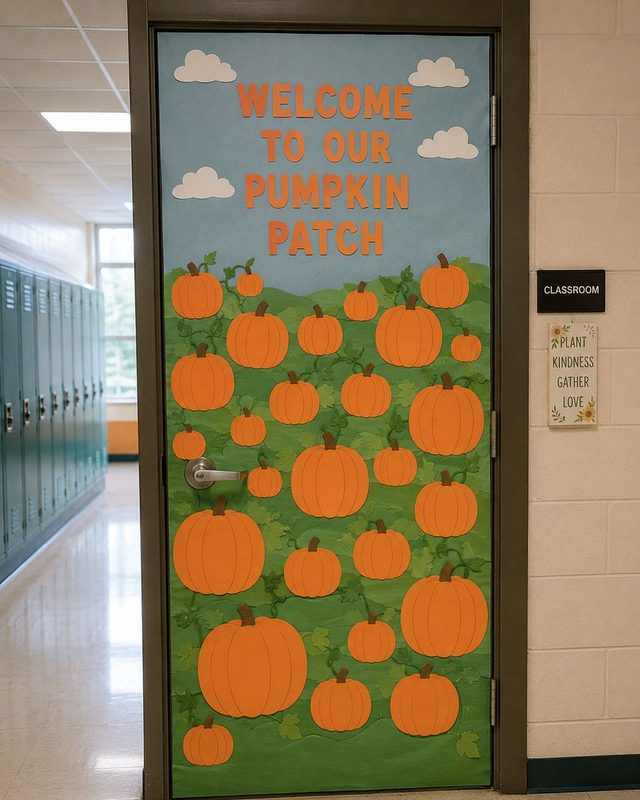
1. A Pumpkin Patch Scene
Materials You Need:
- Orange construction paper
- Green construction paper
- Brown kraft paper
- White cardstock
- Scissors
- Glue
- Black marker
How to Make It:
Turn the classroom door into a cheerful pumpkin patch by cutting pumpkins from orange paper in different sizes and shapes.
Add curly vines and leaves with green paper, then use brown paper for small stems.
Arrange the pumpkins across the lower half of the door so the patch looks lively and scattered.
Cut a simple fence from brown paper and place it behind the pumpkins for extra dimension.
Finish the scene with a large message across the top, such as “Welcome to Our Pumpkin Patch!”
Pro Tip: Leave a few pumpkins blank so students can write their names on them, turning the display into a fun classroom activity.
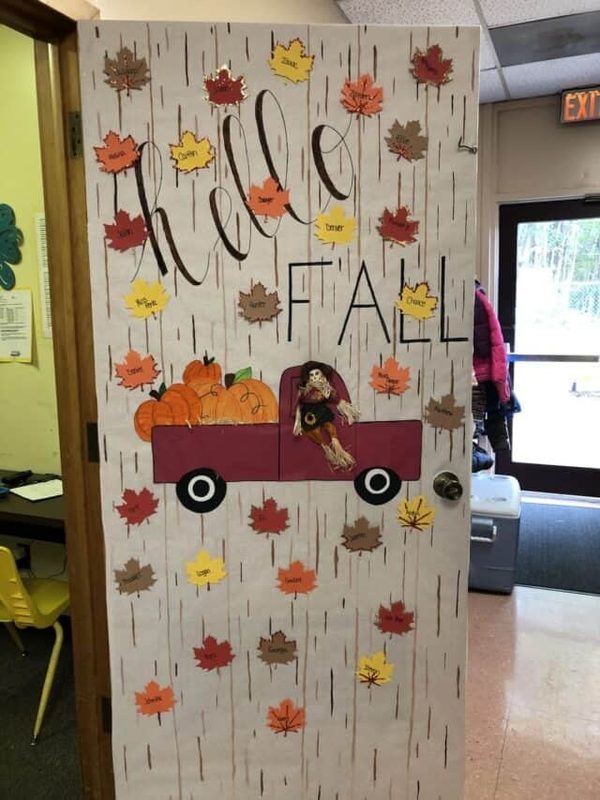
2. “Hello Fall”
Materials You Need:
- Burlap ribbon
- Artificial autumn leaves
- Wooden letters
- Twine
- Mini clothespins
- Hot glue
How to Make It:
Create a simple burlap banner across the upper half of the door using strips of ribbon tied onto a length of twine.
Attach the wooden letters to spell “HELLO FALL,” then secure the banner to the door with removable hooks.
Tuck artificial leaves between the letters so the message has a touch of autumn color.
Clip a few extra leaves along the lower edge of the banner for a relaxed handmade finish.
Keep the rest of the door open so the greeting remains the main attraction from the hallway.
Pro Tip: Choose oversized letters so “HELLO FALL” remains readable from several steps away.
3. Scarecrow Welcome Door

Materials You Need:
- Burlap fabric
- Plaid fabric
- Straw
- Black felt
- Orange felt
- Yarn
- Glue
How to Make It:
Cover the upper section of the door with burlap to form the scarecrow’s face and use black felt to cut two large eyes.
Shape an orange felt triangle into the nose, then add a wide stitched-looking smile with black yarn.
Create a floppy hat from plaid fabric and attach strips of straw around the sides as messy scarecrow hair.
Use another piece of burlap for the body and give the character a plaid bow tie beneath the face.
Finish with a large “WELCOME” sign across the scarecrow’s chest.
Pro Tip: Make the facial features oversized so younger students notice the scarecrow as soon as they enter the hallway.
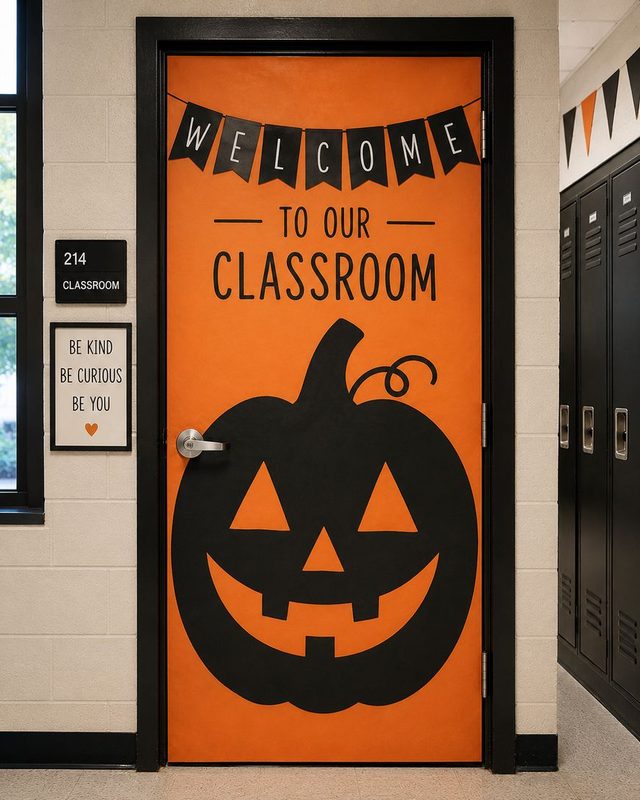
4. Harvest Theme Paired With a Welcome Message
Materials You Need:
- Paper plates
- Artificial apples
- Artificial pumpkins
- Faux corn husks
- Wicker basket
- Wooden welcome sign
- Twine
How to Make It:
Arrange the paper plates across the door as large round harvest baskets, then decorate each one with faux apples, pumpkins, and corn husks.
Place the wicker basket near the bottom of the display and fill it with lightweight seasonal pieces.
Hang the wooden welcome sign above the harvest arrangement using twine so the greeting remains clearly visible.
Scatter a few faux leaves around the basket to connect the individual pieces into one scene.
Keep the heavier decorations toward the bottom so the door remains easy to open and close.
Pro Tip: Secure every decorative piece firmly with removable adhesive so the display survives busy hallway traffic.
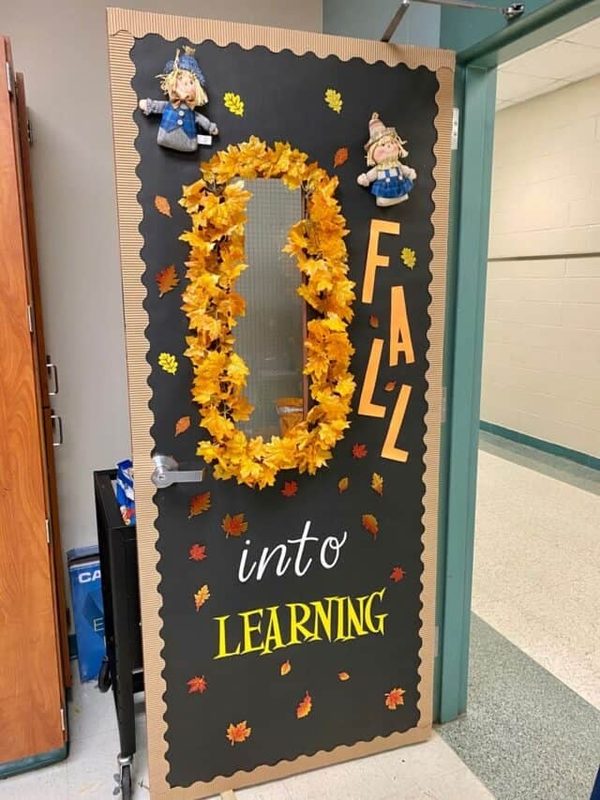
5. “Fall Into Learning” Leaf Collage Door
Materials You Need:
- Pressed autumn leaves
- Clear contact paper
- Brown yarn
- Gold letter stickers
- Scrapbook paper
- Scissors
How to Make It:
Create a large tree from twisted brown yarn and arrange it across the center of the door to form the main structure.
Cut several leaf shapes from scrapbook paper, then mix them with pressed autumn leaves for a layered collage.
Place the gold letter stickers across the branches to spell “FALL INTO LEARNING.”
Add a few loose leaves beneath the tree to suggest they have drifted down from the branches.
Cover delicate pressed leaves with small pieces of clear contact paper so they stay protected throughout the season.
Pro Tip: Leave several blank paper leaves near the bottom so students can write something they are excited to learn during the fall term.
6. Apple Orchard Door
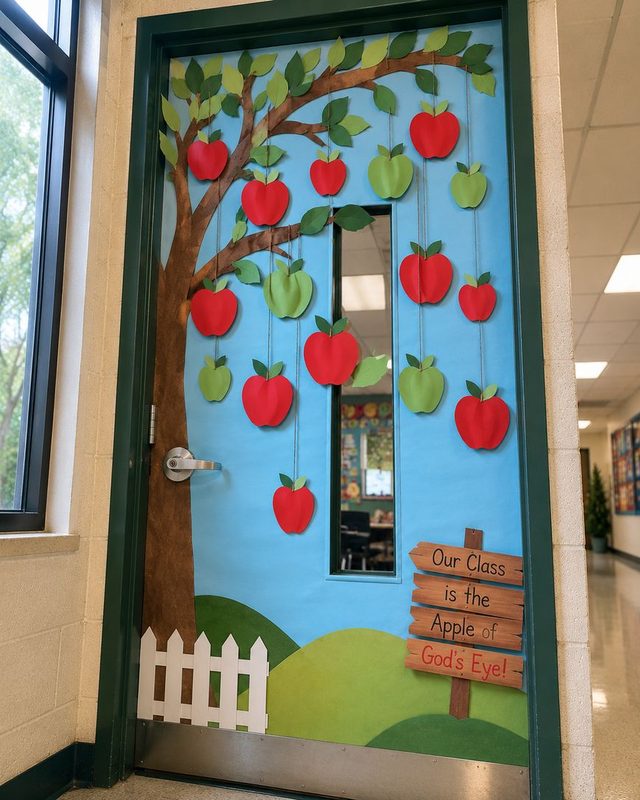
Materials You Need:
- Red construction paper
- Green tissue paper
- Brown bulletin board paper
- White paper
- Apple stickers
- Scissors
- Glue
How to Make It:
Cover the door with brown paper to form a simple tree trunk, then extend several branches toward the top.
Cut large red apples from construction paper and scatter them across the branches to create a cheerful classroom orchard.
Crumple small pieces of green tissue paper and attach them around the apples as textured leaves.
Add a few white paper clouds near the top to give the scene a bright outdoor look.
Finish with a sign reading “Welcome to Our Apple Orchard!” across the middle of the door.
Pro Tip: Write each student’s name on an apple so the orchard becomes a personalized class display.
7. Fall into Learning
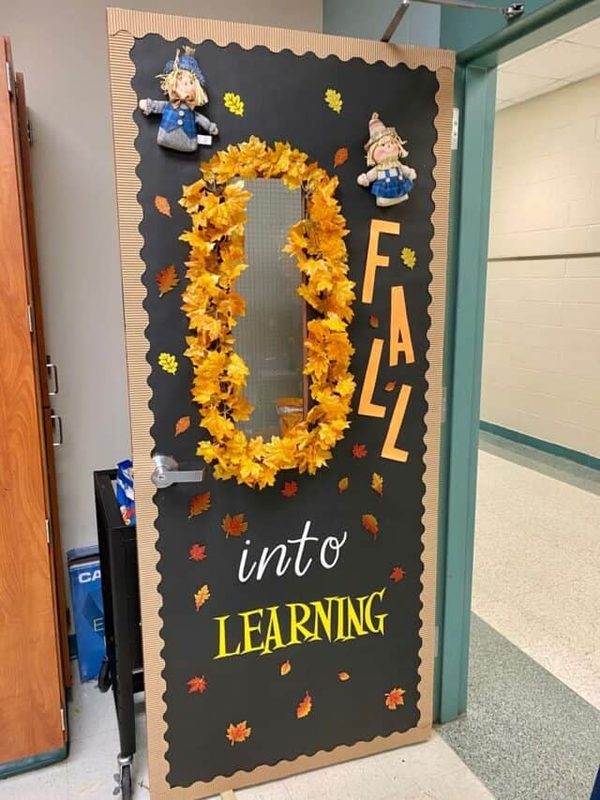
Materials You Need:
- Orange felt
- Yellow felt
- Brown felt
- Black letter stickers
- Twine
- Fabric scissors
- Fabric glue
How to Make It:
Cut large orange and yellow leaves from felt, then arrange them across the door in a loose trail that appears to fall from the top.
Use brown felt to create a large curved branch across the upper section of the display.
Spell “FALL INTO LEARNING” with black letter stickers and position the words beneath the branch.
Let several felt leaves drift toward the bottom so the design has a sense of movement.
Add small felt books among a few leaves to connect the autumn theme directly to classroom learning.
Pro Tip: Use two or three leaf shapes instead of making every leaf identical for a handmade appearance.
8. “Happy Fall Y’all!” Southern Charm Door
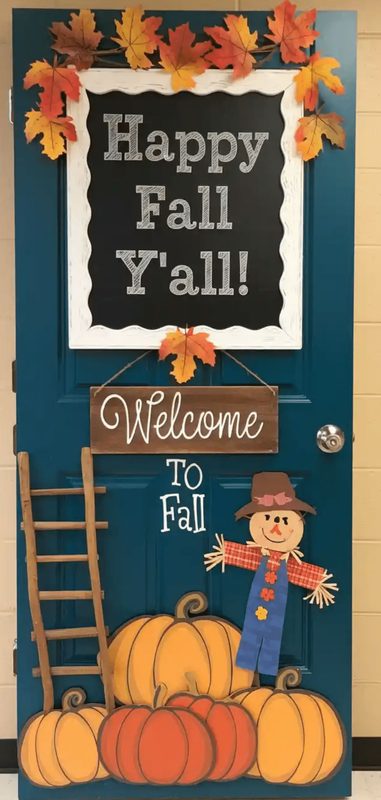
Materials You Need:
- Burlap fabric
- Black chalkboard sign
- Sunflower stems
- Gingham ribbon
- Mini galvanized bucket
- Twine
- Hot glue
How to Make It:
Create a rustic backdrop by hanging a wide piece of burlap across the upper portion of the door.
Place a chalkboard-style sign in the center and write “Happy Fall Y’all!” in large white lettering.
Tie a gingham ribbon around a small galvanized bucket and fill it with sunflower stems.
Attach the bucket near the lower corner of the door so the flowers frame the message from one side.
Finish with a few loose pieces of twine around the sign for a relaxed farmhouse touch.
Pro Tip: Choose oversized lettering for the greeting so the Southern-inspired message catches attention from down the hallway.
9. Leaf-Themed Door

Materials You Need:
- Faux autumn leaves
- Kraft paper
- Leaf-shaped paper punch
- Gold metallic marker
- Double-sided tape
How to Make It:
Cover the door with kraft paper to create a warm neutral background for the leaf display.
Arrange faux leaves from the upper corner so they appear to cascade diagonally toward the opposite side.
Punch additional leaves from kraft paper and write short classroom words on them with a gold marker.
Mix these handmade pieces among the faux foliage to give the display a more personal character.
Leave the center section relatively open so a simple “Welcome, Fall!” message remains easy to read.
Pro Tip: Vary the direction of the leaves as they move down the door so the display looks like falling foliage instead of a straight border.
10. “We Are All Leaves on the Same Tree”
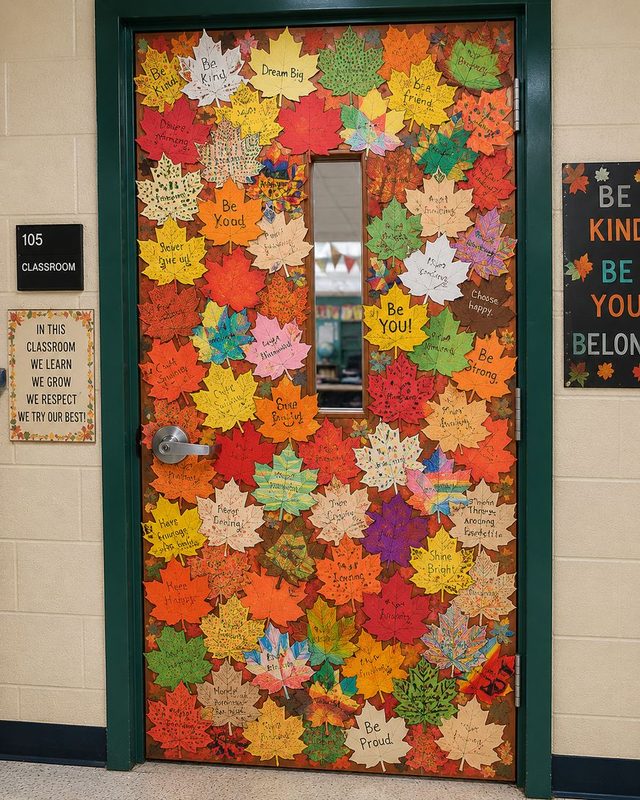
Materials You Need:
- Colored cardstock
- Brown butcher paper
- Leaf-shaped paper punch
- Gold markers
- Washi tape
- Scissors
How to Make It:
Create a large tree trunk from brown butcher paper and extend several branches across the classroom door.
Give every student one leaf cut from colored cardstock and invite them to decorate it with their name, drawing, or a small message.
Attach each finished leaf to the branches until the tree becomes covered with the students’ individual contributions.
Place the phrase “We Are All Leaves on the Same Tree” across the upper section of the door as the central message.
Leave a few leaves lower on the door so the finished display looks like some have drifted from the branches.
Pro Tip: Let students choose their own leaf color so the finished tree becomes a colorful collection of individual personalities.
11. A Simple Woven String Light Display
Materials You Need:
- Warm white string lights
- Artificial autumn leaves
- Twine
- Removable adhesive hooks
- Small wooden clips
How to Make It:
Attach the adhesive hooks around the upper and side edges of the door to create a loose frame for the display.
Weave the string lights between the hooks, leaving gentle loops instead of pulling the strand completely straight.
Tuck artificial leaves beneath sections of the lights so the foliage appears woven into the glowing border.
Use wooden clips to attach a few paper leaves carrying students’ names or short fall messages.
Keep the center of the door open for a simple greeting that remains visible through the display.
Choose battery-operated lights if the classroom door sits far from an outlet.
Pro Tip: Test the lights before hanging them and secure the battery pack near the hinge side so it stays out of sight.
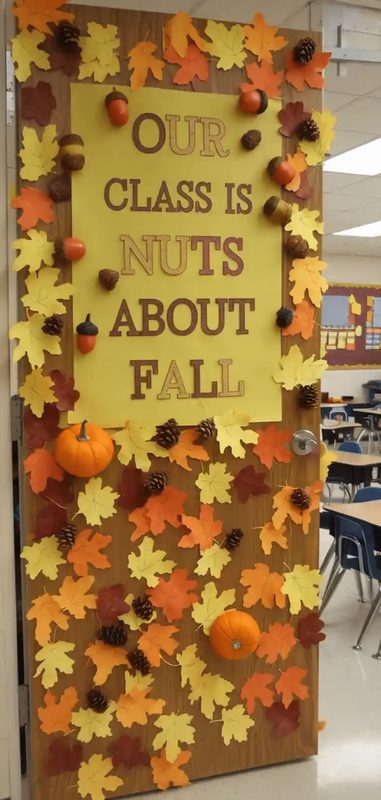
12. “Our Class Is Nuts About Fall” Acorn Theme
Materials You Need:
- Brown cardstock
- Tan cardstock
- Autumn-colored felt
- Acorn stickers
- Black marker
- Scissors
- Glue
How to Make It:
Cut large acorns from brown and tan cardstock, then arrange them across the door like a playful collection scattered beneath an autumn tree.
Use felt to create a few oversized leaves and tuck them between the acorns for extra texture.
Place “Our Class Is Nuts About Fall” across the top using bold lettering that stands out against the background.
Write each student’s name on an acorn and place the pieces around the main message.
Add a simple paper branch near the bottom so the acorns have a visual connection to the tree.
Pro Tip: Give students different acorn shapes to decorate so the finished display has plenty of personality.
13. “Gourd Times in Class” Pumpkin & Gourd Door

Materials You Need:
- Orange cardstock
- Green cardstock
- Corrugated cardboard
- Decorative paper
- Black letter stickers
- Scissors
- Glue
How to Make It:
Cut pumpkins and gourds in different shapes from orange paper to create a lively harvest collection.
Layer smaller shapes over larger ones to give some of the gourds a dimensional appearance.
Use corrugated cardboard for several stems so the display gains a touch of natural-looking texture.
Arrange the pumpkins across the bottom half of the door and let a few curling vines stretch upward.
Spell “Gourd Times in Class” across the top with black letter stickers.
Add small leaf shapes around the lettering to connect the message with the harvest scene.
Pro Tip: Mix smooth paper pumpkins with textured cardboard pieces so the display has visual variety even from a distance.
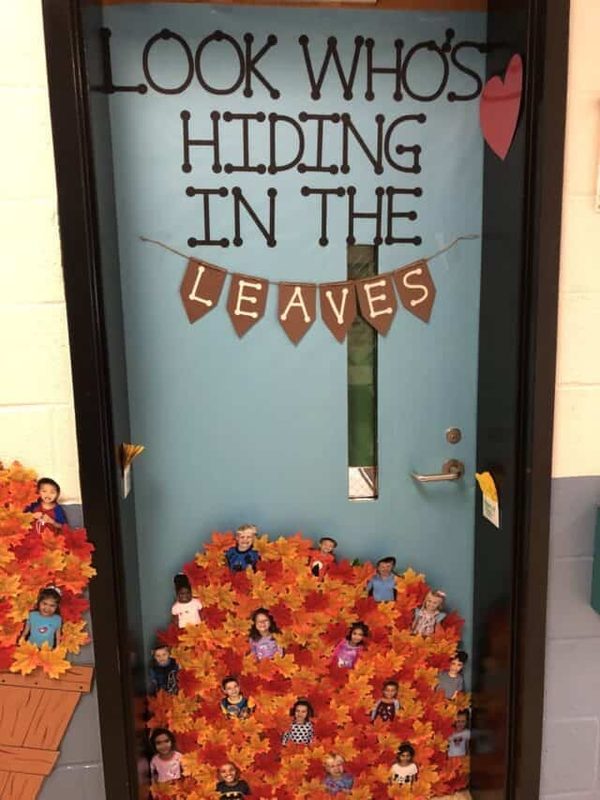
14. Look Who’s Hiding in the Leaves
Materials You Need:
- Artificial fall leaves
- Colored cardstock
- Googly eyes
- Brown construction paper
- Glue
- Scissors
- Black marker
How to Make It:
Cover the door with a loose layer of autumn leaves, leaving small gaps between clusters so the background remains visible.
Cut simple faces from cardstock and add googly eyes to create playful characters hiding behind the foliage.
Place some faces deep inside the leaf clusters so only their eyes and part of their expressions peek through.
Create a few larger leaves from brown paper and write the title “Look Who’s Hiding in the Leaves” across them.
Arrange the characters at different heights to make students curious about what they will discover.
Pro Tip: Use student photos inside a few leaf-shaped frames for a personalized version that turns the hallway into a little guessing game.
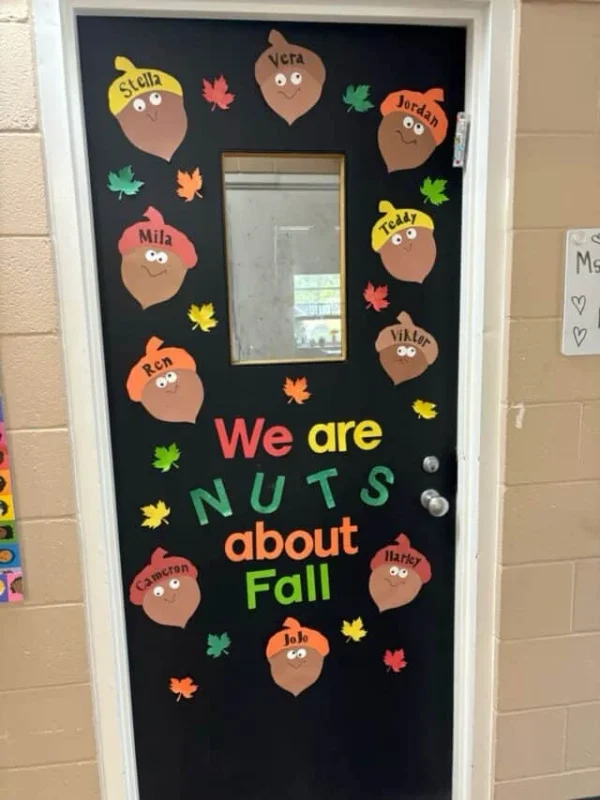
15. We Are Nuts About Fall
Materials You Need:
- Kraft paper
- Brown cardstock
- Acorn-shaped stickers
- Autumn ribbon
- Gold marker
- Scissors
- Glue
How to Make It:
Cover the door with kraft paper and create a large tree branch from brown cardstock across the upper section.
Cut several large acorns and write one positive classroom word on each, such as “kind,” “curious,” or “creative.”
Arrange the acorns beneath the branch so they look like they have fallen onto the ground.
Place “We Are Nuts About Fall” across the center in large lettering.
Tie a small autumn ribbon around one branch for a simple decorative detail that breaks up the brown tones.
Leave a few acorns blank for students to add their own words about what they enjoy at school.
Pro Tip: Turn the blank acorns into a weekly classroom activity by adding one new student response to the door each Friday.
Tips for Making a Classroom Door Unforgettable
A memorable classroom door starts with a clear idea before the first piece of paper gets cut.
Sketch the design on paper first, then measure the door and decide where the main message, characters, and decorative details will go.
Color and Texture
Choose a small fall color palette so the finished door looks connected from top to bottom.
Layering different shades of one color gives paper leaves, pumpkins, and other details a richer appearance.
Mixing smooth paper with textured materials such as felt or burlap brings another dimension to the display.
Interactive Elements
Give students a reason to stop and take part in the display.
A basket filled with blank leaf cutouts gives visitors a place to write a kind message, answer a fun fall question, or leave a classroom greeting.
Lighting and Framing
A simple contrasting border gives the finished design a clear edge and makes the artwork stand out in a busy hallway.
String lights bring a gentle glow to the doorway during darker fall afternoons.
What to Avoid When Decorating Your Classroom Door for Fall
A great classroom door needs a little restraint, especially when the display is meant to stay up for several weeks.
Too Many Details
Packing every inch with pumpkins, leaves, letters, and characters makes the main idea difficult to see from the hallway.
Choose one clear focal point and give the supporting decorations enough breathing room.
Damaging the Door
Some adhesives leave marks, peel paint, or damage laminate surfaces.
Check your school’s decorating guidelines and use approved hanging methods before attaching anything to the door.
Leaving the Display Up Too Long
A fall display starts losing its charm once the season has passed.
Set a removal date before installing the decorations so you have time to replace the display with your next classroom theme.
Weak Paper Decorations
Busy hallways put plenty of wear on classroom doors, especially around frequently opened entrances.
Reinforce delicate paper pieces from behind with clear packing tape so they hold up through daily traffic.
Covering Restricted Areas
School buildings often have specific rules about decorating doors, particularly around fire safety and emergency access.
Check with your administration before covering a large section of the door or adding bulky materials.
Frequently Asked Questions
How can I make my door decorations educational?
Tie the fall theme to something students are learning in class. Add sight words, vocabulary, math facts, reading prompts, classroom rules, or encouraging phrases that reinforce the current lesson.
Can door decorations change throughout the fall season?
Absolutely. Start with leaves, pumpkins, apples, or scarecrows, then bring in a Halloween detail before transitioning toward Thanksgiving. Keeping a few original pieces makes each update easier.
How long does a typical fall classroom door display take to make?
Most projects take one to three hours, depending on the design. A simple pumpkin or leaf display comes together quickly, whereas a detailed harvest scene with layered pieces requires extra preparation.
Can fall door decorations be reused next year?
Yes. Laminate paper pieces, choose durable felt or fabric, and store everything in a labeled container after removing the display. Flat storage also prevents larger pieces from becoming bent or crushed.
How do you keep the door looking fresh throughout the season?
Give the display a quick check each week for loose edges, damaged pieces, or faded details. Replacing a few worn elements or adding fresh student artwork midway through the season keeps the display interesting.