11 Genius Fall Window Painting Ideas For Autumn Vibes

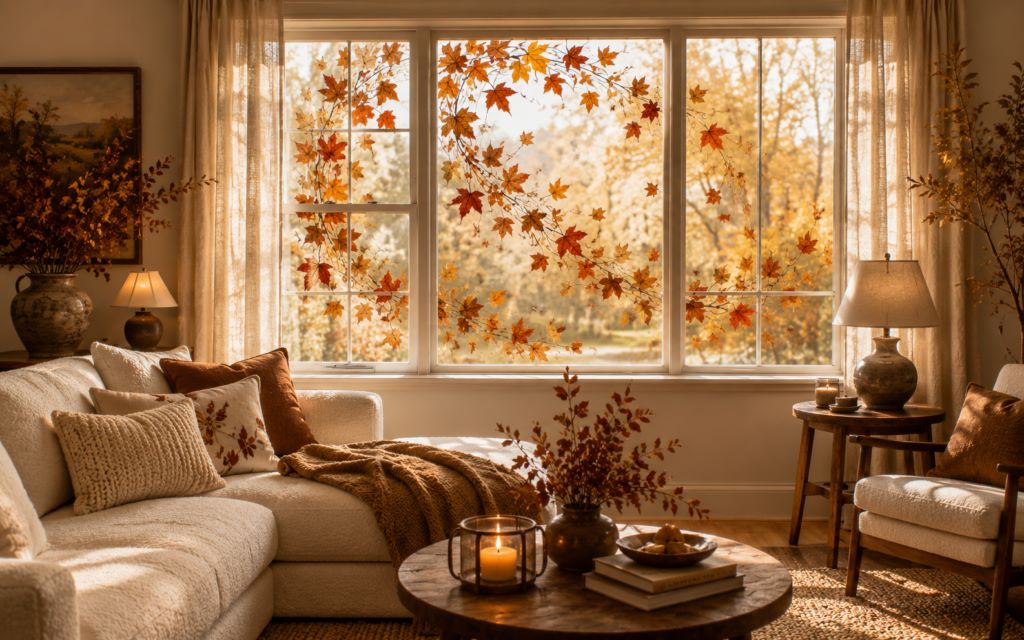
I never think of windows first when fall decorations start.
Usually, my attention goes straight to anything that makes the front porch look ready for October.
But sometimes?
A blank window is exactly where a little seasonal creativity belongs.
A few painted leaves, acorns, or a pile of pumpkins can change the whole view from inside the house.
You do not need fancy artwork either.
Simple shapes and warm fall colors can turn plain glass into something worth stopping to admire.
Today I’m joining you with 12 window painting ideas for fall.
DON’T MISS: 13 Ways To Paint Your Windows For Halloween This Year
How To Paint Your Windows For Fall
Are you preparing to paint your windows for the fall season? These ideas will give autumn vibes.
1. A Low Painted Pumpkin Border
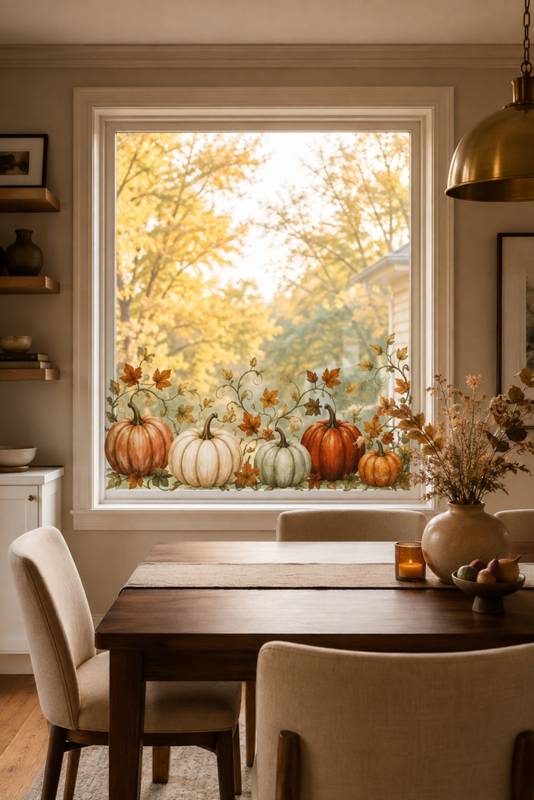
A row of painted pumpkins along the bottom of a window bring fall color into the room without covering the whole pane.
Keep the pumpkins low, almost like a little border running beneath the glass.
Mix round pumpkins with squat shapes, tiny gourds, and a few curling vines to keep the line from looking too uniform.
Orange is the obvious choice, but soft brown give the display a quieter farmhouse look.
You can also give each pumpkin a different face, stem, or leaf detail.
This idea suits kitchen windows, dining areas, and larger panes where the lower section needs a little decoration.
Leave the upper glass clear so daylight continue flowing through the room.
For a longer window, let the pumpkins vary slightly in height as they move from one side to the other.
Quick Tip: Use painter’s tape as a guide along the bottom edge so your pumpkin border stays level.
TRENDING: 12 Fun Pumpkin Decorating Ideas For Kids
2. Classic Falling Leaves Window Silhouette
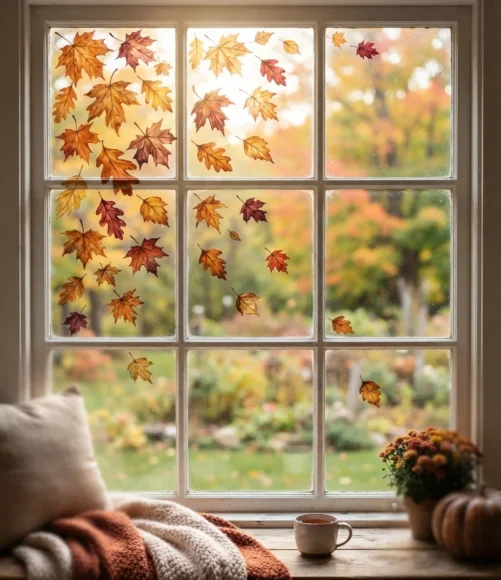
Falling leaves are one of those fall decorations that make a window look seasonal with very little fuss.
Paint leaves drifting diagonally across the glass instead of covering the entire pane.
Start with a few larger leaves near the top, then scatter smaller ones as they move toward the bottom.
Maple, oak, and simple rounded leaves can appear together, giving the display a natural mix of shapes.
Warm shades such as burnt orange, golden yellow, rust, and muted red bring the colors of autumn indoors.
As well, paint a few leaves with darker outlines to make their shapes easier to see from outside.
A handful of leaves overlap the window frame, making the scene appear to continue beyond the glass.
This design suits bedrooms, living rooms, porches, and dining spaces.
Keep the center fairly open if the window provides an important view of the yard.
Quick Tip: Rotate each painted leaf slightly so the group looks like leaves drifting through the air.
3. Whimsical Forest Silhouettes Framed in Charcoal Black
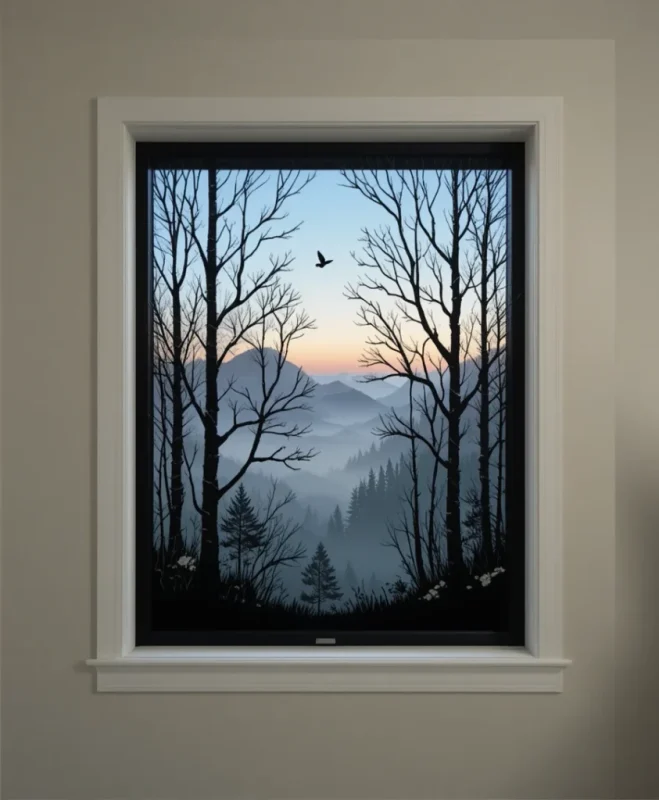
Turn your window into a little autumn forest with simple tree silhouettes and playful woodland details.
Charcoal-black paint gives the trunks a strong outline while keeping the scene softer than solid jet black.
Paint a few tall trees along the sides of the window and leave the center open for the main view.
Small leaves, acorns, birds, or woodland animals can peek between the branches.
You could add a tiny fox near the bottom or a squirrel sitting on one of the branches.
The whimsical details give this idea a storybook quality that suits a family room.
Keep the trees slightly different in height so the forest does not look like a perfectly repeated pattern.
A few rusty orange and golden leaves bring the fall season into the darker silhouette.
The charcoal frame also gives the artwork a finished border around the edges.
Quick Tip: Sketch the tree shapes on paper first so you adjust their height and spacing before painting the glass.
4. Vibrant Stained-Glass Effect Oak Leaves
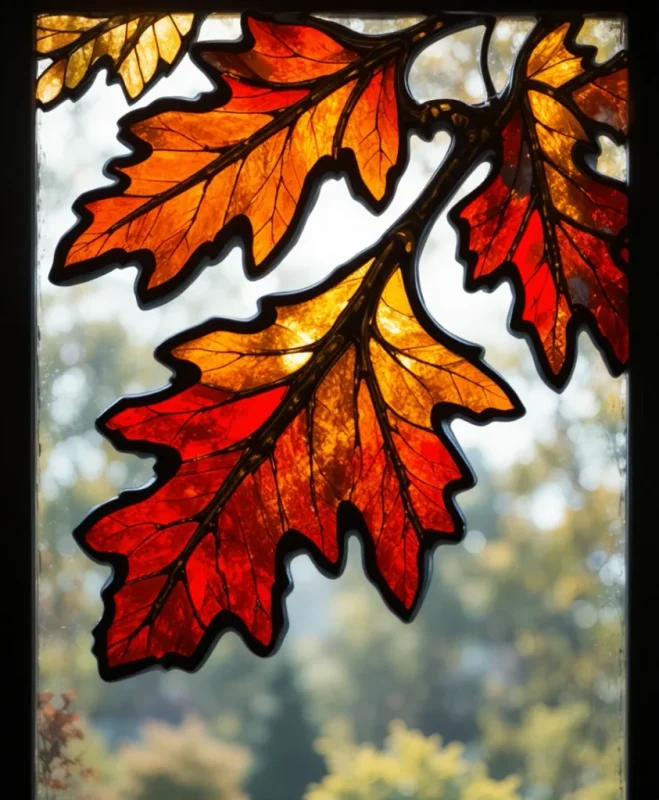
Oak leaves bring a rich autumn look to a window when you give them a stained-glass treatment.
Start by painting the leaf outlines in a dark shade, then divide each leaf into several small sections.
Fill those sections with different fall colors instead of using one shade across the entire leaf.
Burnt orange, golden yellow, deep red, amber, and muted brown can sit together in the same design.
The dark outlines keep the colors separated and make the leaves easier to recognize.
Place several large leaves across the glass, then scatter smaller ones around them for variety.
You can also paint a few acorns between the leaves to fill small gaps.
This design looks striking when daylight passes through the window because the changing light brings out the different painted sections.
Keep the artwork concentrated around the edges if you want to preserve a clear view through the center.
Quick Tip: Test your color combinations on paper first so the finished leaves have enough contrast between each section.
5. Autumn Floral Arch
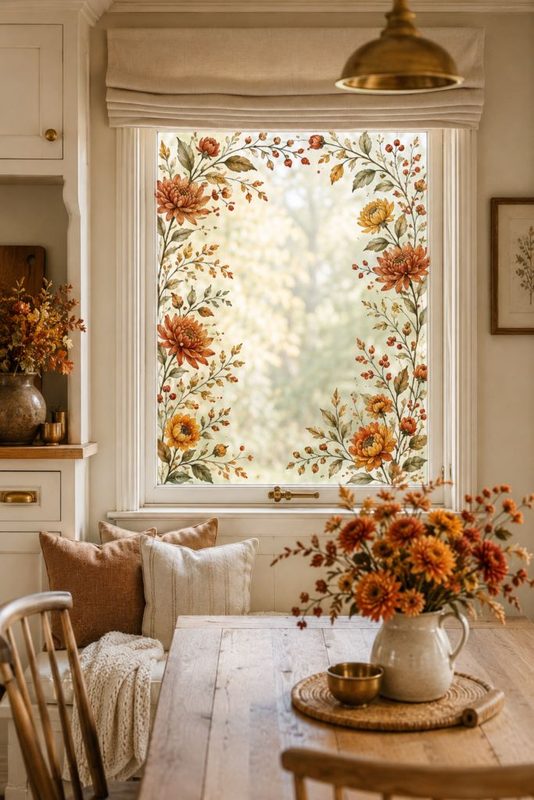
An autumn floral arch turns a plain window into a seasonal frame for the view outside.
Paint branches that curve upward from the lower corners and meet near the top center.
Then fill the branches with fall flowers, berries, leaves, and small seed heads.
Sunflowers results in a cheerful touch, while mums, dahlias, and dried grasses give the arrangement a richer autumn character.
Here, I do not need to paint every flower with perfect detail.
Simple petals and clusters of dots suggest flowers from a distance.
Keep the middle section of the glass mostly open so the arch frames the window instead of covering it.
For a softer palette, use cream, rust, dusty pink, golden yellow, and olive green.
A few painted berries fill narrow spaces between the larger flowers.
This idea suits dining room windows, kitchen spaces, and large living room panes.
Quick Tip: Paint the branches first and let them guide the placement of your flowers, leaves, and berries.
6. Golden Wheat Stalks Swaying Across the Lower Glass
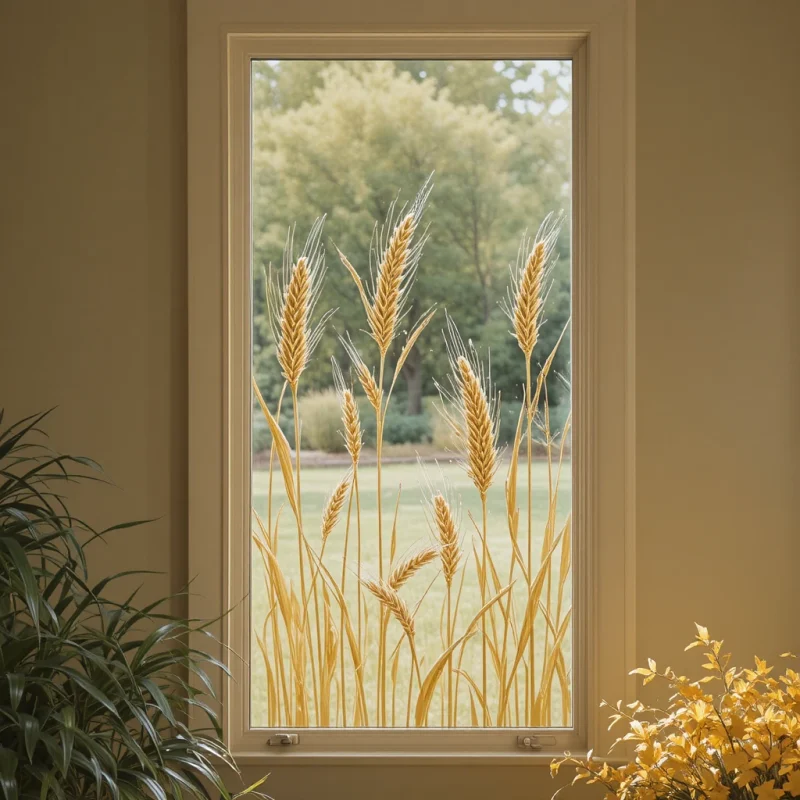
Golden wheat stalks bring a harvest-inspired look to the bottom of a window without covering the entire pane.
Paint several long stems rising from the lower edge and curve them slightly in different directions.
The gentle variation makes the stalks look like they are moving in a light breeze.
Use golden yellow, muted tan, and warm brown to keep the design close to the colors of dried wheat.
Add tiny seed heads along each stem with short brushstrokes.
A few loose leaves or small autumn berries break up the repeating shapes.
This idea looks lovely on kitchen or dining room windows where harvest decorations already have a place.
Keep the stalks concentrated along the lower third of the glass.
That leaves plenty of open space above for daylight and outdoor views.
For a larger window, allow a few taller stalks to reach higher while keeping the main border low.
Quick Tip: Use a fine brush for the seed heads and a slightly wider brush for the long stems.
7. Harvest Moon Silhouette
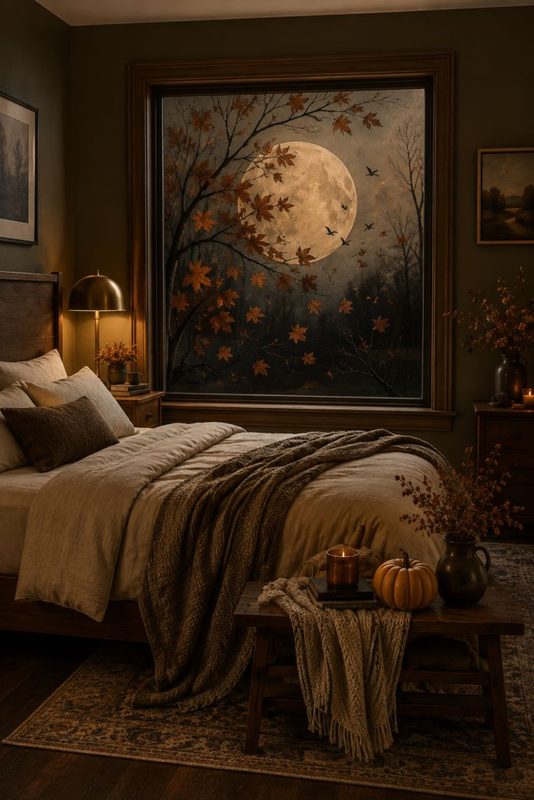
A large harvest moon become the centerpiece of a fall window painting.
Paint a warm golden moon near the upper section of the glass and surround it with simple silhouettes of autumn trees.
Dark branches crossing the lower part of the moon give the scene a dramatic nighttime appearance.
Add flying birds, falling leaves, or a small farmhouse beneath the trees.
Keep the silhouettes simple so the moon remains the main attraction.
Deep charcoal or brown works nicely for the foreground, especially when paired with an amber or golden moon.
For a little extra character, paint a few clouds passing across one edge of the moon.
The design works on a bedroom window, living room glass, or a large pane facing the backyard.
Leave some open glass around the moon so the scene has enough breathing room.
Indoor lighting can make the moon stand out after sunset.
Quick Tip: Use a round plate or bowl as a guide if you want a clean, symmetrical moon shape.
8. Frost-Kissed Pine Cones
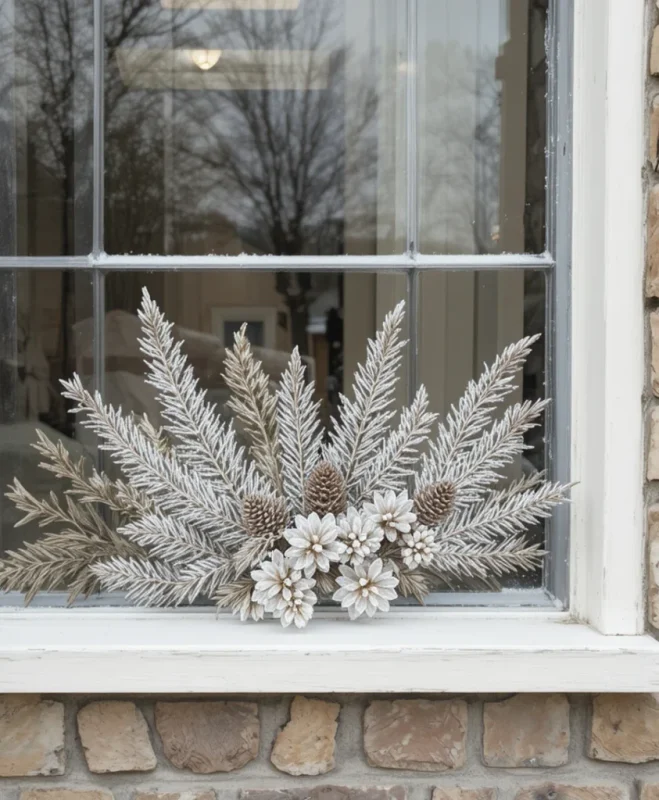
Pine cones may remind you of winter, but a few painted touches bring them into a late-fall window design.
Paint several pine cones along the lower section of the glass, using warm brown as the main color.
Then add pale cream or soft white along the edges to suggest the first touch of frost.
Small pine branches connect the cones and give the design a natural woodland setting.
Also scatter a few golden leaves around the branches to keep the display firmly rooted in autumn.
Vary the pine cones in size and angle so they do not look like identical decorations.
A few tiny berries can fill the gaps and introduce another seasonal color.
This idea suits a cozy kitchen, dining area, or family room where earthy fall decorations already appear.
Keep the frosted sections light so they resemble a delicate coating instead of heavy snow.
Quick Tip: Use a nearly dry brush for the pale edges so the frost effect stays light and uneven.
9. Acorn Branch Corners
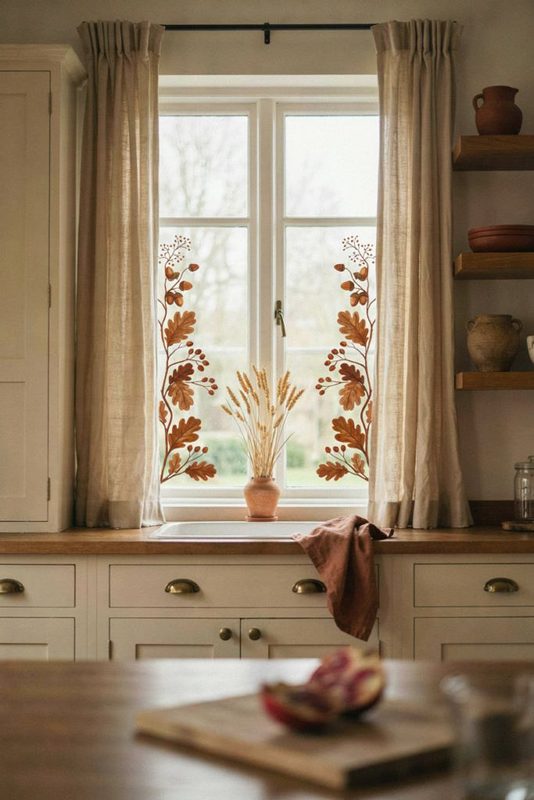
Acorn branches tucked into the corners of a window give fall decorating a simple woodland touch.
Begin with thin branches that extend inward from two corners, then scatter oak leaves and acorns along the stems.
The arrangement does not need to fill the entire pane.
Leaving the center open makes the painted branches look like they are framing the view outside.
Warm brown works for the branches, while shades of rust, amber, olive, and golden yellow suit the leaves.
Give the acorns different sizes so the arrangement does not look too carefully repeated.
A few loose leaves drifting away from the branches can soften the edges and connect the two corners.
This design suits smaller windows because it uses the frame itself as part of the artwork.
For a dining room or kitchen, tiny painted berries tucked between the leaves introduce another seasonal detail.
A fine brush will give the branches a delicate appearance, especially around the thinner twigs.
Quick Tip: Start with the branches and add the leaves afterward, since their placement becomes easier once the basic structure is established.
10. Migrating Geese V-Formation Silhouette
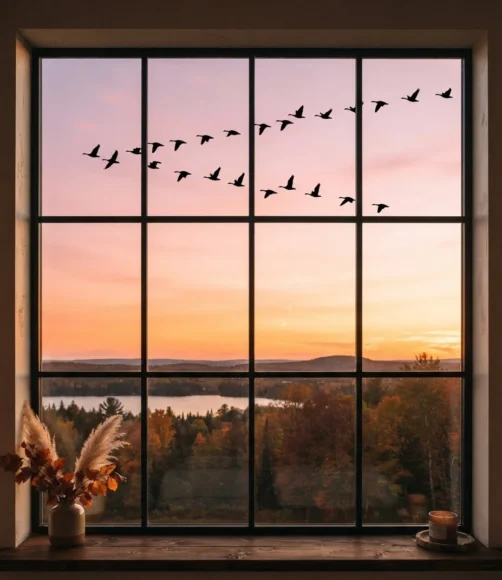
A flock of migrating geese crossing a fall sky brings a completely different mood to window painting.
Paint the birds in a loose V formation, with the largest bird leading and smaller shapes trailing behind.
The silhouettes need only a few simple strokes to suggest wings, bodies, and pointed necks.
Dark charcoal or soft black gives the flock a crisp appearance against a pale window.
Position the group diagonally so it appears to travel across the glass instead of sitting in one fixed spot.
A few scattered clouds can sit behind the birds, while tiny leaves drifting below them tie the scene to autumn.
The design suits a bedroom or living room window where a quieter seasonal theme feels appropriate.
Leave plenty of clear glass around the flock so each bird remains recognizable.
Vary the wing positions too.
Some birds might have their wings raised, while others appear to glide with their wings stretched outward.
Quick Tip: Sketch the entire flight path first so the spacing between the birds looks natural before you begin painting.
11. Majestic Stag Head Silhouette with Crown of Autumn Leaves
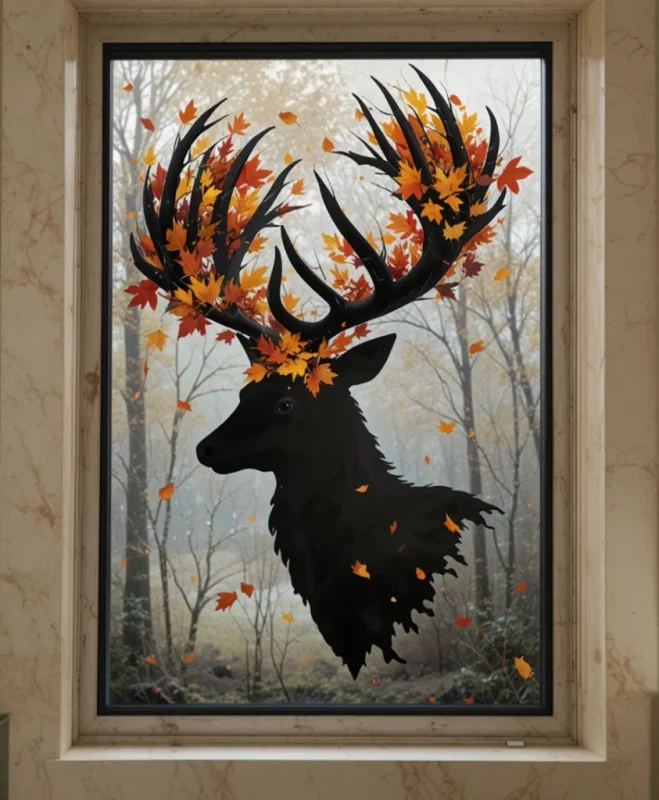
A stag head surrounded by autumn foliage gives a fall window an elegant woodland character.
Paint the stag in a strong charcoal silhouette, focusing on the shape of its antlers rather than small facial details.
Then weave colorful leaves through the antlers as though the branches have become a natural crown.
Rust, copper, golden yellow, burgundy, and muted green give the foliage a rich seasonal palette.
The design deserves a prominent section of glass because the antlers need room to spread outward.
A few leaves can extend beyond the main shape and drift toward the window edges.
For a simpler version, paint only the head and antlers, then use small leaf clusters to frame the silhouette.
The contrast between the dark animal and brighter foliage makes the centerpiece easy to notice from outside.
A larger living room window would suit this treatment, especially when the surrounding decor has natural wood or autumn colors.
Quick Tip: Draw the antlers on paper first and test the leaf placement before transferring the design onto the window.
12. Lantern Glow Window
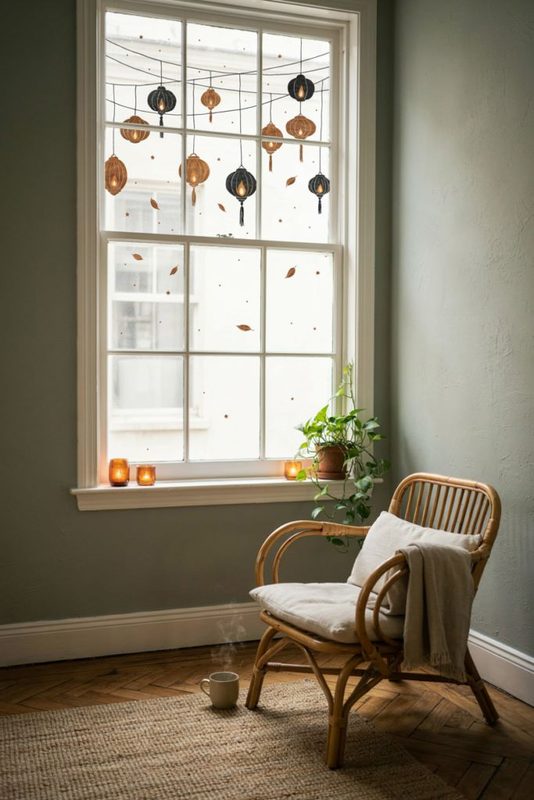
A painted lantern can give a fall window the cozy appearance of a warm evening outdoors.
Start with one large lantern near the lower corner and paint a soft golden glow inside its glass panels.
Dark brown or charcoal lines define the lantern frame, while amber and pale yellow fill the lighted sections.
Surround the lantern with fallen leaves, small branches, berries, or a few acorns to tie it into the autumn theme.
A second, smaller lantern can sit farther along the window for a sense of distance.
The design looks charming near a real table lamp or string lights placed behind the glass.
That extra illumination gives the painted flame a stronger nighttime presence.
For a farmhouse-style room, add a few dried grasses around the base.
A more polished room might suit a single lantern surrounded by sparse leaves as well as delicate branches.
Let the glass remain mostly open so the glow stays at the center of attention.
Quick Tip: Paint the brightest yellow in the center of the lantern and gradually deepen the surrounding shades toward the edges.
Final Thoughts
Fall window painting does not need complicated artwork to make a statement.
A few leaves, pumpkins, branches, or woodland shapes can give plain glass a seasonal personality.
Choose colors that suit your home, grab a brush, and let the design take shape as you paint.
Sometimes, an imperfect leaf or crooked pumpkin gives the window its charm.