12 Fun Pumpkin Decorating Ideas For Kids

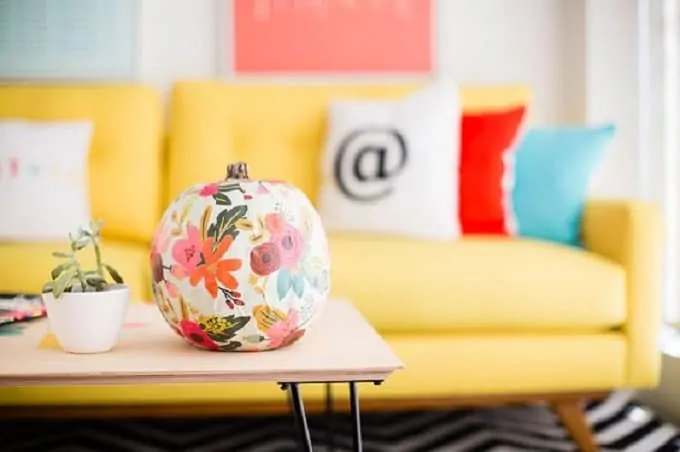
Pumpkin decorations gets a lot more fun when kids get to make the rules.
Forget perfect jack-o’-lanterns and let them paint, glue, stick, and scribble their way to something silly.
I’ve had plenty of Halloween projects where the wonky details ended up being the cutest part.
A pumpkin with mismatched eyes has a charm you simply cannot buy at the store.
Younger kids can handle simple crafts, while older ones can tackle bigger ideas.
Here are some fun pumpkin decorating ideas for kids that turn an ordinary pumpkin into a little Halloween masterpiece.
GET INSPIRED: 13 Gorgeous DIY Fall Décor Ideas For Your Home
Easy DIY Pumpkin Decorating Ideas For Young Kids
1. Bug Garden Pumpkin
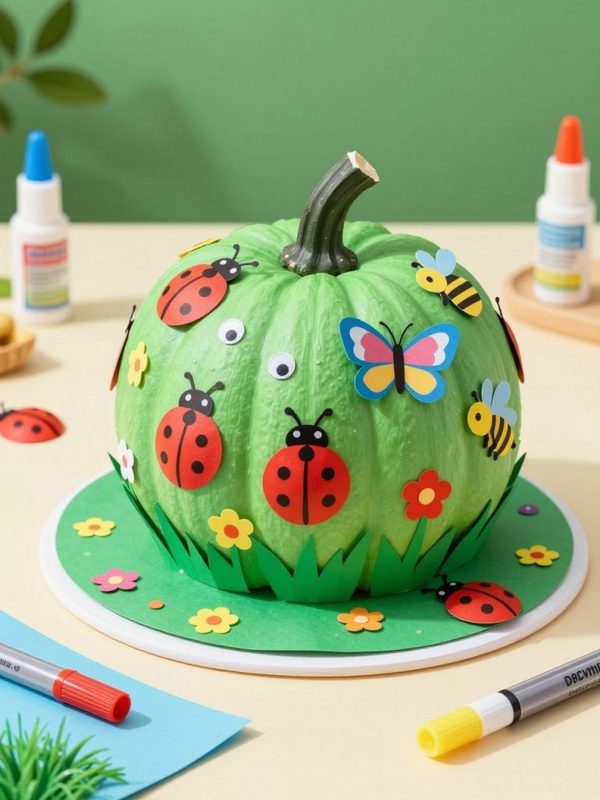
Turn a plain pumpkin into a tiny bug garden that kids can decorate with their favorite creepy crawlers.
Paint the pumpkin green, purple, or even bright blue, then let them add ladybugs, caterpillars, bees, butterflies, and tiny spiders.
Craft foam, pipe cleaners, pom-poms, and googly eyes give children plenty of pieces to work with.
Pipe cleaners make fun little legs and antennae, while pom-poms can become round bug bodies.
Let each child decide which insects belong in the garden.
There is no need to make the bugs match, since a collection of different shapes makes the pumpkin look like a busy little habitat.
Pro Tip: Use washable craft paint for younger children. It gives them freedom to experiment and makes cleanup easier when little hands get carried away.
2. Pom-Pom Gumball Machine Pumpkin
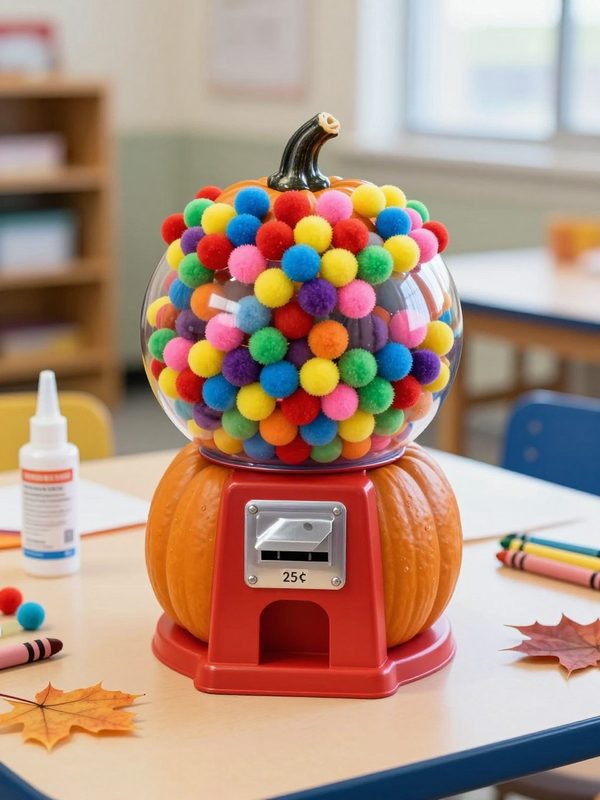
A pumpkin can become a giant gumball machine with nothing more than paint and a pile of colorful pom-poms.
This project gives kids an easy way to turn a familiar object into something completely different.
Paint the lower section silver or gray, then add a clear plastic bowl near the top to mimic the glass portion of a real machine.
Fill it with bright pom-poms in different colors and secure the pieces so they stay in place.
A few painted details can suggest the coin slot and dispenser.
Older kids can design a pretend brand name for their gumball machine and add it to a small sign on the front.
Pro Tip: Choose large pom-poms for younger children and keep small craft pieces away from toddlers who may put them in their mouths.
3. Animal Faces with Googly Eyes
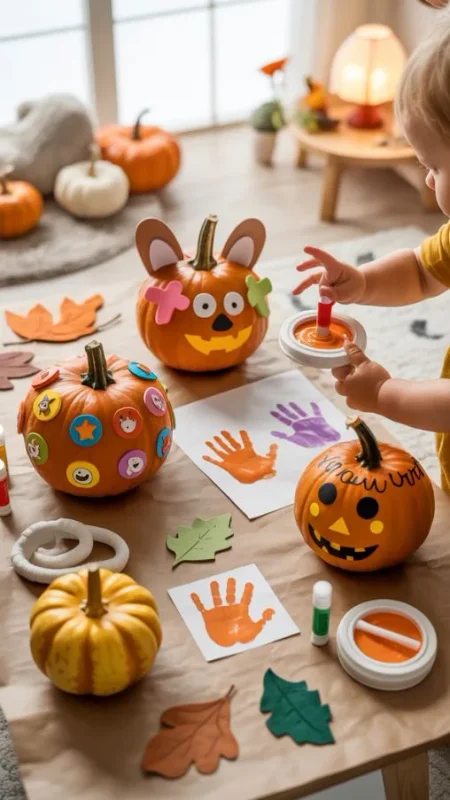
Give each pumpkin its own personality by turning it into an animal face.
Kids can choose a favorite creature, then use paint, paper ears, felt shapes, pipe cleaners, and googly eyes to bring it to life.
A cat might have triangle ears and painted whiskers, while a frog could get a wide smile and oversized eyes.
Brown paper ears can turn another pumpkin into a bear, and a few felt spots can transform it into a playful puppy.
The best part of this project is the freedom to mix features. Let children exaggerate the eyes, ears, noses, and expressions so every pumpkin looks different.
Pro Tip: Attach the eyes after the paint has dried completely. They will stick better, and kids can move them around first to test different expressions.
4. Pop Art Pumpkins
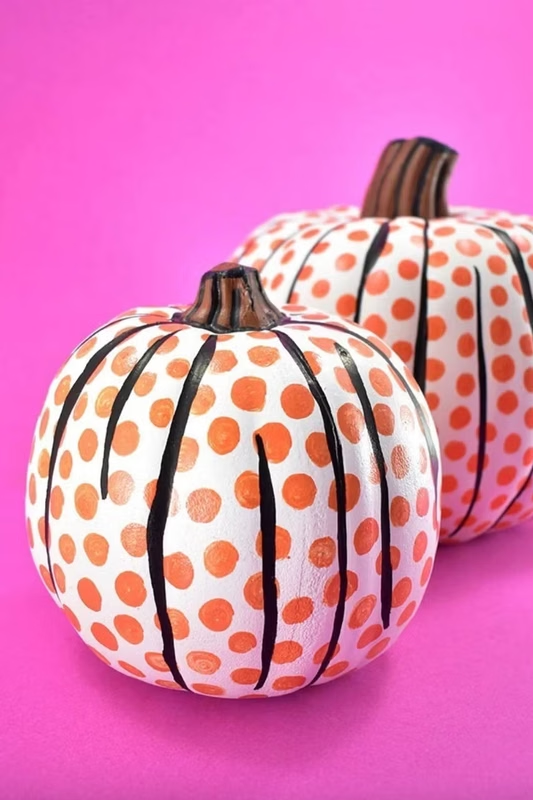
Bright colors and bold patterns make pop art pumpkins a fun project for kids who enjoy painting.
Give each pumpkin a simple base color, then let them cover the surface with dots, stripes, zigzags, stars, or oversized shapes.
You can introduce the look of comic-book art with thick black outlines and short words such as “BOO!” or “EEK!”
Older children may enjoy creating their own pattern instead of following a finished example.
A collection of these pumpkins can become a colorful Halloween display once the paint dries.
Put several designs together and let the differences between them become part of the decoration.
Pro Tip: Acrylic craft paint gives stronger coverage than thin washable paint. Let each color dry before adding another so the patterns stay crisp.
5. Rainbow Crayon Drip Pumpkin
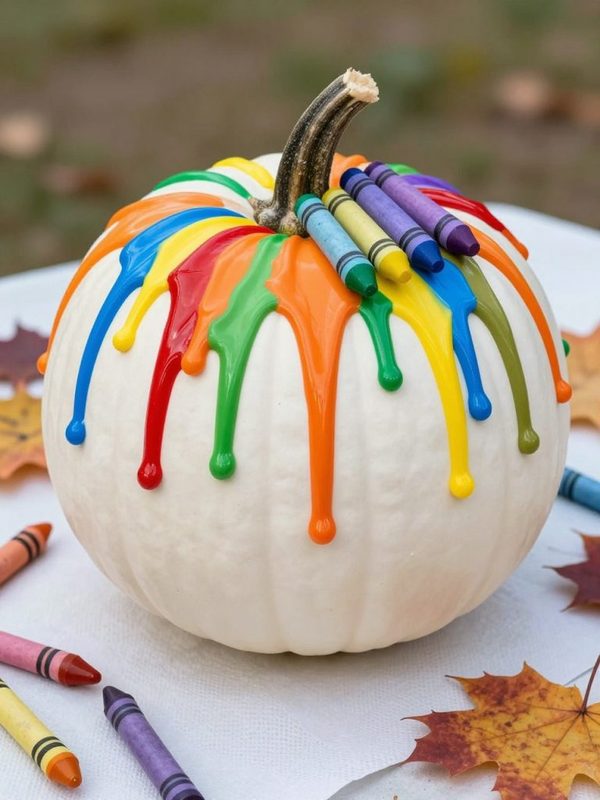
A rainbow crayon drip pumpkin lets kids turn broken or unwanted crayons into colorful Halloween art.
Remove the paper wrappers, arrange the crayons around the top of a light-colored pumpkin, and let an adult handle the heat needed to melt them.
As the wax runs down the pumpkin, children can watch the colors form their own patterns.
Let them arrange the crayons in rainbow order, or mix the colors for a wilder result.
You can leave the pumpkin mostly white so the melted wax becomes the main attraction.
A black pumpkin can create a completely different effect, with the bright colors standing out against the darker surface.
Pro Tip: Place the pumpkin on a covered tray before melting the crayons. Wax can travel farther than expected, so protecting the work surface will save you a messy cleanup.
6. Paper Plate Lion Pumpkin
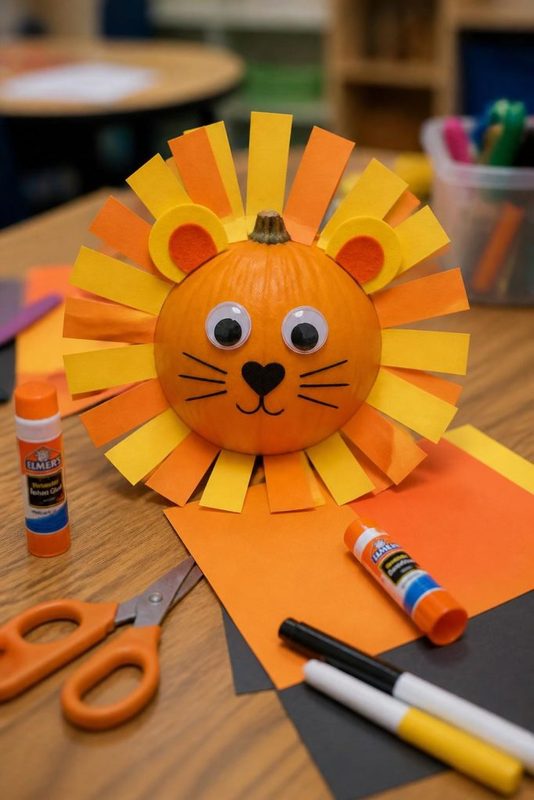
Turn an ordinary pumpkin into a cheerful little lion with a paper plate mane.
This one is a fun afternoon project because kids can take charge of the face while you handle any cutting that needs an adult hand.
Paint the pumpkin orange or leave it in its natural color for a quicker project.
Cut a paper plate into a wide mane shape, then let your child cover it with orange, yellow, or brown paint.
Once it dries, attach the plate around the back of the pumpkin.
A simple painted nose and a pair of large eyes bring the lion to life. Small paper ears tucked behind the mane finish the face.
My kids I’ve used paper plates for Halloween crafts before, and they are handy when you want a big decorative shape that weighs very little.
Pro Tip: Draw the lion’s face lightly with a pencil first so younger children have an easy guide for painting.
7. Silly Sock Monster Pumpkin
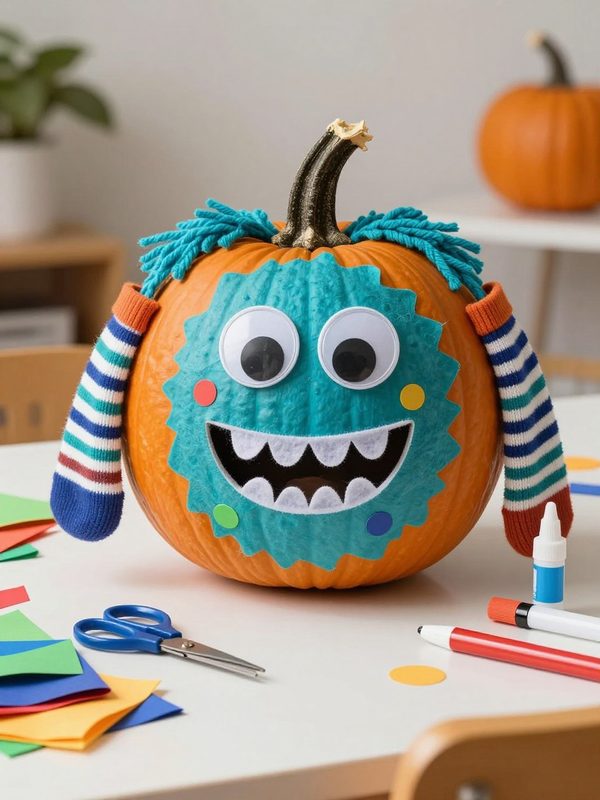
Grab a colorful old sock and turn it into a goofy monster hat for your pumpkin.
The stranger the sock looks, the better this project becomes when kids get to decide what kind of creature they are making.
Stretch the sock over the top of a small pumpkin and bunch the loose end into a floppy point.
Glue on oversized craft eyes, then give the monster a funny mouth with felt or paper. A few scraps of yarn can become hair around the opening.
For a classroom-style craft, kids can set out a basket of clean mismatched socks and let each child pick one.
That little bit of choice makes every pumpkin look different, and nobody worries about making their monster too neat.
Pro Tip: Choose socks with bold patterns because stripes, dots, and bright colors make the monsters look even sillier.
8. Sticker Story Pumpkin
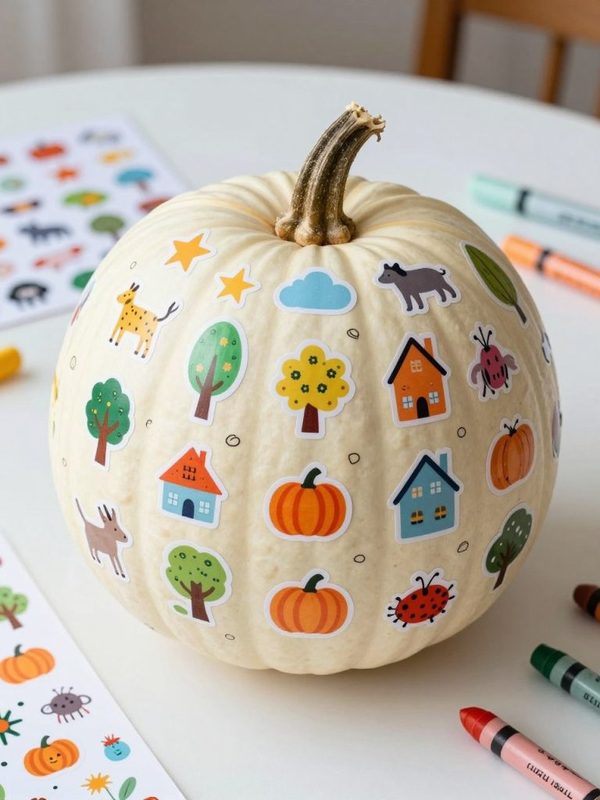
Give kids a pile of Halloween stickers and let them turn a plain pumpkin into a tiny story.
This idea takes very little preparation, which makes it useful for a rainy afternoon when you need an easy craft.
Start with a clean pumpkin and let your child choose a theme.
One pumpkin might become a spooky night scene with bats and ghosts, while another could look like a silly Halloween party.
Place the larger stickers first, then fill the empty spots with tiny stars, candy pieces, or spider shapes.
A sticker pumpkin can also become a little storytelling game. Ask your child who lives on the pumpkin, where they are going, or what happened during their Halloween adventure.
Basically, crafts with a story attached tend to keep kids interested long after the decorating is finished.
Pro Tip: Use removable stickers if you want to change the story later or save the pumpkin for another Halloween activity.
9. Ice Cream Sundae Pumpkin
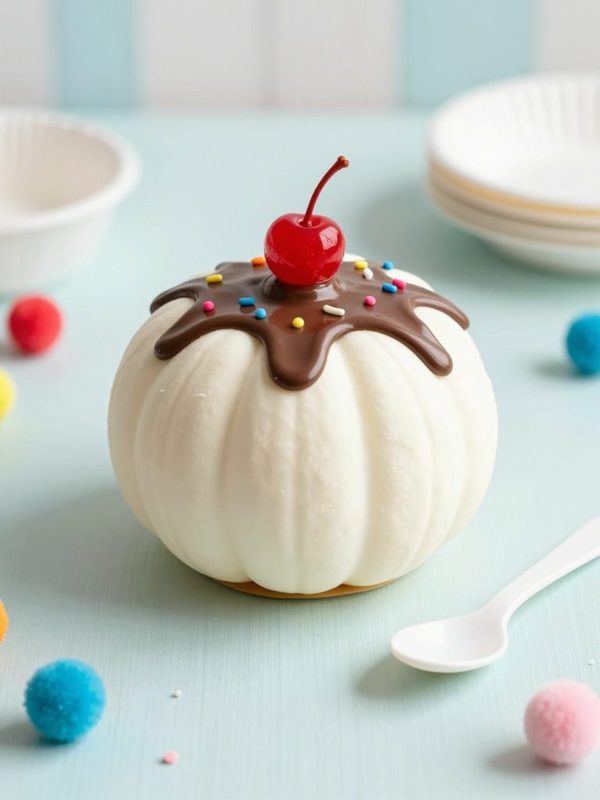
Who says pumpkins have to look spooky?
Turn a small pumpkin into a giant ice cream sundae for a playful Halloween decoration that kids can decorate like their favorite dessert.
Paint the pumpkin in a soft pastel shade and let it dry completely.
Then add a fluffy scoop on top using lightweight craft materials, followed by colorful sprinkles and a paper cherry.
Keep the toppings firmly attached so little hands can carry the finished pumpkin around safely.
This idea can get wonderfully goofy when kids start designing their own imaginary sundae.
During family craft sessions, dessert-inspired projects tend to spark plenty of conversation because everyone has an opinion about toppings.
Pro Tip: Use a small pumpkin with a flat bottom so the finished sundae stays steady on a table or shelf.
10. Yarn-Wrapped Mummy Pumpkin
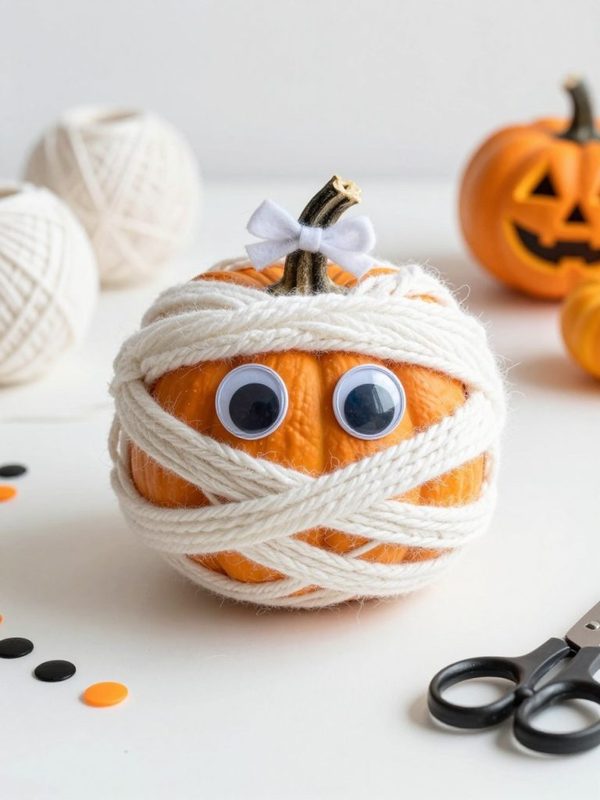
A ball of white yarn is all you need to give a pumpkin a cute mummy makeover.
Kids can wrap the yarn around the pumpkin in their own way, so the finished decoration does not need to look perfectly even.
Begin near the bottom and wind the yarn around the pumpkin, leaving a few small gaps for the pumpkin color to peek through.
Tuck the loose end underneath or secure it with a small dab of glue.
Add two large eyes between the yarn strands, then draw a tiny mouth if your child wants the mummy to look extra expressive.
Letting kids control the winding also makes this a good hands-on activity for different ages.
Pro Tip: Use chunky yarn for younger children because it is easier for small hands to grip and wrap around the pumpkin.
11. Handprint Leaf Pumpkin
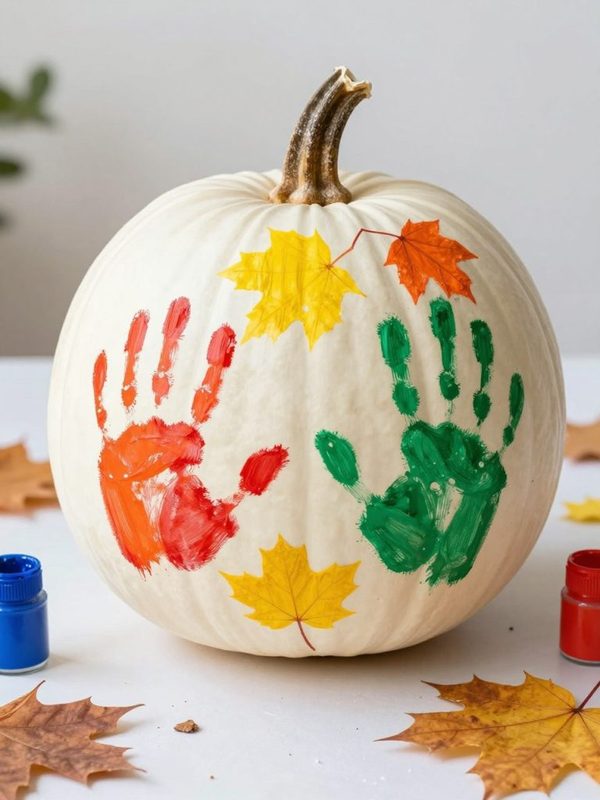
Turn little handprints into a leafy autumn design that kids can create themselves.
Paint a few fingers and the palm in fall shades, then press the hand onto the pumpkin to form clusters of leaves.
Red, orange, yellow, and golden paint can produce a cheerful tree-like pattern across the surface.
Children can overlap their prints or use different colors for each section, so no two pumpkins end up looking exactly alike.
Add a brown painted trunk and a few tiny acorns or dots beneath the branches once the handprints have dried.
Younger kids may enjoy making one large tree, whereas older children can cover the pumpkin with a whole collection of colorful leaves.
Pro Tip: Use a slightly damp cloth nearby for quick cleanup. Painting little hands can get messy once the project gets underway.
12. Bedtime Pajama Pumpkin
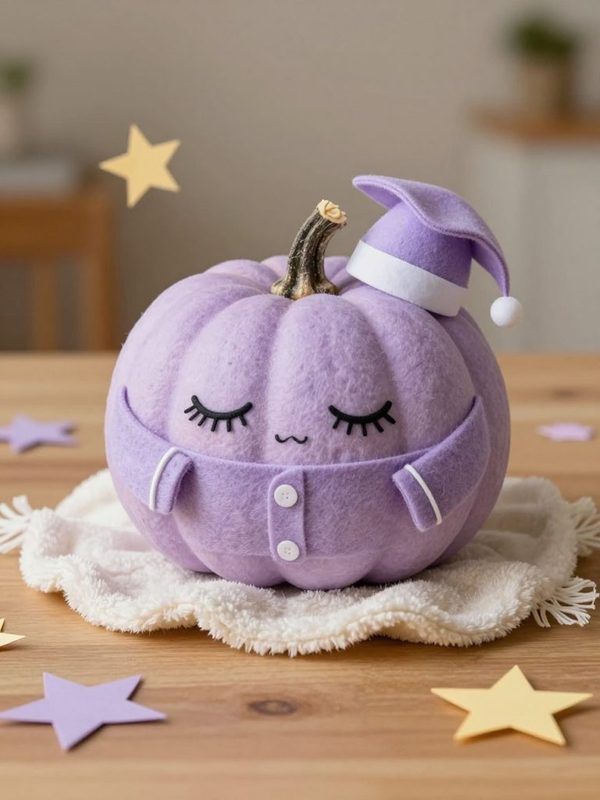
Give a pumpkin a cozy Halloween personality by turning it into a little character dressed for bed.
Paint on a pajama pattern, add a sleepy face, and finish the look with a tiny nightcap made from felt or fabric.
Stripes, stars, moons, and tiny clouds make easy patterns for kids to paint.
A pair of felt slippers placed beside the pumpkin can make the character look as though it has just climbed out of bed.
You can make the face silly, sleepy, or slightly spooky depending on the child’s imagination.
Add a blanket nearby for a cute bedtime scene that works nicely on a child’s dresser or Halloween party table.
Pro Tip: Draw the pajama pattern lightly with a pencil before painting. It gives younger artists a guide to follow and keeps the design easier to manage.