10 Fun Thanksgiving Construction Paper Crafts For Kids

Disclosure: This post may contain affiliate links. As an Amazon Associate, I earn a small commission from qualifying purchases at no extra cost to you. Thanks.
Thanksgiving is a wonderful time to thank everyone and everything we you have.
This year I thought about including something that could be done with younger kiddos.
What about Thanksgiving crafts made with construction paper?
A good idea indeed.
Not too many steps, not too many supplies, and it doesn’t take too much time.
If you’re anything like me, these 9 Thanksgiving construction paper crafts are an activity for kids to do while waiting for the feast to start.
Then, use them to decorate playrooms or line your dinner table.
Why Use Construction Paper for Thankful Crafts?
Construction paper crafts are a fun way for kids to get creative while learning useful skills.
As they make their thankful crafts, they can practice:
- Developing fine motor skills
- Improving cutting skills
- Following instructions
- Practicing coloring
- Learning to count
1. Easy Paper Turkey Craft
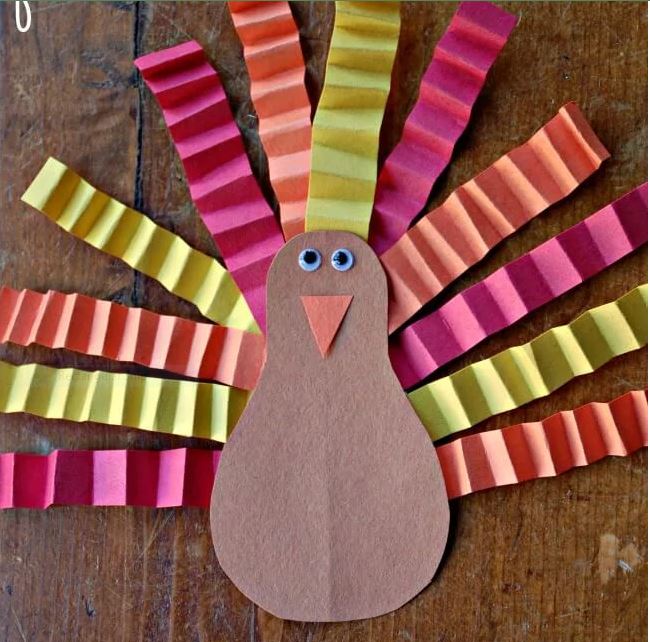
A few sheets of construction paper are all kids need to create a turkey with a big personality.
They can draw their own feather shapes, choose bold colors, and give their bird a funny expression.
This project is suitable for younger crafters who are learning to cut shapes and glue pieces together.
Older kids might enjoy adding patterned feathers or changing the turkey’s design.
Essential Supplies
- Colored cardstock or construction paper
- Wood-cased school pencil
- Scissors
- Glue stick
How to Make It
- Draw a large oval on brown construction paper for the turkey’s body.
- Sketch a smaller circle for the head, then draw several feather shapes on red, orange, and yellow paper.
- Cut out the shapes carefully.
- Glue the head onto the body, then arrange the feathers behind it.
- Cut a small triangle for the beak and a tiny wattle from colored paper.
- Attach the facial pieces to finish the turkey.
Creative Hack: Fold the bottom edge of the turkey’s body backward to create a small stand for displaying it on a desk or shelf.
2. Kids’ Pilgrim Hat DIY
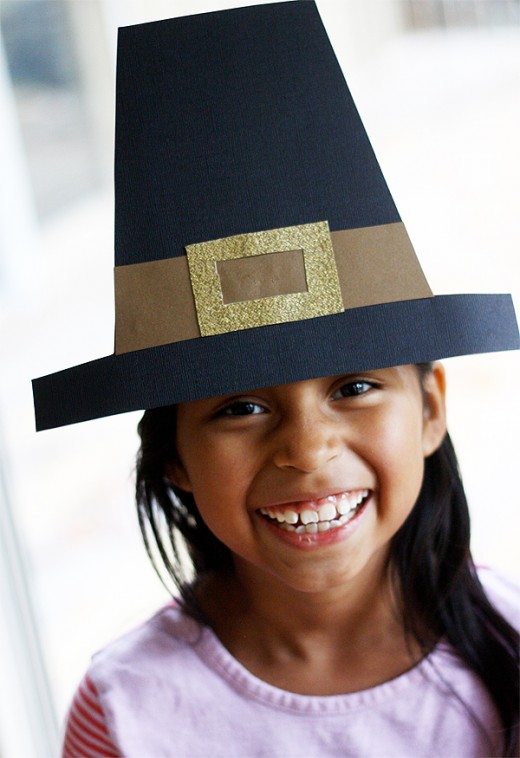
A miniature Pilgrim hat turns ordinary construction paper into a fun dress-up accessory for kids.
The black paper forms the crown, while a brown band adds contrast around the base.
A gold buckle gives the hat its recognizable finishing detail.
Kids get to practice measuring, cutting, and assembling paper pieces as they build their own hats.
This project suits pretend play, history-themed lessons, or a holiday craft session at home.
Essential Supplies
- Black and brown construction paper
- Gold glitter paper
- Scissors
- Stapler
- Glue stick
How to Make It
- Cut a wide strip of black construction paper long enough to fit around the child’s head.
- Form the strip into a ring, adjust the size, then staple the ends together.
- Cut a black oval or wide brim shape, then make a hole in the center large enough for the crown to fit through.
- Slide the crown through the brim and secure it with glue.
- Cut a narrow brown strip for the hatband and glue it around the crown.
- Cut a small buckle from gold glitter paper, then attach it to the front of the band.
Sizing Tip: Measure the paper ring around the child’s head before stapling so the finished hat fits comfortably.
3. Thanksgiving Gratitude Bug
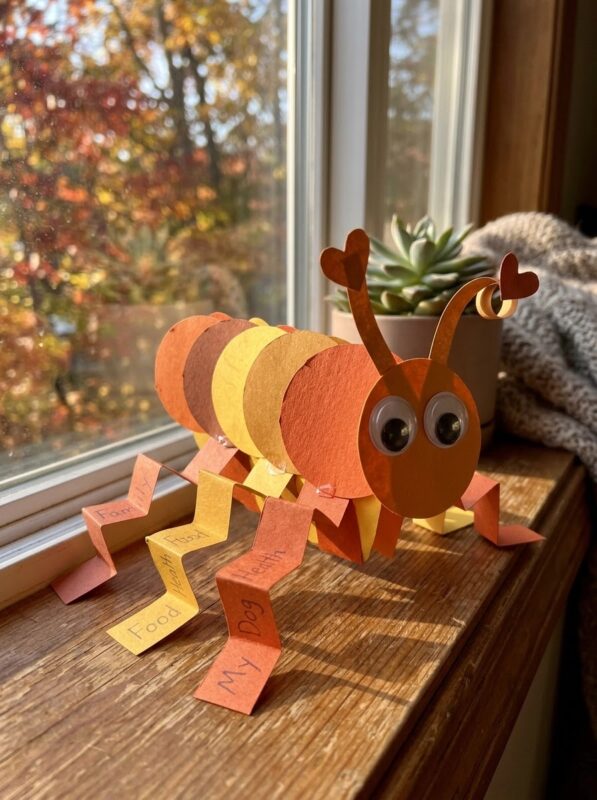
A gratitude bug turns small messages of appreciation into a colorful paper creature.
Kids write something they are thankful for on each paper circle, then link the pieces to form a long, segmented body.
The finished bug grows as children think of more people, experiences, or little things that matter to them.
This craft combines paper construction with a gentle writing activity, making it suitable for home or classroom use.
Supplies Needed
- Circle punch or a cup to trace
- Long strips of colored construction paper
- Black marker
How to Make It
- Use a circle punch or trace around a cup to cut out a circle for the bug’s head.
- Cut several colored paper strips for the body segments.
- Write one thing to be grateful for on each strip.
- Fold each strip into a loop, overlapping the ends to secure it.
- Link the loops together to form a long body.
- Draw eyes, a smile, and antennae on the head circle.
- Attach the head to the first loop to complete the gratitude bug.
Creative Idea: Ask kids to write one gratitude message per loop, then read their messages aloud as they link the body together.
4. Toilet Paper Roll Pilgrims
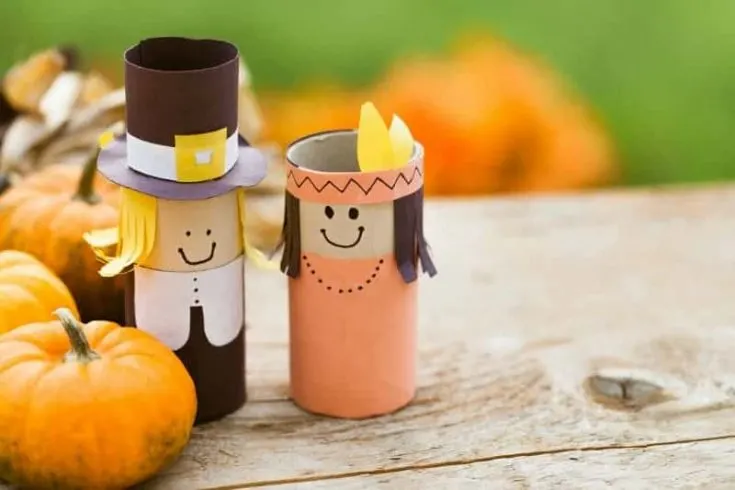
An empty toilet paper roll provides a sturdy base for these small paper characters.
Kids can turn the cardboard tube into a standing figure by adding a paper outfit, drawing a face, and creating a simple hat.
The upright shape makes the finished characters easy to display during a history lesson or holiday craft activity.
Each child can choose different facial expressions or clothing details to give their figure its own look.
Material List
- Empty toilet paper roll
- Markers
- Glue
- Construction paper
- Scissors
How to Make It
- Cut a piece of construction paper to fit around the toilet paper roll.
- Wrap the paper around the tube, then secure it with glue.
- Draw the character’s face near the top using markers.
- Cut a hat shape from black construction paper and glue it above the face.
- Cut additional paper pieces for the collar, coat, or other clothing details.
- Attach the clothing pieces to the tube, then let the glue dry.
Display Hack: Make several figures with different expressions or clothing details to create a small paper-character display.
5. Tipi or Teepee Paper Craft
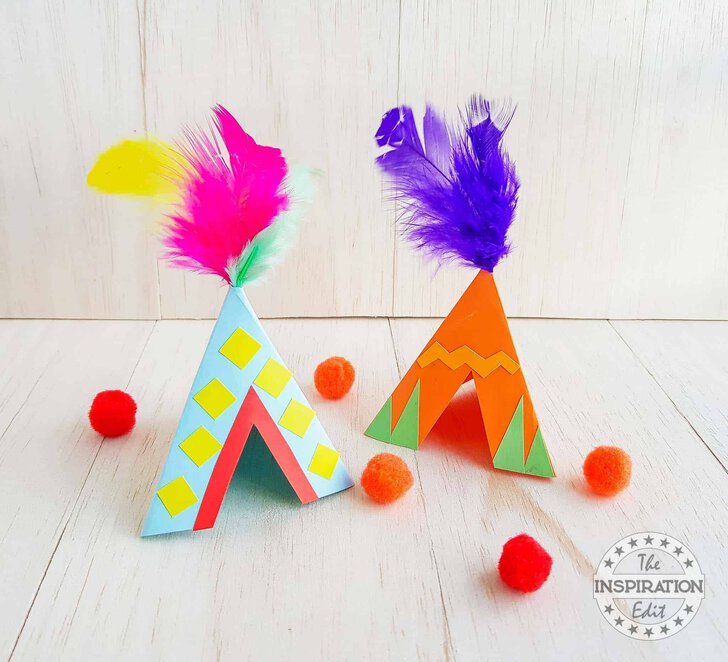
A paper tipi craft introduces kids to a traditional shelter associated with some Indigenous nations of the Great Plains.
The project uses folded paper to create a three-dimensional structure that stands on its own.
Kids can decorate the outside with lines, shapes, or geometric patterns before assembling the shelter.
This activity offers an opportunity to discuss how homes and building materials differ across cultures and environments.
Supplies Needed
- Colored craft paper
- Pencil
- Scissors
- Craft glue
- Washable marker (optional)
How to Make It
- Roll a sheet of craft paper into a cone, leaving a small opening at the top.
- Adjust the cone until it stands securely, then glue the overlapping edge.
- Trim the bottom so the tipi sits flat on a surface.
- Use markers to add simple geometric designs around the outside.
- Cut a small doorway near the bottom if desired.
- Hold the glued edge in place until secure, then allow the structure to dry.
Culture Note: Explain that tipis were traditionally used by some Plains Indigenous peoples, not by all Native American nations, whose homes varied by region and tradition.
6. Pattern Block Turkey Craft
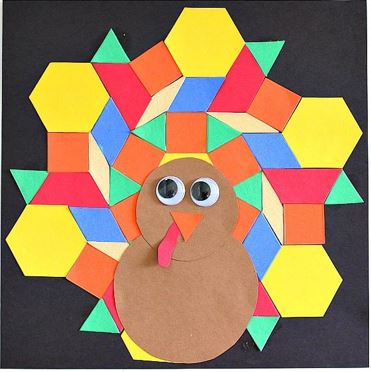
Pattern blocks help kids turn a familiar bird into a colorful design filled with shapes and patterns.
This construction paper turkey craft combines basic geometry with holiday creativity, giving children room to arrange triangles, squares, and diamonds into feathers.
Kids choose their colors, position each piece, then glue the finished arrangement onto paper.
The activity encourages fine motor practice without requiring complicated instructions.
It suits classroom craft stations because children can create different turkey designs using the same set of pattern block sheets.
Materials Needed
- Construction paper in various colors
- Glue stick
- Googly eyes
- Scissors or paper cutter
- Pattern block sheets
How to Make It
- Cut out a large brown or orange oval for the turkey’s body, along with a smaller circle for its head.
- Use pattern block sheets to trace colorful geometric shapes for the feathers.
- Arrange the shapes in a fan behind the body, alternating colors to create a clear pattern.
- Glue the body over the lower part of the feather fan.
- Add googly eyes, then cut out a small beak and wattle from construction paper.
- Glue the facial details in place and let the turkey dry.
Creative Challenge: Ask kids to repeat a color sequence across the feathers or use matching shapes to introduce simple patterns.
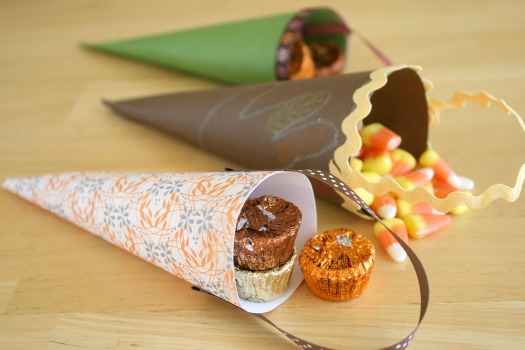
7. Crafty Paper Cornucopias
A paper cornucopia turns one sheet of construction paper into a tiny horn-shaped basket for seasonal treats.
Kids roll the paper into a cone, secure its shape, then add a ribbon handle or bow for a festive finishing touch.
The wide opening holds small wrapped candies, making this craft useful for classroom parties.
Children can choose different paper colors to personalize each cornucopia, while adults help secure the cone if the paper proves tricky to roll.
Supplies
- 1 sheet of construction paper
- Scissors
- Double-sided tape
- Ribbon, cut 8–10 inches
- Treats
How to Make It
- Roll the construction paper diagonally into a cone, leaving a wide opening at one end and a narrower point at the other.
- Secure the overlapping edge with double-sided tape.
- Trim the wide opening so its edge looks neat, then gently bend the narrow tip upward to create the traditional cornucopia shape.
- Tie or tape the ribbon around the cone as a decorative accent.
- Fill the opening with small wrapped treats.
Party Tip: Prepare the paper cones ahead of time for younger children, then let them add ribbon and choose their own wrapped treats.
8. Paper Turkey Wreath
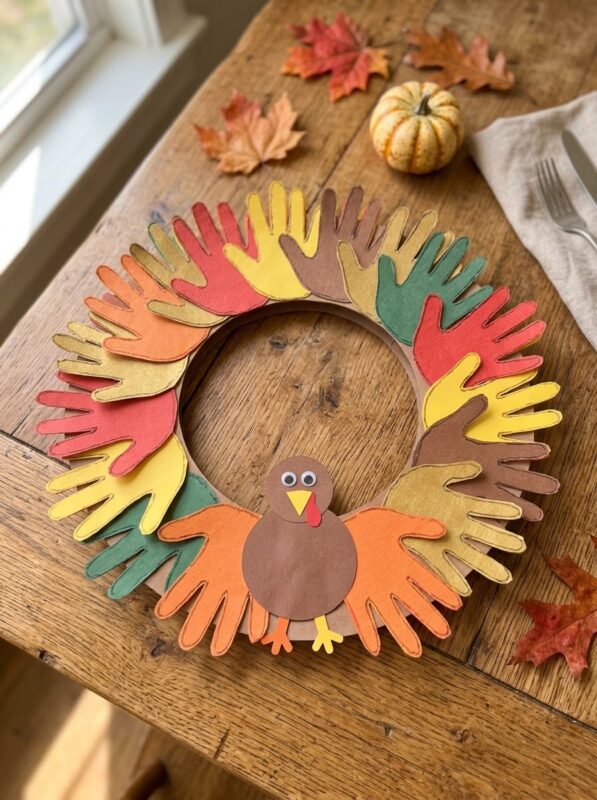
This turkey wreath brings a burst of autumn color to a front door.
Kids build the wreath from a paper plate ring, then layer construction paper feathers around the edge in warm shades of red, orange, yellow, and brown.
A turkey face placed near the bottom transforms the circular decoration into a friendly holiday character.
The project offers cutting and gluing practice, with plenty of room for children to vary feather shapes.
Supplies Needed
- Construction paper in red, orange, yellow, and brown
- 1 paper plate
- Kid-safe scissors
- A glue stick
How to Make It
- Have an adult cut out the center of the paper plate, leaving a sturdy ring.
- Cut construction paper into feather shapes, using different colors and sizes.
- Glue the feathers around the ring so they overlap slightly and point outward.
- Cut a brown circle or oval for the turkey’s head, then add a beak and wattle from colored paper.
- Attach the head to the lower part of the wreath.
- Cut two small feet from orange paper and glue them beneath the head if desired.
- Leave the wreath flat until all pieces are firmly attached.
Display Hack: Add a paper loop to the back so children can hang their wreaths on classroom doors or bedroom walls.
9. Pilgrim Hat Candy Holders
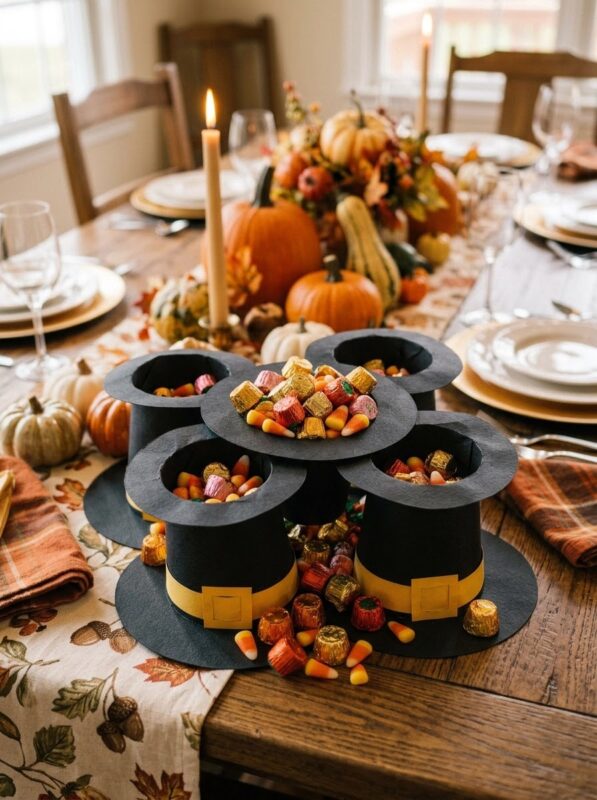
These miniature paper hats turn wrapped candies into festive table favors for a holiday meal.
Kids shape black construction paper into a small hat, then add a yellow buckle for a classic finishing detail.
Each holder keeps a few treats together and looks charming beside a place setting.
The project involves basic paper folding, cutting, and gluing, with you helping your kids secure the pieces neatly.
Items Needed
- Black construction paper
- Small yellow scraps
- Clear tape
- Glue stick
- Small wrapped candies
How to Make It
- Cut a rectangle of black construction paper and roll it into a short cylinder, overlapping the edges slightly.
- Secure the cylinder with clear tape.
- Cut a black circle large enough to form the hat’s brim.
- Attach the cylinder to the center of the brim with glue or tape.
- Cut a small yellow rectangle for the buckle, then glue it to the front of the hat.
- Once the glue dries, place a few small wrapped candies inside the holder.
Party Hack: Make the holders in advance, then let kids decorate the buckles before adding the wrapped candies.
10. Table Place Cards
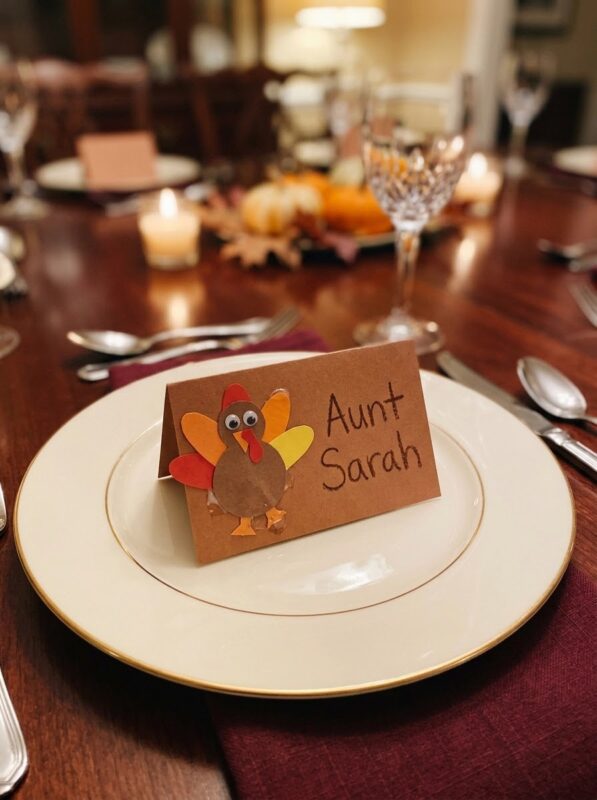
Personalized place cards help guests find their seats and add a handmade touch to the holiday table.
Kids fold sturdy cardstock into small tent cards, then decorate each one with colorful paper-inspired details drawn with washable markers.
Googly eyes add a funny expression, giving every card its own personality.
Children can write each guest’s name on the front, then add a small greeting or doodle inside for an extra personal touch.
These cards suit family dinners, classroom feasts, or a pretend holiday meal during dramatic play.
Materials Needed
- Sturdy cardstock or heavy paper
- Scissors
- Washable markers
- Googly eyes
How to Make It
- Cut the cardstock into rectangles of equal size.
- Fold each rectangle in half to create a tent that stands on its own.
- Write a guest’s name across one side using a marker.
- Draw a turkey face or feather fan around the name, leaving the lettering easy to read.
- Glue on googly eyes and add a beak, wattle, or other small details with markers.
- Let the cards dry before placing them on the table.
Personalization Idea: Invite kids to draw a different turkey expression for each guest so every place card has its own character.
FAQs
1. What are the easiest Thanksgiving construction paper crafts for young kids?
Paper turkeys, simple turkey wreaths, and paper cornucopias are good choices for young children.
2. What supplies are best for Thanksgiving construction paper crafts?
Construction paper, child-safe scissors, glue sticks, washable markers, and cardstock cover most basic projects.
3. How can teachers use construction paper crafts in the classroom?
Teachers can set up craft stations with pre-cut shapes, demonstrate each project, then let students personalize their designs.