13 Easy DIY Turkey Crafts For Kids (Thanksgiving Projects)

Disclosure: This post may contain affiliate links. As an Amazon Associate, I earn a small commission from qualifying purchases at no extra cost to you. Thanks.
A funny turkey with crooked feathers usually gets more laughs than a perfect one.
That’s part of the fun of crafting with the little one.
Thanksgiving offers a chance to put away the screens for a bit and let little hands get creative.
This guide observes 13 DIY turkey crafts ideas that suit kids, from simple paper projects to more detailed designs.
Each one brings a fresh way to enjoy some hands-on holiday fun.
How To Make Kids Busy With Turkey Crafts For Thanksgiving
This festive holiday gives kids the opportunity to work on crafting projects.
I found the most essential Amazon supplies for DIY turkey crafts
- Acrylic paint
- Construction paper and Colored cardstock
- Child-safe scissors
- Glue sticks and craft glue
- Googly eyes
- Washable paint
- Washable paintbrushes
- Popsicle sticks
These one suits kids in preschool, kindergarten & early elementary.
1. Paper Turkey Craft
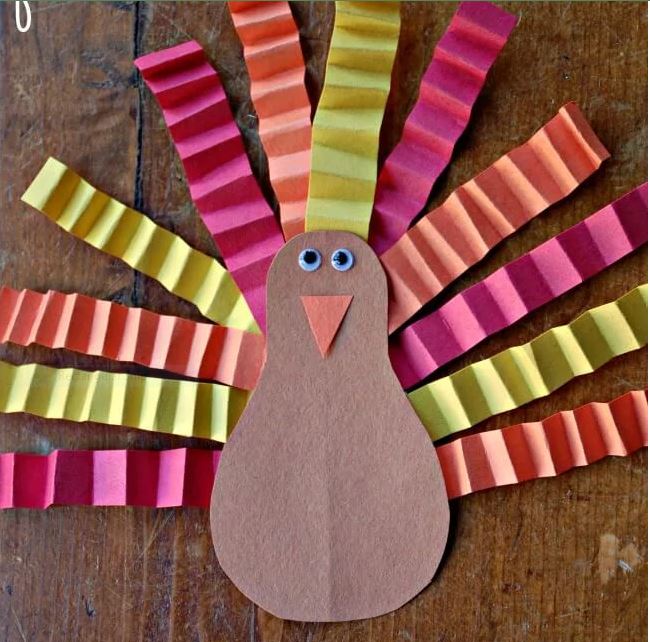
Paper turkey crafts are a fun way to spend a creative afternoon with kids during Thanksgiving.
I enjoy projects like this because children get to make their turkeys look however they want.
Bright feathers, funny faces, and oversized beaks add plenty of personality.
This craft uses basic supplies you may already have at home.
Kids can make several turkeys to decorate the house or create a little flock for the Thanksgiving table.
Craft Supplies
- Construction paper in brown, yellow, orange, and red
- Glue
- Googly eyes
- Scissors
- Tape
How To Make It
- Cut a large brown circle or oval for the turkey’s body.
- Cut feather shapes from red, orange, and yellow construction paper.
- Arrange the feathers behind the body and glue them in place.
- Cut a small orange triangle for the beak and a red shape for the wattle.
- Glue on the beak, wattle, and googly eyes to complete the face.
Pro Tip: Fold the bottom of the turkey slightly to help it stand upright for display.
2. Paper Plate Turkey Craft
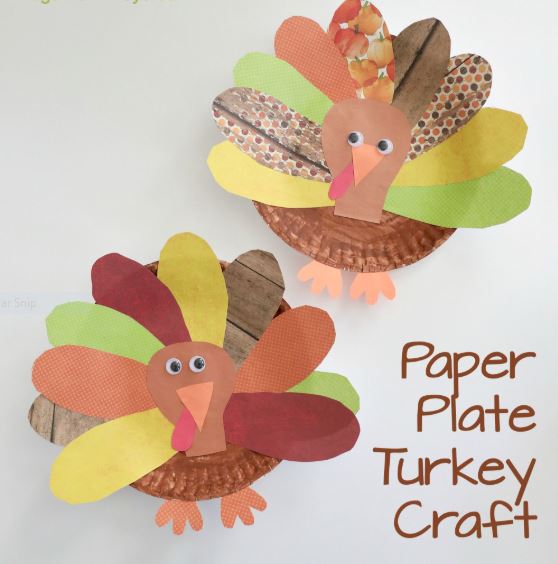
A paper plate makes a sturdy base for a cheerful thankful turkey.
Kids can paint it in fall colors before adding a fan of paper feathers around the edge.
Googly eyes, an orange beak, and a red balloon wattle help bring the turkey’s face to life.
This craft gives young makers room to choose their own color combinations to create a festive decoration for the holiday table.
Craft Supplies:
- Paper plate
- Paint and paintbrushes
- Scissors
- Googly eyes
- Orange paper
- Red balloon
- Glue
How To Make It
- Paint the paper plate in your chosen turkey color, then let it dry completely.
- Cut feather shapes from the outer rim of the plate, or use leftover painted plate pieces to create a colorful feather fan.
- Cut a small triangle from orange paper for the beak.
- Ask an adult to cut a small red balloon piece for the turkey’s wattle.
- Glue the feathers behind the plate, then attach the beak, wattle, and googly eyes to the front.
- Allow the glue to dry before displaying the finished turkey.
Genius Tip: Have an adult handle the craft knife and balloon cutting, then let kids arrange the feathers themselves.
3. No Sew Sock Turkey

An old brown sock makes a soft, squishy turkey with plenty of character.
Kids will enjoy turning an unused sock into a little bird with colorful felt feathers and googly eyes.
Rice fills the sock, helping the turkey sit upright on a shelf or table.
This no-sew project suits kids who enjoy hands-on crafts, with an adult helping secure the pieces when needed.
What You Need
- An odd brown sock, preferably a fluffy one
- Wiggle eye stickers
- Felt in fall colors
- Rubber band
- Rice
- Scissors
- Hot glue gun or felt glue
How to Make It
- Fill the sock with rice until it forms a plump body, leaving enough room at the opening to close it securely.
- Twist the open end, then wrap a rubber band tightly around it to hold the rice inside.
- Cut feather shapes from colorful felt, along with a small triangle for the beak and a wattle.
- Attach the felt feathers to the back of the sock using felt glue.
- Add the beak, wattle, and wiggle eye stickers to complete the turkey’s face.
- Adjust the rice filling so the turkey sits upright.
Quick Tip: Choose felt glue for kids’ crafting sessions, since hot glue requires adult handling and may damage delicate sock fabric.
4. Turkey Handprint Craft
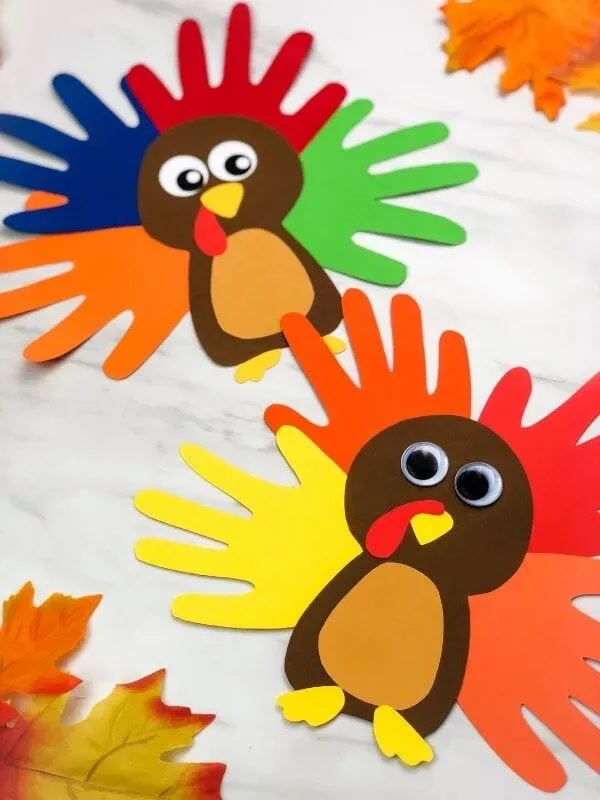
Little hands become colorful turkey feathers in this creative craft.
Kids spread their fingers to create a feather pattern, then add a simple turkey body to complete the picture.
Each handprint has its own shape, giving every finished turkey a personal touch.
This project is a fun way to practice painting while creating artwork to display at home.
Materials list
- Acrylic paint in red, orange, and yellow
- White cardstock paper
- Paintbrush
- Glue
- Scissors
- Paint tray
How to Make It
- Pour small amounts of red, orange, and yellow paint into a paint tray.
- Brush paint onto the child’s palm and fingers, using different colors for a layered feather effect.
- Press the painted hand firmly onto white cardstock, then lift it carefully.
- Once the print dries, cut out a brown paper body, an orange beak, and a red wattle.
- Glue the body over the palm area, then add the beak and wattle.
- Draw the eyes with a marker or attach paper eyes to finish the turkey.
Creative Keepsake: Write the child’s name and date beneath the handprint to track how their little hands grow over the years.
5. Paper Bag Turkey Craft
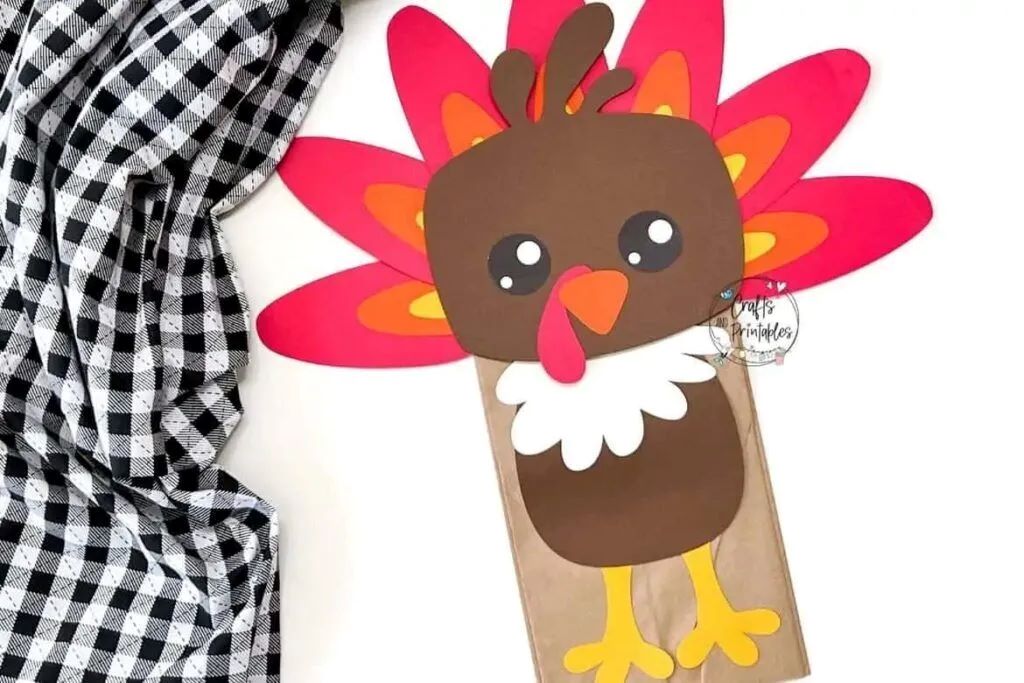
A brown lunch bag becomes a funny turkey puppet with a few colorful additions.
Kids will enjoy decorating the bag with bright feathers and a silly face.
The folded bottom creates a natural head shape, giving the turkey a fun character.
Once finished, the puppet is ready for imaginative play, storytelling, or a little turkey show at home.
Supplies Needed
- Brown paper lunch bag, 5 or 6 inches wide
- Printer and white cardstock
- Scissors
- Glue stick
- Colored cardstock
- SVG cut file or printable turkey template
How to Make It
- Print the turkey template onto cardstock, or draw simple feather, beak, and wattle shapes by hand.
- Cut out the colored pieces, including a body shape and several feathers.
- Turn the paper bag so its folded bottom flap faces up.
- Glue the turkey’s face onto the bottom flap, positioning the eyes near the top.
- Attach the beak and wattle, then glue the colorful feathers along the back of the bag.
- Let the glue dry before slipping a hand inside to operate the puppet.
Fun Idea: Give the puppet a name and let kids use different turkey voices to act out a short, silly story.
6. Turkey Popsicle Stick Craft
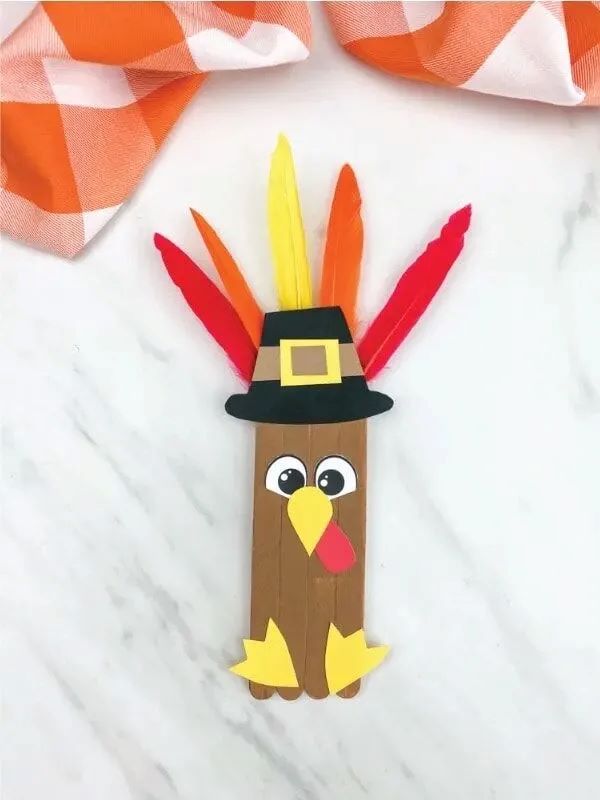
Popsicle sticks form the base of this cheerful turkey, giving kids a little building project to enjoy.
They can paint the sticks, arrange colorful paper feathers, then create a face with simple cutouts.
The finished turkey looks cute on a desk, shelf, or craft display.
It’s a good choice for kids who enjoy assembling small pieces into a recognizable character.
Supplies
- Popsicle sticks
- Permanent glue dots
- Glue stick
- Paint
- Paintbrush
- Colored cardstock or construction paper
- Scissors
How to Make It
- Arrange several popsicle sticks side by side to form the turkey’s body.
- Secure the sticks with glue dots or glue, then let the adhesive set.
- Paint the sticks brown and leave them to dry.
- Cut feather shapes from colored cardstock, along with a small beak and wattle.
- Glue the feathers behind the body in a fan shape.
- Attach the beak and wattle to the front, then draw or add eyes to complete the turkey.
Display Hack: Glue a short craft stick across the back as a brace to keep the body secure when kids move their finished turkey.
7. Watercolor Turkey Craft
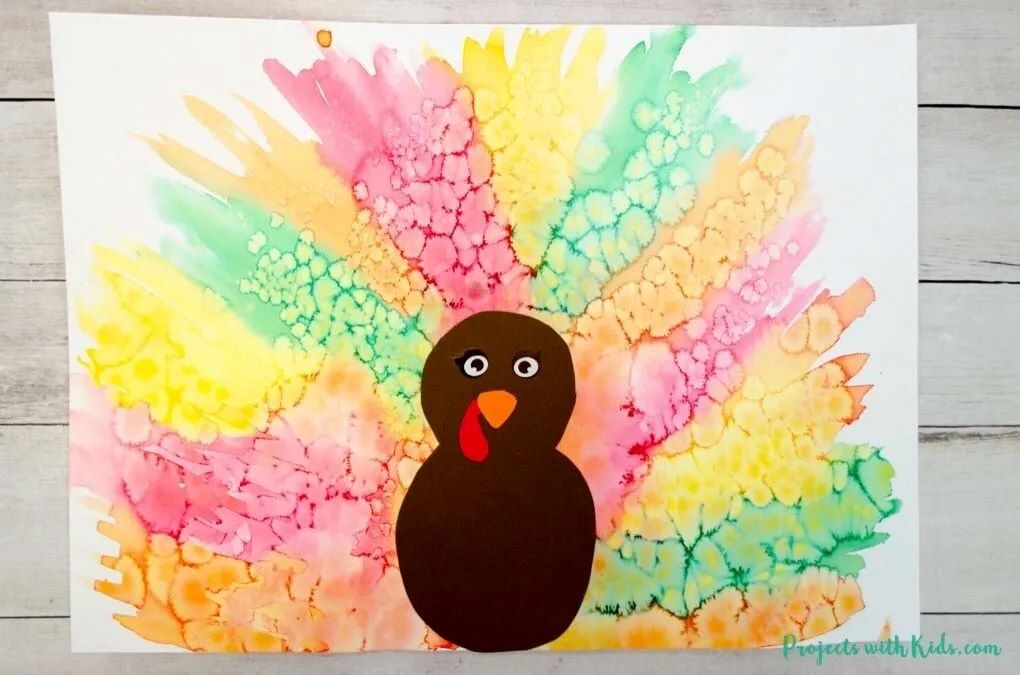
Watercolor turkeys turn ordinary painting time into a colorful art project for kids.
The magic happens when coarse salt touches wet paint, creating tiny speckles and interesting textures across the paper.
Kids get to experiment with colors before assembling their turkey from paper cutouts.
Each finished bird has a unique pattern, so no two projects need to look alike.
This craft suits children who enjoy painting, cutting shapes, and combining different art techniques in one project.
Essential Supplies
- Watercolor paper
- Watercolor paints in red, orange, green, and yellow
- Large round paintbrush
- Cardstock or construction paper in red, orange, and brown
- Paint palette
- Coarse salt
- Scissors
- Glue stick
- Pencil
- Eye stickers or googly eyes
How to Make It
- Paint the watercolor paper with patches of red, orange, yellow, and green.
- Sprinkle a little coarse salt over the wet paint, then let the paper dry completely.
- Brush away the salt to reveal the textured patterns beneath.
- Draw a turkey body on brown cardstock, then cut it out.
- Cut feather shapes from the painted paper, using different sections to capture the colors and textures.
- Arrange the feathers behind the body, then glue everything onto a fresh sheet of cardstock.
- Add the eyes and finish the face with small paper details.
Art Trick: Sprinkle salt while the paint is still wet for more visible patterns, then remove it only after the paper dries.
8. Coffee Filter Turkey Craft
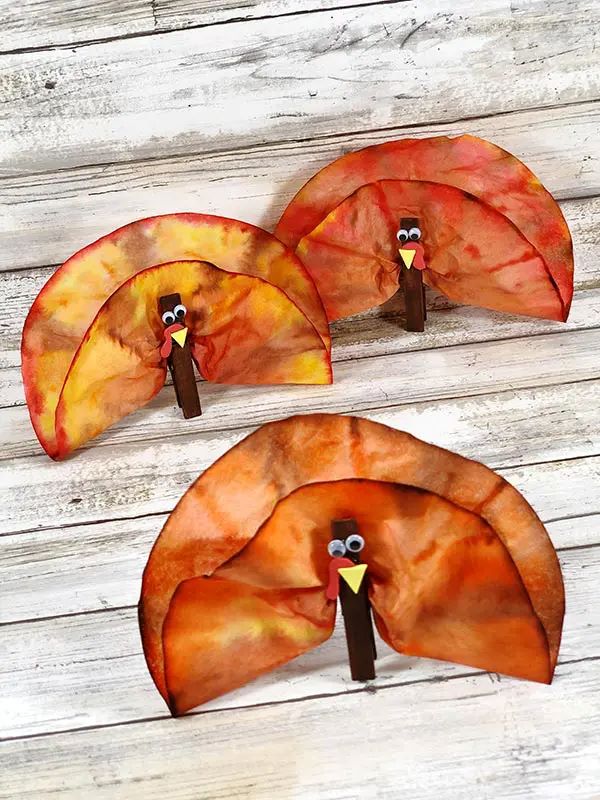
Coffee filters make excellent turkey feathers because their thin, absorbent paper takes color beautifully.
Kids can decorate each filter with washable markers, creating bright patterns for their turkey’s tail.
A wooden clothespin forms the body, giving the finished bird a fun shape that stands out from flat paper crafts.
This project introduces children to simple color blending while letting them create their own feather designs.
Craft Supplies
- Wooden spring clothespins
- Round white coffee filters
- Googly eyes
- Washable markers in brown, red, orange, and yellow
- Tacky craft glue
- Brown acrylic craft paint
- Red and yellow craft foam
- Paintbrush
- Scissors
- Pencil
- Scrap cardboard
How to Make It
- Place a coffee filter on scrap cardboard to protect the work surface.
- Color the filter with washable markers, adding stripes, dots, or patches in fall colors.
- Paint the clothespin brown, then let it dry completely.
- Cut a small triangle from yellow craft foam for the beak and a red shape for the wattle.
- Glue the colored coffee filter behind the clothespin to create the turkey’s tail.
- Attach the beak, wattle, and googly eyes to the front of the clothespin.
- Allow the glue to dry before standing the turkey upright.
Creative Twist: Color the coffee filter with overlapping marker shades to create a rainbow tail with distinct bands of color.
9. Pinecone Turkeys with Feathers
A pinecone’s natural shape makes it a clever base for a little turkey.
Kids can tuck bright feathers between its scales to create a full, fan-shaped tail.
The rough texture adds character, so the finished bird looks different from a paper turkey.
This nature-inspired craft suits children who enjoy collecting materials outdoors before turning them into something creative.
Required Materials
- Pinecones
- Orange felt
- Feathers
- Googly eyes
- Glue sticks
How to Make It
- Choose a dry pinecone with enough open scales to hold the feathers.
- Arrange several feathers at the wider end to create the turkey’s tail.
- Secure the feathers between the scales with craft glue.
- Cut a small triangle from orange felt for the beak.
- Glue the beak and googly eyes onto the narrower end of the pinecone.
- Leave the turkey to dry before placing it on a table or shelf.
Craft Hack: Brush dirt from the pinecones before crafting, then let them dry fully so the glue sticks more securely.
10. Toilet Paper Roll Turkey Craft

An empty toilet paper roll gives kids a sturdy base for building a standing turkey.
Colored paper creates the feathers, while glittered foam adds a little sparkle to the design.
Kids can change the feather shapes or color combinations to give every turkey a different look.
This budget-friendly project is ideal for using up leftover craft materials while encouraging children to build with simple shapes.
Supplies Needed
- Colored craft paper
- Glittered foam paper
- Toilet paper roll
- Googly eyes
- Pencil
- Scissors
- Craft glue
How to Make It
- Cover the toilet paper roll with brown craft paper, securing the edges with glue.
- Draw several feather shapes on colored paper, then cut them out.
- Cut smaller decorative shapes from glittered foam paper.
- Glue the foam accents onto the paper feathers, then attach the feathers around the back of the roll.
- Add googly eyes to the front of the roll.
- Cut a small orange beak and red wattle from leftover paper, then glue them beneath the eyes.
- Leave the turkey upright until the glue dries.
Display Idea: Cut a small strip of colored paper into a name tag and attach it to the base for a personalized place setting.
11. Cereal Box Turkey

An empty cereal box becomes the sturdy body of a colorful turkey in this recycled craft.
Kids get to cut out the pieces, choose their favorite feather colors, then assemble their own bird.
The cardboard holds its shape better than thin paper, so the finished turkey stands out on a desk or shelf.
This project is a good way to reuse household packaging for a creative afternoon with kids.
Essential Supplies
- Recycled cereal box
- Construction paper in brown, red, yellow, orange, and green
- Two googly eyes
- Scissors
- Glue stick
- Turkey pattern pieces
- White craft glue
How to Make It
- Flatten the cereal box, then trace the turkey body pattern onto the cardboard.
- Cut out the body carefully, asking an adult for help if the cardboard is thick.
- Cover the body with brown construction paper using a glue stick.
- Cut feather shapes from the colored paper and arrange them behind the body.
- Attach the feathers with white craft glue, then add the googly eyes.
- Cut a small orange beak and red wattle, then glue them onto the face.
- Let the glue dry before displaying the turkey.
Recycling Hack: Save clean cereal boxes throughout the month so kids have sturdy cardboard ready for future craft projects.
12. Pop-Up Turkey Card Craft

A pop-up turkey adds a fun surprise to a handmade card.
When kids open the card, the turkey rises from the center instead of lying flat on the page.
They can decorate the bird with colorful feathers, draw a funny face, or write a short message inside.
This project introduces a simple paper-engineering technique while giving children a creative way to make a card for someone special.
Craft Supplies
- Cardstock for the card base
- Craft paper for the turkey
- Pencil
- Ruler
- Scissors
- Glue
- Marker pens
How to Make It
- Fold a sheet of cardstock in half to create the card base.
- Draw two short parallel lines across the folded edge where the turkey will pop up.
- Cut along both lines, then push the cut section inward to form a raised tab.
- Draw and cut out the turkey body, feathers, beak, and wattle from craft paper.
- Glue the turkey onto the raised tab, keeping the card flat as you work.
- Add the eyes and decorate the inside with a handwritten message.
- Open and close the card gently to check that the turkey pops up correctly.
Paper-Craft Trick: Keep the pop-up tab short and firmly creased so the turkey folds neatly inside the card.
13. Giant Turkey Craft
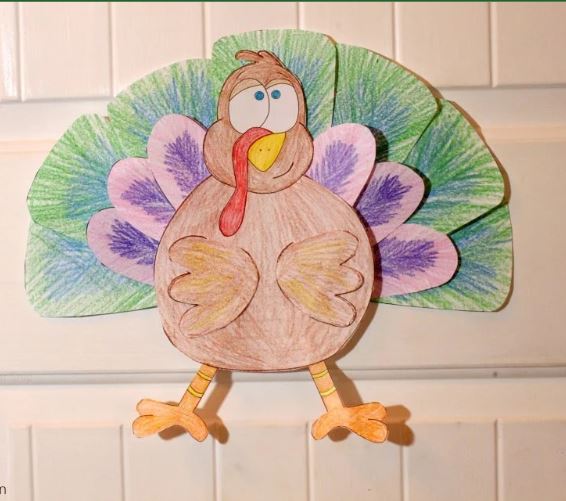
A giant turkey gives kids a chance to create a large piece of artwork together.
The oversized design makes room for bold feathers, silly facial features, and plenty of coloring.
Kids can work on different sections before joining the pieces into one big turkey.
This project suits a family craft session or a group activity where everyone contributes to the finished display.
Essential Supplies
- Crayons
- Scissors
- Regular tape
- Double-sided tape
How to Make It
- Draw a large turkey body on several sheets of paper, using a simple outline that is easy to cut out.
- Color the body with crayons, adding the eyes, beak, and wattle.
- Draw oversized feathers on separate sheets, then color each one with a different pattern.
- Cut out the body and feathers carefully.
- Arrange the feathers behind the body, securing them with double-sided tape.
- Use regular tape to join any paper sections that need extra support.
- Display the giant turkey on a wall or door.
Craft Idea: Give each child one feather to decorate, then assemble them into a giant shared turkey with a mix of colors and patterns.
Frequently Asked Questions
1. What are the easiest turkey crafts for toddlers and preschoolers?
Handprint turkeys, paper plate turkeys, and simple paper collages are good choices for young children. Adults should prepare tricky cuts and supervise projects that use small pieces.
2. What materials do you need to make turkey crafts?
Most turkey crafts use construction paper, glue, scissors, and googly eyes. Depending on the project, kids might need paint, paper plates, feathers, pinecones, or recycled cardboard.
3. How do you make turkey crafts suitable for different ages?
Give younger children pre-cut shapes to arrange and glue. Older kids can cut their own pieces, follow detailed patterns, or try projects such as pop-up turkey cards and watercolor designs.
Turkey Crafting Projects for a Memorable Thanksgiving!
Turkey crafts give kids a chance to get creative, try new techniques, and enjoy hands-on activities at home.
Choose a project that suits their age, gather the supplies, then let their imagination lead the way.
The finished turkeys may turn out colorful which is part of the fun.
Most importantly, enjoy the time spent creating something together.