19 Easy DIY Thanksgiving Decor Ideas For A Warm, Inviting Home

Disclosure: This post may contain affiliate links. As an Amazon Associate, I earn a small commission from qualifying purchases at no extra cost to you. Thanks.
Thanksgiving is almost here, and guess who the host is this year.
Well, it’s me!
If you enjoy hands-on projects much like me, this is a fun time to bring a few creative ideas to life.
I’ve been making simple crafts that use affordable materials and fit easily into the home.
Some are quick weekend projects, while others give you a chance to spend more time creating something special.
In this article, I’ll share 16 DIY Thanksgiving decoration ideas, materials and steps for bringing each project together.
Thanksgiving Décor Ideas You Can Make Easily
I found the most common, reusable products for these DIY décor projects from Amazon:
- Colored cardstock: Useful for creating banners and other sturdy DIY shapes.
- Jute twine: Handy for tying bundles, hanging garlands, and securing decorations.
- Hot glue gun: Useful for attaching lightweight decorations such as leaves or paper.
- Acrylic craft paint: Suitable for painting pumpkins, wooden pieces, and other surfaces used in seasonal crafts.
- Paintbrush set: Best for applying paint to pumpkins and wooden decorations.
- Battery-operated LED tea lights: Ideal for adding a soft glow inside handmade paper lanterns.
- Wooden serving tray: Ideal for grouping candles, pumpkins, and fruits, greenery.
This collection of DIY Thanksgiving decorations barely cost a dime to make.
Actually, you’ll find ideas on how to repurpose your Halloween mini pumpkins, make place cards and other stuffs out of just construction paper.
1. Easy DIY Paper Lantern Craft
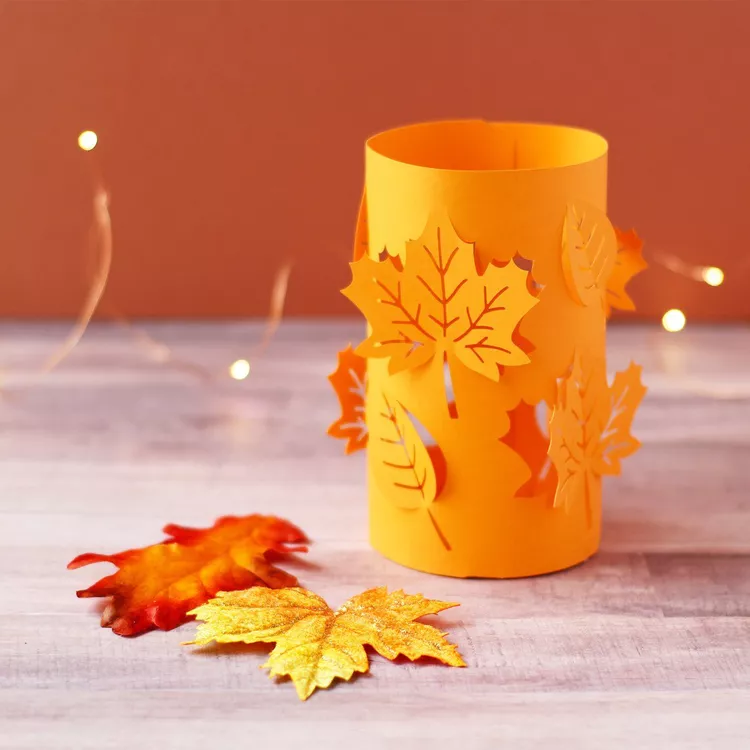
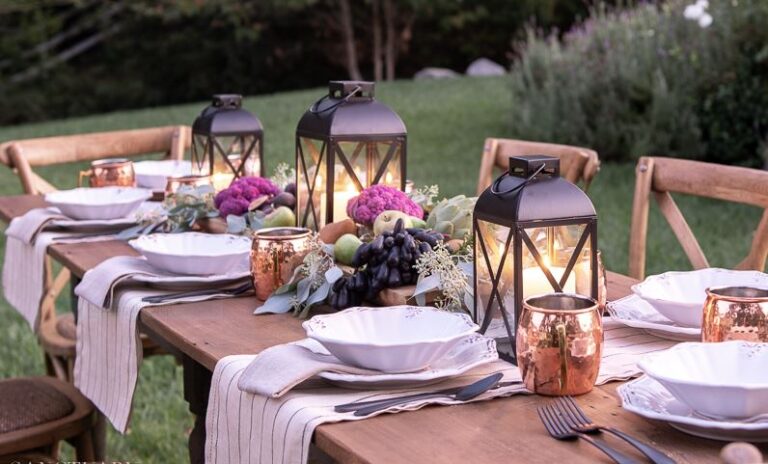
Paper lanterns bring a soft glow to Thanksgiving decorating with very little effort.
For this project, choose colored cardstock in a warm autumn shade that complements your existing decor.
Burnt orange, deep brown, or golden yellow paper suits the Thanksgiving season.
I’d make several lanterns and place them across a dining table, mantel, or entryway console.
The cutting pattern is simple to adjust, so larger sheets work well for taller lanterns.
Add an LED tea light inside each lantern for a gentle evening glow.
Materials:
- Colored cardstock
- Pencil
- Ruler
- Scissors
- Glue stick
- Battery-operated LED tea lights
How to Make It:
- Cut cardstock into an 8-by-11-inch rectangle, then fold it in half lengthwise.
- Use a ruler to mark lines 1 inch apart along the folded edge.
- Cut along the marks, stopping about 1 inch before reaching the opposite edge.
- Carefully unfold the cardstock, then bring the short edges together to form a cylinder.
- Apply glue stick along one short edge and press it against the opposite edge.
- Cut a 1-inch-wide cardstock strip, then attach its ends to opposite sides.
- Place a battery-operated LED tea light inside the finished lantern.
- Arrange several lanterns together on your chosen Thanksgiving display surface.
Pro Tip: Use cardstock instead of thin paper for a sturdier lantern that holds its shape.
2. DIY Fabric-Covered Pumpkins
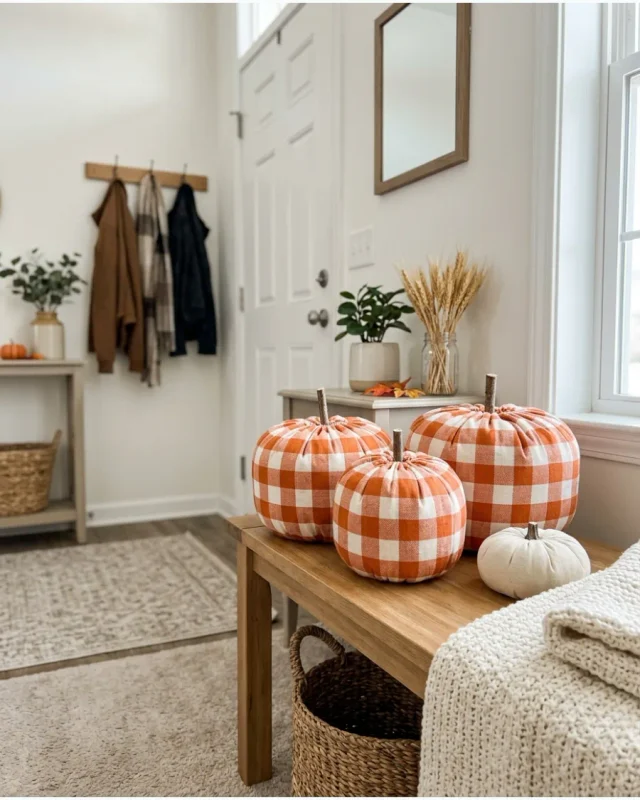
Give plain pumpkins a cozy Thanksgiving makeover with scraps of fabric you already enjoy.
This project is a simple way to bring patterns, texture, and seasonal colors into your decor.
Choose cotton fabric in plaid, floral, gingham, or a solid autumn shade.
Use small foam pumpkins because they are lightweight and easy to cover.
The finished pumpkins look sweet on a mantel, bookshelf, dining table, or entryway console.
Mix two or three patterns for a collected look.
You could also use leftover fabric from another project, which keeps this craft inexpensive.
Materials:
- Small foam pumpkins
- Cotton fabric
- Fabric scissors
- Hot glue gun
- Hot glue sticks
- Natural jute twine
- Small artificial leaves
How to Make It:
- Place the foam pumpkin on your fabric and cut a piece large enough to cover it.
- Make several cuts around the fabric edges so it wraps smoothly around the pumpkin.
- Pull the fabric toward the pumpkin stem, keeping the material evenly gathered.
- Secure the gathered fabric around the stem with small dots of hot glue.
- Trim away excess fabric near the stem if the gathered area becomes too bulky.
- Wrap twine around the stem, then secure it with a small amount of glue.
- Tuck an artificial leaf beneath the twine for a simple finishing detail.
Pro Tip: Choose fabric with a little stretch for easier wrapping around rounded pumpkins.
3. Autumn Wreath with Corn Husks on the Wall
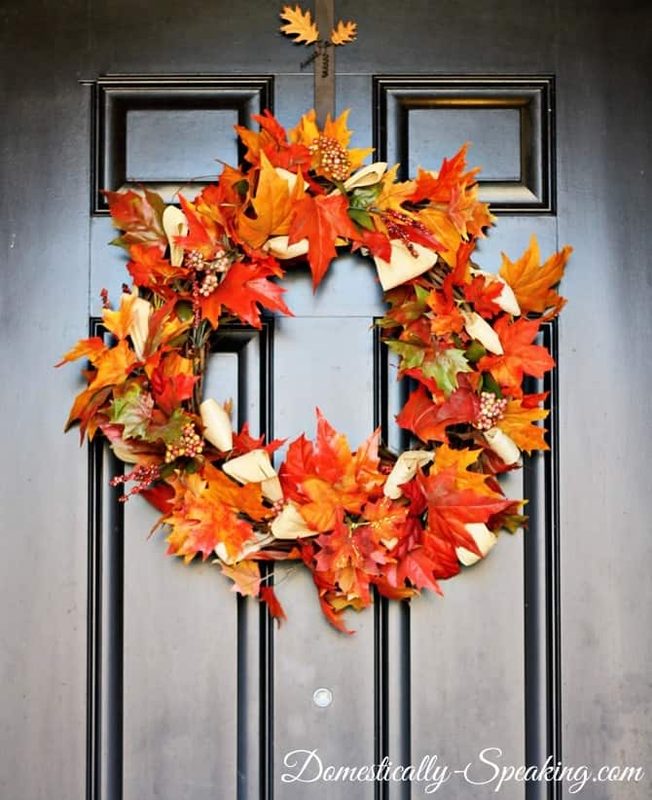
Turn dried corn husks into an autumn wreath that brings a rustic touch to your decor.
The natural texture works beautifully with farmhouse, country, or simple neutral interiors.
Start with clean, completely dry corn husks so your wreath stays fresh throughout the season.
Arrange the husks in layers to create a full shape around the wreath base.
Let the colors be natural, then add a small ribbon if the finished piece needs more detail.
Hang the wreath on an entryway door, kitchen wall, pantry door, or above a mantel.
It is also a useful way to repurpose corn husks after preparing a favorite fall dish.
Materials:
- Dried corn husks
- Grapevine wreath form
- Hot glue gun
- Hot glue sticks
- Natural jute twine
- Scissors
- Optional fall ribbon
How to Make It:
- Soak dry corn husks in warm water briefly if they need softening for easier shaping.
- Pat the husks dry and arrange them according to size.
- Start at the outer edge of the wreath form with your largest husks.
- Attach each husk with hot glue, keeping the pointed ends facing outward.
- Continue layering smaller husks toward the center until the wreath looks full.
- Fill any noticeable gaps with smaller husks placed between the existing layers.
- Tie a piece of jute twine around the top for hanging.
- Add a simple ribbon if you want a small pop of seasonal color.
Pro Tip: Overlap each husk slightly to create a fuller wreath with fewer visible gaps.
4. Dried Bundle of Wheat
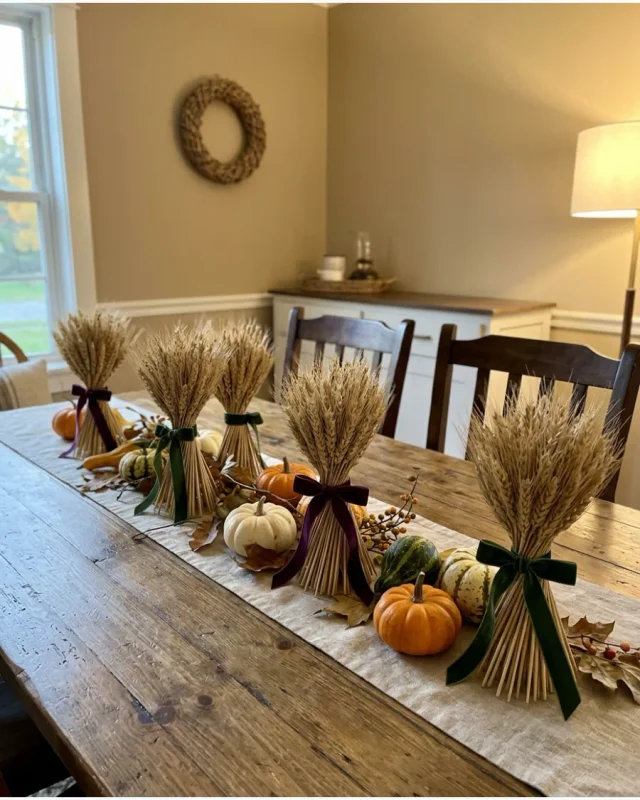
A simple wheat bundle brings an understated harvest detail to a holiday display.
This project takes only a few minutes, yet it makes a noticeable statement on a mantel or console.
Gather dried wheat stalks with similar lengths so the bundle looks neat and full.
Leave the wheat in its natural golden color to keep the arrangement feeling seasonal.
Tie the stems with twine, ribbon, or a strip of burlap for a rustic finish.
Place the bundle inside a tall container, lean it against a wall, or display it beside pumpkins.
You could also make smaller bundles for individual places around your Thanksgiving table.
Materials:
- Dried wheat stalks
- Natural jute twine
- Scissors
- Optional burlap ribbon
How to Make It:
- Gather the dried wheat stalks together and arrange them with the heads facing upward.
- Remove loose or damaged stems so the bundle looks clean.
- Trim the bottom stems to create an even base.
- Wrap jute twine firmly around the stems about three inches below the heads.
- Tie the twine into a secure knot, then trim the loose ends.
- Add burlap ribbon around the twine if you want a more decorative finish.
- Place the finished bundle in a vase or lean it against your chosen surface.
Pro Tip: Make three smaller bundles instead of one large arrangement for a relaxed harvest display.
5. Ceramic Vase with Dried Hydrangeas
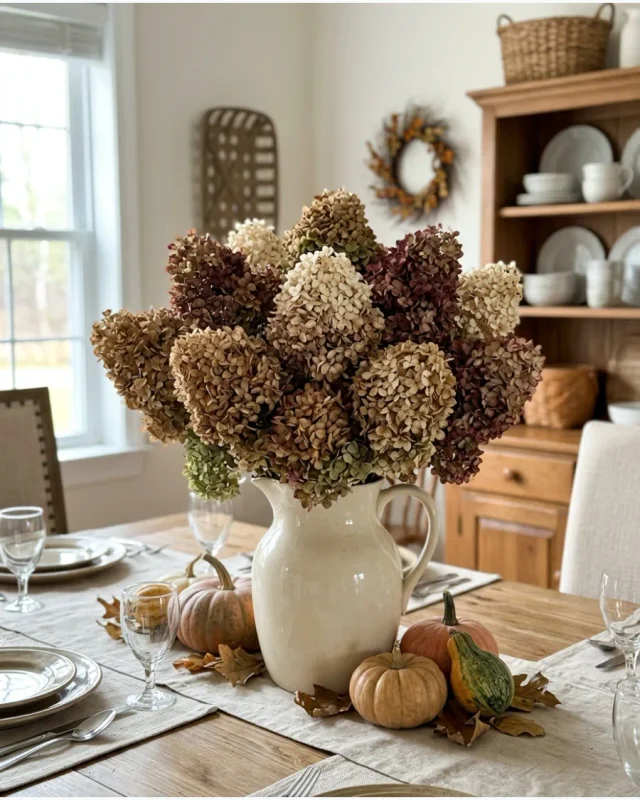
A ceramic vase filled with dried hydrangeas makes an easy centerpiece with lasting appeal.
The muted flower heads suit autumn decorating beautifully in rooms with neutral furniture.
Choose a ceramic vase with a shape that gives the stems enough room to spread naturally.
Cream, beige, brown, or muted green flowers work nicely for a softer seasonal arrangement.
Keep the arrangement loose instead of packing the vase tightly with stems.
Place it on a dining table, kitchen island, sideboard, or entryway console.
Once Thanksgiving passes, the dried flowers remain useful for everyday home decorating.
Materials:
- Ceramic vase
- Dried hydrangeas
- Floral shears
- Optional dried wheat stems
How to Make It:
- Choose a ceramic vase that is tall enough to support the hydrangea stems.
- Remove damaged petals and loose leaves from each dried hydrangea stem.
- Hold the stems beside the vase to determine your preferred arrangement height.
- Trim the stems gradually until they sit comfortably inside the vase.
- Place the tallest hydrangea stems toward the center of the arrangement.
- Add shorter stems around them to create a loose, rounded shape.
- Insert dried wheat between the flowers if you want extra harvest texture.
- Adjust the stems until the arrangement looks full without appearing crowded.
Pro Tip: Keep dried hydrangeas away from damp areas to help preserve their papery texture.
6. “Thankful” Throw Pillow Covers
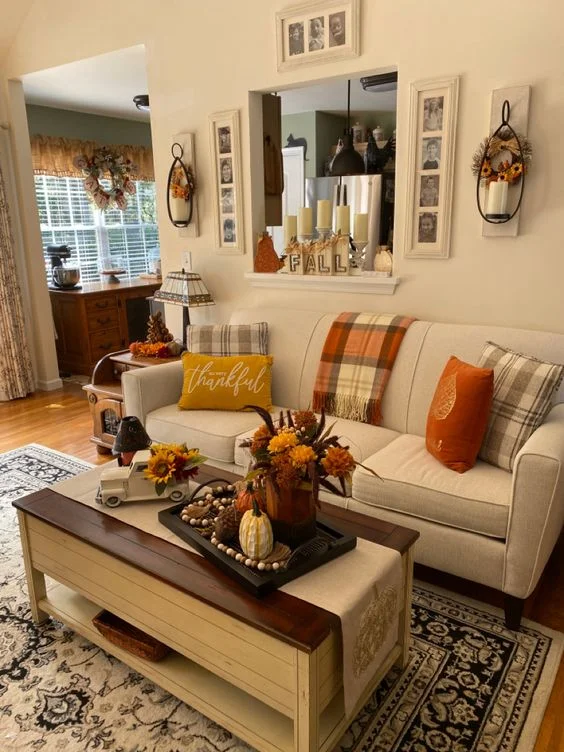
Give your sofa a seasonal update with pillow covers that carry a simple message.
This project turns plain covers into personalized accents using fabric paint and a little creativity.
Choose neutral pillow covers so the lettering stands out clearly.
A handwritten “Thankful” design suits a relaxed farmhouse room, while block lettering gives the pillow a cleaner appearance.
Go for one larger pillow as the statement piece, then keep the surrounding cushions simple.
The finished cover also stores easily with your seasonal decorations.
Materials:
- Plain cotton pillow cover
- Fabric paint
- Fabric paintbrush
- Pencil
- Ruler
- Cardboard
How to Make It:
- Insert cardboard inside the pillow cover to prevent paint from reaching the back.
- Lightly sketch the word “Thankful” across the front using a pencil.
- Use a ruler to keep the lettering centered and evenly spaced.
- Trace over the pencil marks with fabric paint and a fine paintbrush.
- Let the lettering dry completely according to the paint manufacturer’s instructions.
- Remove the cardboard, then place the finished cover over your pillow insert.
Pro Tip: Practice the lettering on scrap fabric first to find a style you like.
7. DIY Neutral Painted Pumpkin Set
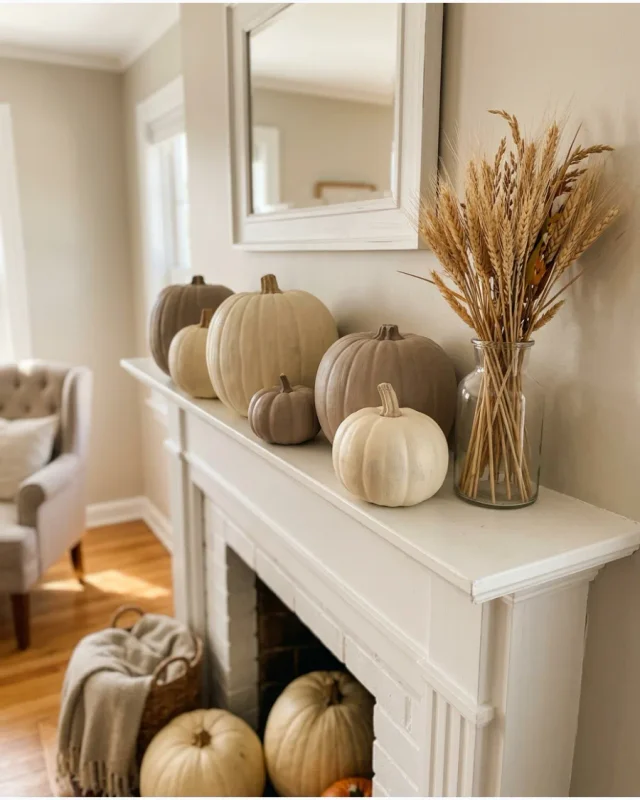
Turn mini pumpkins into understated accents with a soft neutral paint palette.
Cream, beige, and muted gray give the pieces a calmer appearance than traditional bright fall colors.
Choose small pumpkins in different shapes to keep the finished collection interesting.
Paint each pumpkin a slightly different shade, then arrange them together on a tray.
A small amount of distressing around the raised ridges gives painted pumpkins some character.
This set suits a mantel, dining table, bookshelf, or entryway.
Materials:
- Small foam pumpkins
- Acrylic craft paint
- Paintbrush set
- Fine-grit sandpaper
- Drop cloth
- Small tray
How to Make It:
- Wipe each pumpkin with a dry cloth to remove dust and loose debris.
- Place the pumpkins on a drop cloth before starting the painting process.
- Choose two or three neutral paint shades for the collection.
- Apply the first coat with a paintbrush, following the pumpkin’s ridges.
- Let the pumpkins dry, then apply another coat if the surface needs more coverage.
- Lightly sand selected ridges to reveal small areas of the original surface.
- Arrange the finished pumpkins together on a tray for display.
Pro Tip: Mix matte and satin finishes if you want subtle differences across the pumpkin set.
8. Pear and Greenery Table Garland
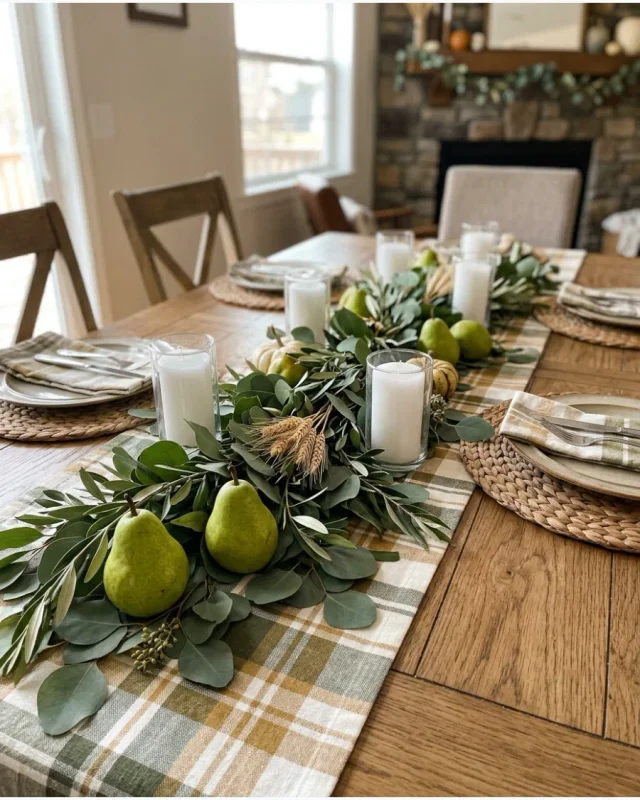
Fresh pears turn a simple table arrangement into an eye-catching seasonal display.
Their soft green and golden tones pair nicely with eucalyptus, olive branches, or other greenery.
Choose firm pears that hold their shape for several hours during a gathering.
Lay the greenery along the center of the table, then tuck pears between the stems.
Keep the arrangement low so guests have a clear view across the table.
A wooden serving tray beneath part of the garland adds structure if your table needs more definition.
Materials:
- Fresh pears
- Fresh or faux greenery
- Floral wire
- Floral shears
- Wooden serving tray
How to Make It:
- Trim the greenery into manageable pieces using floral shears.
- Lay the longest greenery pieces along the center of your table.
- Add shorter stems between the longer pieces to fill open areas.
- Secure loose sections with small pieces of floral wire.
- Tuck pears between the greenery, spacing them evenly along the arrangement.
- Place the finished garland on a wooden serving tray if desired.
Pro Tip: Choose pears with similar coloring for a cleaner, more cohesive table arrangement.
9. DIY Cinnamon Stick Candles
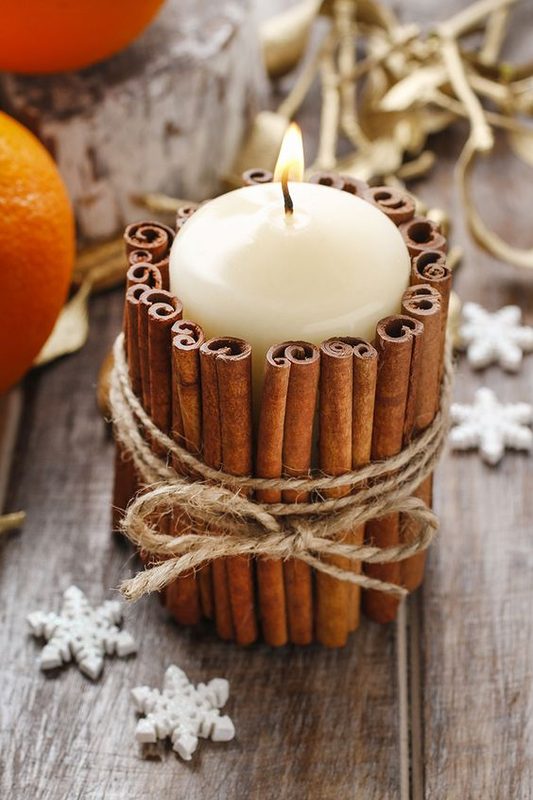
Wrap unscented pillar candles with cinnamon sticks for a simple decoration that suits the season.
The warm brown sticks add texture around the candle while releasing a subtle cinnamon aroma nearby.
Choose straight-sided candles so the sticks sit securely against the surface.
Get different candle heights to create a more interesting arrangement on a tray.
Tie each candle with jute twine for a rustic finish.
Keep the cinnamon sticks decorative and away from the flame.
Materials:
- Unscented pillar candles
- Cinnamon sticks
- Natural jute twine
- Scissors
- Double-sided tape
How to Make It:
- Choose pillar candles with smooth, straight sides for easier decorating.
- Cut several pieces of double-sided tape and place them around the candle.
- Position cinnamon sticks upright against the tape, keeping them close together.
- Continue around the candle until the entire outer surface has a cinnamon border.
- Wrap jute twine around the cinnamon sticks to hold them firmly in place.
- Tie the twine securely, then trim the loose ends with scissors.
- Place the decorated candle on a heat-resistant tray before displaying it.
Pro Tip: Keep the cinnamon sticks below the candle’s flame area for safer burning.
10. Clean Lines and Simple Accents
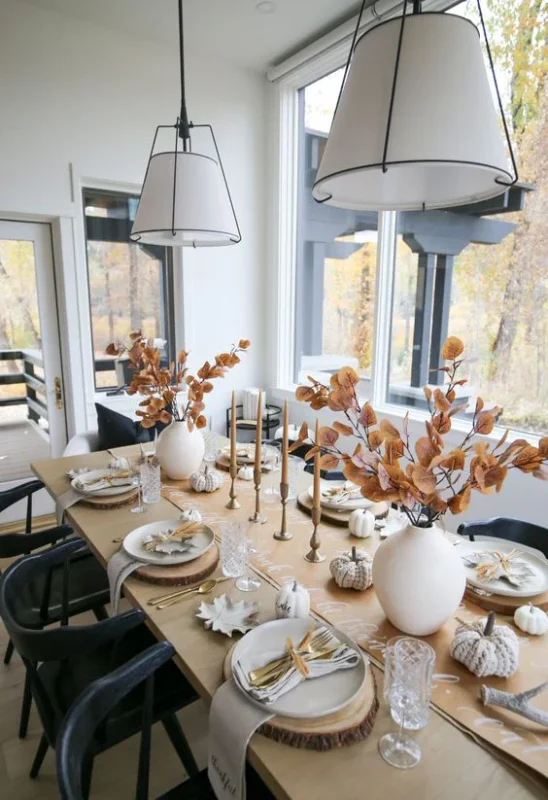
A restrained arrangement proves that seasonal decor does not have to cover every surface.
Start with one clean centerpiece, then introduce a small accent that echoes its color.
A white ceramic vase, neutral decorative pumpkins, or a single branch of dried foliage keeps the setup simple.
Choose pieces with smooth shapes and minimal patterns for this approach.
Place the main decoration near the center of a console, dining table, or mantel.
Leave plenty of open space around each piece so every item remains easy to appreciate.
Materials:
- White ceramic vase
- Neutral decorative pumpkins
- Dried eucalyptus stems
- Small wooden tray
How to Make It:
- Choose one surface that needs a seasonal update, such as a mantel or dining table.
- Place the wooden tray near the center of the surface.
- Set the white ceramic vase slightly off-center on the tray.
- Fill the vase with a small bundle of dried eucalyptus stems.
- Arrange two or three neutral pumpkins beside the vase.
- Remove extra pieces until the arrangement looks simple and uncluttered.
- Step back and adjust the spacing between the remaining decorations.
Pro Tip: Stick to two or three colors so the simple arrangement stays cohesive.
11. Handmade Thankful Banner Placement
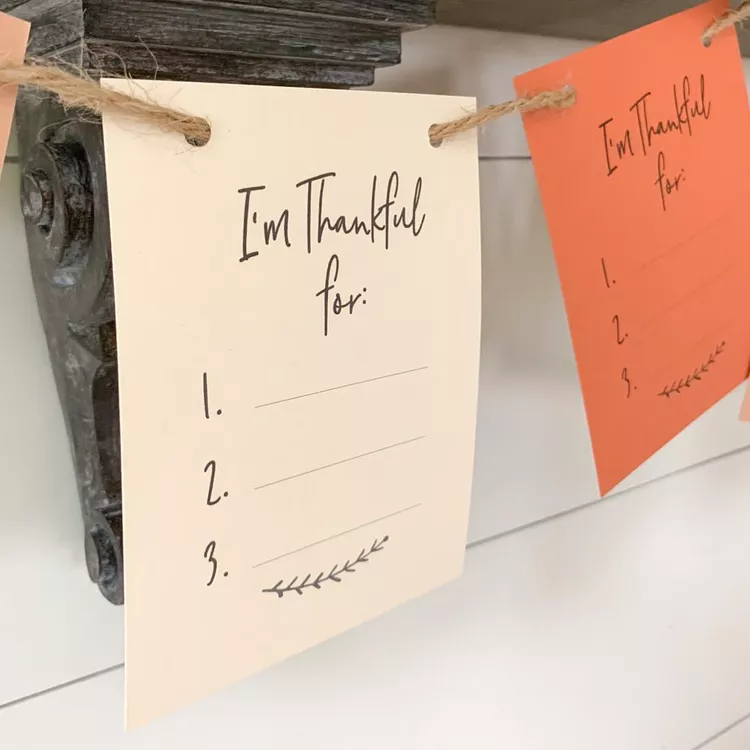
A handmade “Thankful” banner fills an empty wall with a message worth displaying all season.
Cardstock gives the letters a clean shape, while jute twine keeps the project casual and easy to hang.
Choose paper in cream, brown, rust, or mustard to suit your existing decor.
The banner looks right at home above a mantel, across a dining room wall, or behind a dessert table.
Keep the lettering large enough to read from across the room.
Smaller versions suit shelves, cabinets, and entryway tables.
Materials:
- Cardstock
- Pencil
- Ruler
- Scissors
- Jute twine
- Alphabet stencil set
- Hole punch
- Wooden clothespins
How to Make It:
- Cut the cardstock into equal rectangles or triangles for each banner piece.
- Use an alphabet stencil to trace one letter onto each piece.
- Fill the letters with a marker, paint, or colored pencil.
- Punch two small holes near the upper corners of each piece.
- Thread the pieces onto jute twine in the correct letter order.
- Secure each piece with a wooden clothespin for extra stability.
- Hang the finished banner across your chosen wall, mantel, or shelf.
Pro Tip: Choose cardstock that picks up a color already present nearby for a more coordinated display.
12. Apple Accents and Rosemary Returns
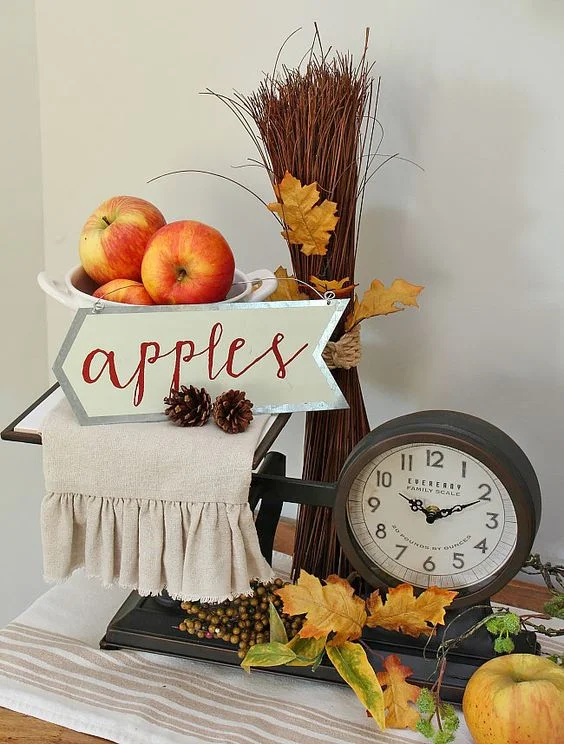
Fresh apples paired with rosemary turn a simple table arrangement into a crisp seasonal display.
Red and green apples provide natural color, while rosemary introduces slender green sprigs.
Choose firm apples with smooth skins so they stay attractive throughout your gathering.
A shallow woven serving bowl keeps the arrangement low and easy to manage.
Place several apples inside, then tuck rosemary between the fruit.
For individual settings, one rosemary sprig beside each folded napkin provides a smaller variation.
The same combination also suits a kitchen island, buffet table, or entryway console.
Materials:
- Fresh apples
- Fresh rosemary
- Woven serving bowl
- Linen napkins
- Kitchen scissors
How to Make It:
- Wash the apples thoroughly, then dry them with a clean kitchen towel.
- Trim the rosemary into short, evenly sized sprigs with kitchen scissors.
- Arrange the apples inside the woven serving bowl, leaving small gaps between them.
- Tuck rosemary sprigs into the spaces between the apples.
- Add individual rosemary sprigs beside folded napkins for matching place settings.
- Replace any wilted rosemary before guests arrive.
Pro Tip: Choose apples in one or two colors so the greenery remains the main contrasting detail.
13. Dried Leaf Placement
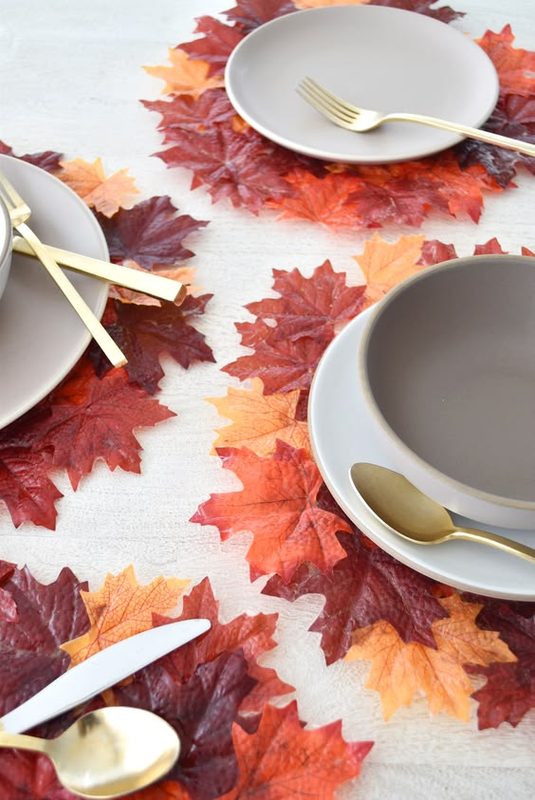
Pressed leaves turn ordinary place settings into small seasonal details that cost almost nothing.
Oak, maple, and beech leaves offer interesting shapes, visible veins, and varied autumn colors.
Select leaves that have intact edges and little surface damage.
Press them flat before arranging them around your table.
A single leaf beneath each plate creates a simple place setting.
Several leaves scattered along the table center provide another option for larger gatherings.
Neutral napkins let the natural leaf colors stand out.
Materials:
- Fresh leaves
- Leaf press
- Heavy books
- Clear acrylic spray sealer
- Linen napkins
How to Make It:
- Select clean leaves with attractive shapes and intact edges.
- Place each leaf between sheets of plain paper inside a leaf press.
- Leave the leaves pressed for several days until they become completely flat.
- Remove them carefully, then check each leaf for curled or damaged edges.
- Apply clear acrylic spray sealer if you want additional protection.
- Let the sealer dry completely before handling the leaves.
- Place one leaf beneath each plate or scatter several along the table center.
Pro Tip: Press extra leaves during preparation so replacements are ready if any become damaged during setup.
14. Wooden Candle Tray
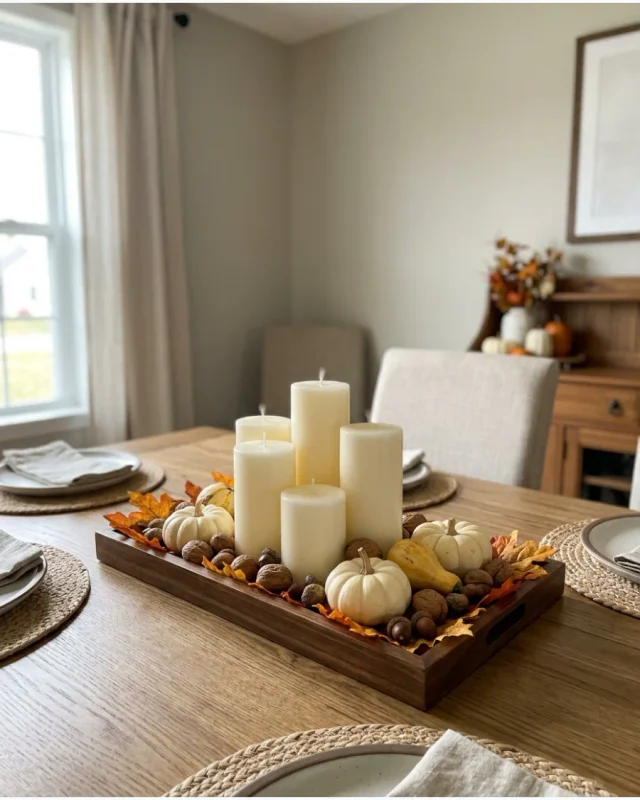
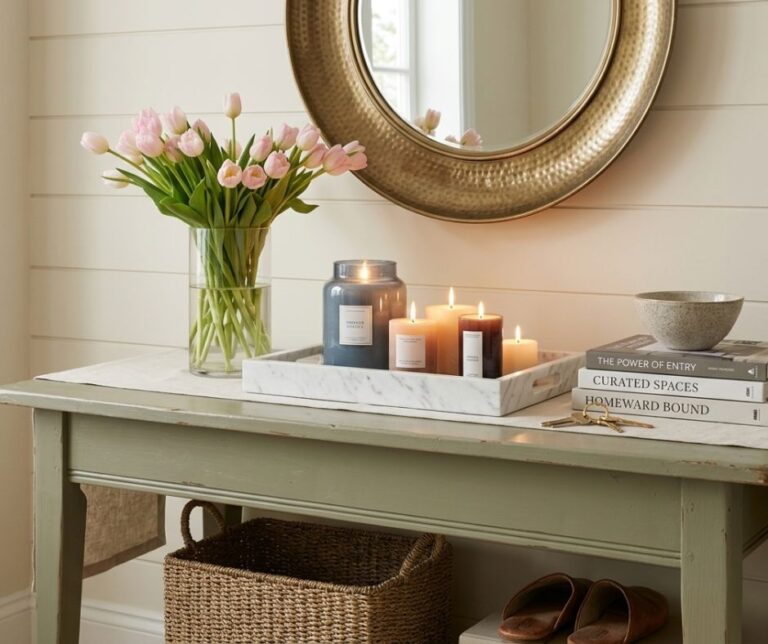
A wooden tray turns several candles into one organized centerpiece for a dining table or mantel.
The wood introduces natural texture that pairs nicely with neutral candles and small seasonal accents.
Choose a tray with raised edges if the arrangement needs extra stability.
Use candles in different heights to give the display more dimension.
Small pumpkins, pinecones, or dried leaves provide simple finishing details around the candle bases.
Flameless LED candles suit displays placed near fabric, greenery, or other decorations.
The finished tray also moves easily when you need to clear the table.
Materials:
- Wooden serving tray
- Flameless pillar candles
- Dried leaves
- Pinecones
- Small decorative pumpkins
How to Make It:
- Select a wooden tray with a flat base and enough room for your candles.
- Place the tallest candle toward the back of the tray.
- Position the shorter candles beside it, leaving space between each one.
- Arrange dried leaves, pinecones, or small pumpkins around the candle bases.
- Check each piece for stability before moving the completed tray.
- Place the finished arrangement on your mantel, dining table, or sideboard.
Pro Tip: Choose candles with different heights but similar finishes to give the arrangement dimension while keeping the display cohesive.
15. DIY Pressed Leaf Wall Art
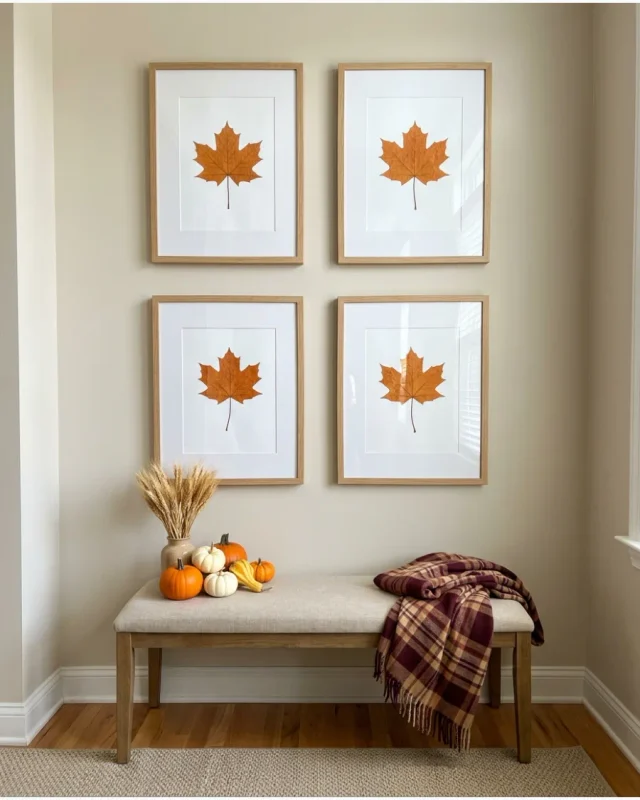
A collection of pressed leaves turns simple frames into seasonal artwork for an empty wall.
Their natural shapes provide plenty of detail, from delicate veins to uneven edges.
Choose leaves that are still in good condition before pressing them flat.
Once dry, arrange them against white or neutral cardstock for a clean backdrop.
Three floating picture frames create a simple gallery arrangement above a dining table.
A single large leaf also looks striking in a larger frame.
This project suits seasonal decorating because the artwork stores easily after the holidays.
Materials:
- Fresh leaves
- Leaf press
- Plain white cardstock
- Floating picture frames
- Tweezers
- Acid-free glue
How to Make It:
- Select several leaves with strong shapes and intact surfaces.
- Place the leaves inside a leaf press and leave them until completely flat.
- Cut white cardstock to fit inside each floating picture frame.
- Arrange the pressed leaves on the cardstock until the composition looks right.
- Apply tiny amounts of acid-free glue beneath each leaf to hold it in place.
- Let the glue dry completely before placing the artwork inside its frame.
- Hang the finished frames together to form a simple seasonal display.
Pro Tip: Arrange leaves by size first, then place the largest shapes near the center of your gallery.
16. Botanical Fall Print Frames
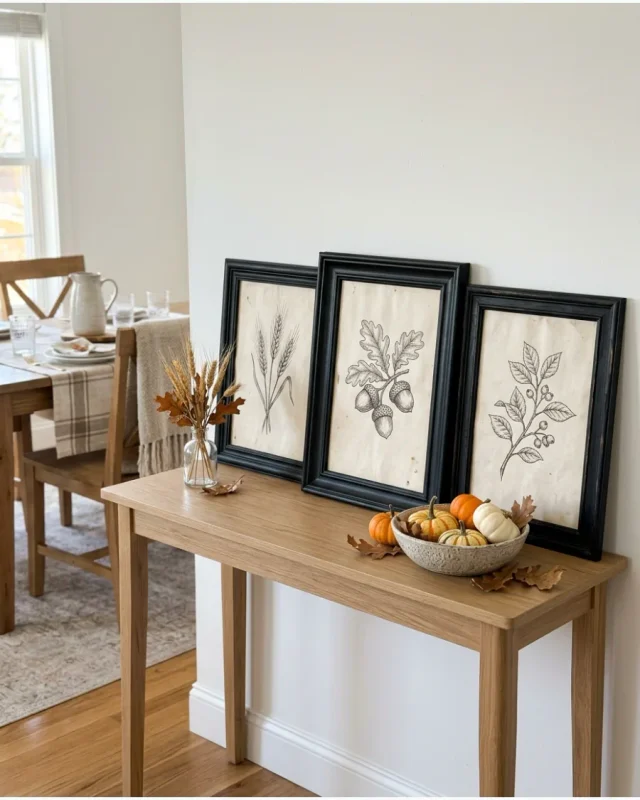
Turn pressed autumn foliage into simple framed artwork for an easy seasonal wall update.
A few leaves with strong shapes are enough to fill a small frame attractively.
Choose foliage in rust, gold, brown, or muted green for a natural color palette.
Plain cardstock gives the leaves a clean background and keeps attention on their details.
Arrange three frames together above a console, dining table, or fireplace.
A single oversized frame also suits a smaller decorating project.
Materials:
- Pressed fall leaves
- Botanical picture frames
- White cardstock
- Acid-free craft glue
- Tweezers
- Scissors
How to Make It:
- Select pressed leaves that are completely dry and free from cracks or damaged edges.
- Cut cardstock to fit inside each frame.
- Arrange the leaves on the cardstock until you find a pleasing composition.
- Use tweezers to reposition delicate leaves without tearing them.
- Apply tiny dots of glue beneath each leaf to secure it.
- Allow the glue to dry completely before placing the cardstock inside the frames.
- Assemble the frames, then hang them together as a seasonal display.
Pro Tip: Use leaves from different trees to introduce subtle variations in shape across your framed collection.
17. Paper Feather Turkey Decoration
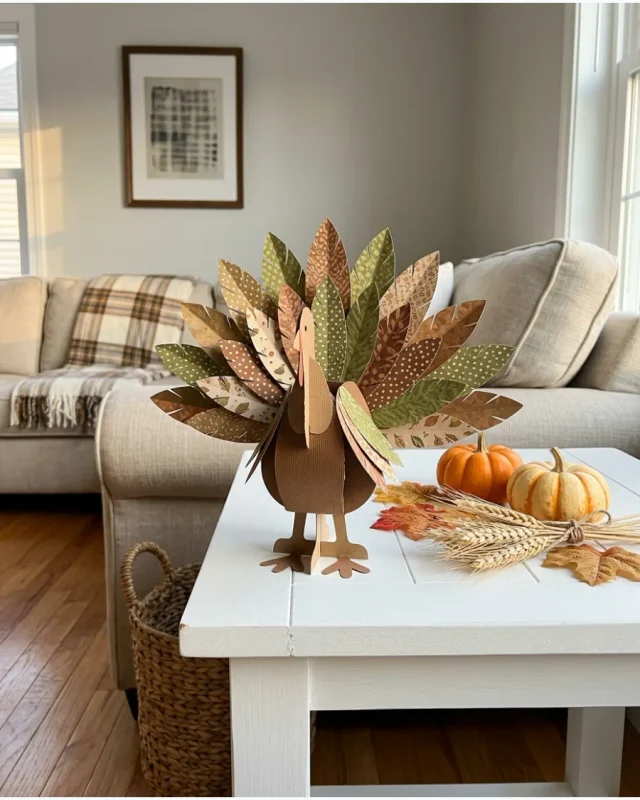
Give the kids a fun afternoon project with a turkey made from colorful paper feathers.
The craft uses simple shapes that are easy to cut, arrange, and decorate.
Choose several fall colors for the feathers, then use brown cardstock for the turkey’s body.
Layer the feathers behind the body to create a full tail.
Add a small face with paper eyes, a beak, and a wattle.
The finished turkey suits a children’s table, mantel, bookshelf, or Thanksgiving craft display.
Materials:
- Colored construction paper
- Brown cardstock
- Pencil
- Scissors
- Craft glue
- Googly eyes
- Black marker
How to Make It:
- Draw several feather shapes on colored construction paper, then cut them out.
- Cut one large oval from brown cardstock for the turkey’s body.
- Arrange the paper feathers in a fan shape behind the body.
- Glue the feathers together at their lower edges.
- Attach the brown body over the center of the feather fan.
- Add googly eyes, then draw a small beak and wattle with colored paper.
- Let the glue dry before placing the finished turkey on display.
Pro Tip: Let children choose their own feather colors to give every turkey a different personality.
18. Wooden Place Cards
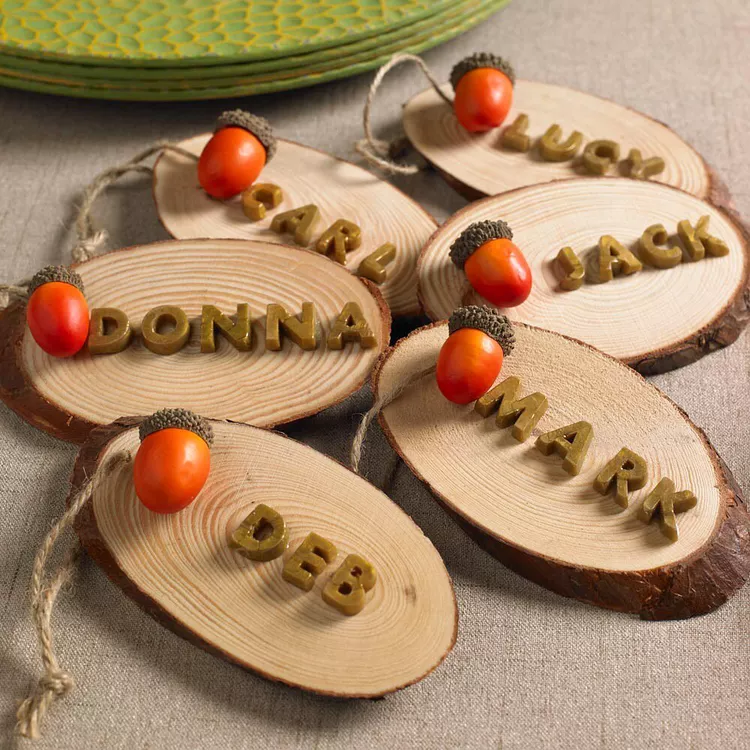
Personalized wooden place cards give each guest a small keepsake at the dinner table.
Wooden discs or small rectangular pieces provide a simple surface for names.
Use a paint pen for crisp lettering that stands out against the natural wood.
The cards also suit a rustic table filled with neutral linens, greenery, or dried foliage.
Arrange each one above the corresponding plate before guests arrive.
After dinner, guests can take their cards home as a small reminder of the gathering.
Materials:
- Unfinished wooden place card blanks
- White paint pen
- Pencil
- Fine-grit sandpaper
- Small dried leaves
- Hot glue gun
How to Make It:
- Lightly sand each wooden piece to remove rough edges and splinters.
- Wipe away the sanding dust with a dry cloth.
- Sketch each guest’s name lightly with a pencil.
- Trace the names with a white paint pen.
- Let the lettering dry completely before adding any decorations.
- Attach a small dried leaf near each name with hot glue.
- Place one finished card above each guest’s plate.
Pro Tip: Practice each guest’s name on scrap paper first to keep the lettering consistent across all cards.
19. Dried Orange Garland
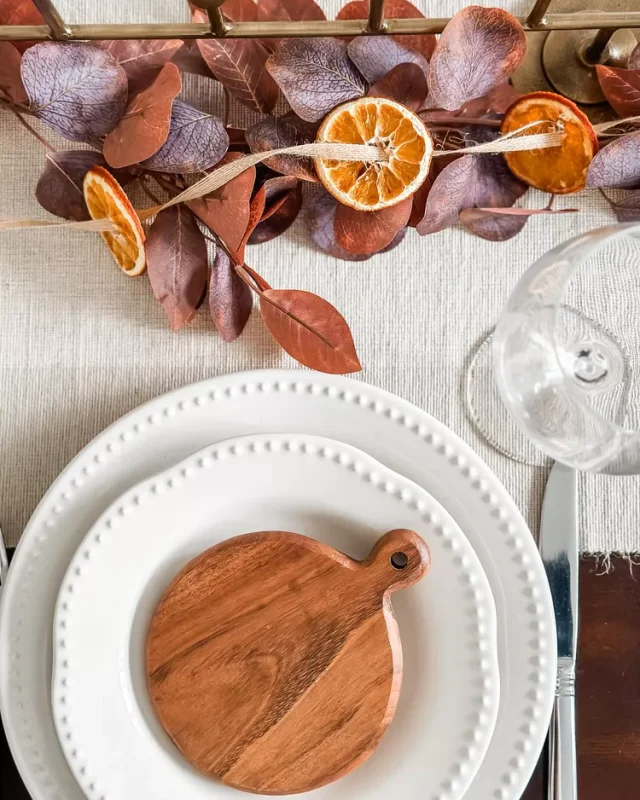
Slices of dried orange bring color and texture to a simple seasonal garland.
The translucent fruit slices look striking against greenery, wood, or a neutral wall.
Choose firm oranges and slice them evenly so they dry at a similar rate.
Once completely dry, thread the slices onto twine with small gaps between each piece.
Add dried leaves or cinnamon sticks if you want more texture along the strand.
Hang the finished garland across a mantel, window, cabinet, or dining room wall.
Materials:
- Fresh oranges
- Natural jute twine
- Baking sheet
- Parchment paper
- Scissors
- Wooden skewer
How to Make It:
- Slice the oranges into thin, even rounds using a sharp kitchen knife.
- Arrange the slices on a parchment-lined baking sheet.
- Bake the slices at a low temperature until they become completely dry.
- Turn the slices occasionally so both sides dry evenly.
- Let the dried oranges cool completely before assembling the garland.
- Use a wooden skewer to create a small hole near each slice’s edge.
- Thread the orange slices onto jute twine, leaving small spaces between them.
- Tie knots at both ends, then hang the finished garland.
Pro Tip: Slice the oranges as evenly as possible because thicker pieces require more drying time than thinner slices.
Frequently Asked Questions
How early should I make DIY Thanksgiving decorations?
Most paper, fabric, and dried-material projects can be prepared several days before your gathering, giving everything enough time to dry and settle.
How should I store homemade Thanksgiving decorations?
Let every painted, glued, or dried piece become completely dry before storing it in a clean, dry container away from moisture.