11 Creative Animal Pumpkin Decorating Ideas You Can Do

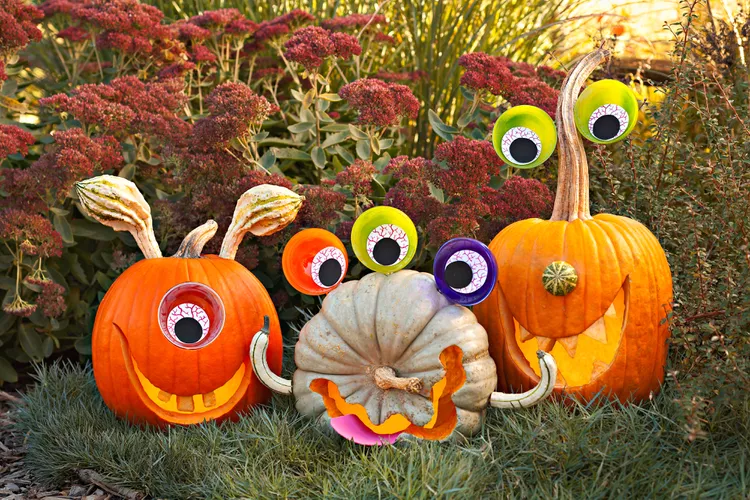
Pumpkins are among the best classic fall decorations, especially for Halloween outdoor décorations.
Painted pumpkins have a funny way of becoming little characters once you give them a face.
A few ears, painted whiskers, or a pair of oversized eyes can turn a pumpkin into your favorite animal.
This is where decorating gets playful.
You might end up with a sleepy cat on the front porch, a woodland fox on the mantel, or a wide-eyed owl beside the front door.
The best part? Animal designs leave plenty of room for creativity, even if painting is not your strongest skill.
Let us get over these 9 animal pumpkin decorating ideas
READ ALSO: 9+ DIY No-Carve Pumpkin Decorating Contest Ideas
Ways To Decorate Pumpkins With Animals
These ideas suits porch displays, classroom projects, pumpkin contests, Halloween activities, kids’ parties and fall shelves.
1. Black Cat Moon Pumpkin
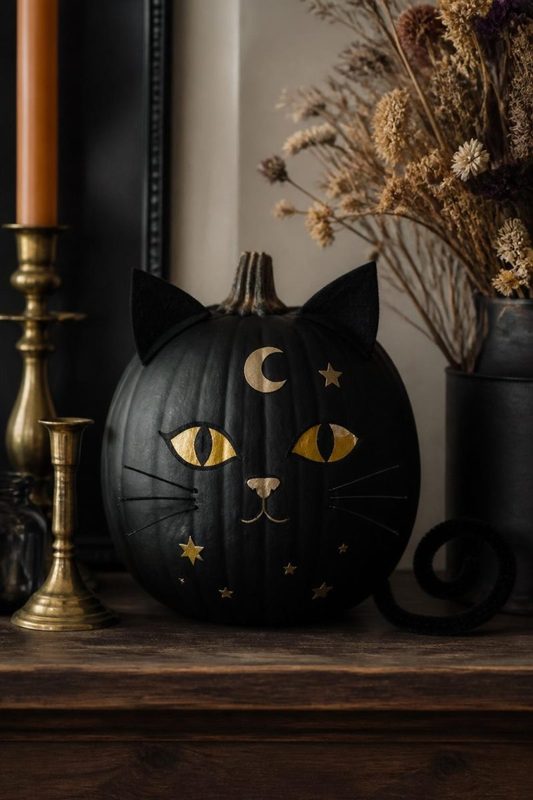
A black cat curled beneath a painted moon gives a pumpkin an enchanting Halloween look without making it frightening.
Paint the pumpkin a deep charcoal or black, then add a large golden crescent moon across one side.
A sleek cat silhouette sitting in front of the moon becomes the focal point.
Pointed ears, a curved tail, and bright eyes are enough to make the animal recognizable.
Tiny painted stars scattered around the moon fill the background and give the design a nighttime setting.
For a slightly different finish, use metallic gold for the moon and eyes. The contrast looks striking once the pumpkin sits among darker Halloween decorations.
The curved surface actually suits this design because the cat’s tail can follow one of the pumpkin’s natural grooves.
I’ve experienced simple silhouette designs outperform complicated illustrations in seasonal displays because their shapes remain easy to recognize from a distance.
Quick Tip: Paint the moon first and let it dry before adding the cat silhouette. That keeps the edges of the animal crisp.
TRENDING: 13 Beautiful Pumpkin Painting Ideas For Fall
2. Cozy Highland Cow Pumpkin
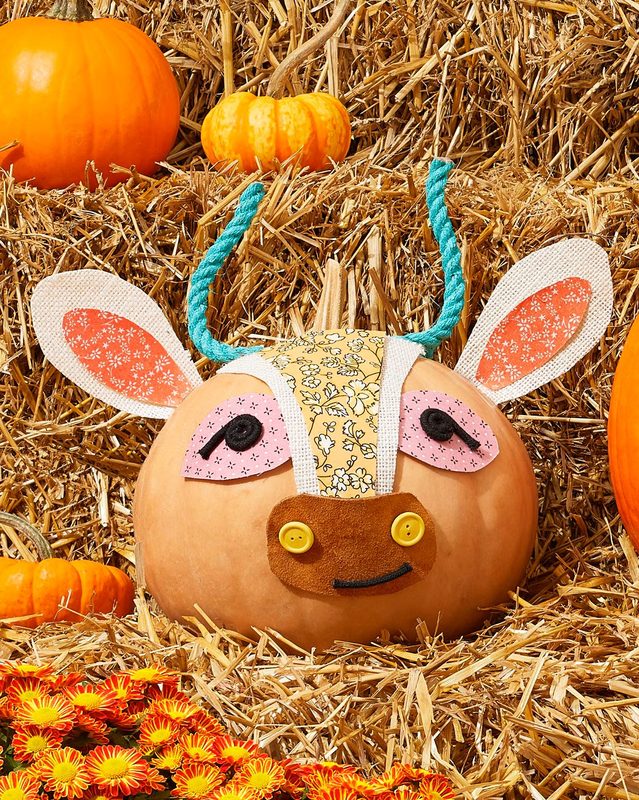
Bring a little farmhouse charm to your fall display with a pumpkin inspired by a fluffy Highland cow.
Start with a warm tan, cream, or muted brown base. Then paint a shaggy fringe across the upper portion, letting the strands overlap slightly around the forehead.
Large curved horns give the animal its unmistakable Highland cow appearance.
The face itself does not require much detail. Two dark eyes, a broad muzzle, and a few painted nostrils are enough to establish the character.
For extra texture, attach short pieces of raffia or yarn around the forehead instead of painting every strand of fur.
That combination of paint and tactile material gives the pumpkin a handcrafted quality that suits a farmhouse porch.
A small plaid bow around the stem would push the cozy country theme even further.
Quick Tip: Keep the facial features fairly large. Tiny eyes and a narrow muzzle tend to disappear against the pumpkin’s rounded surface.
3. Cute Owl Pumpkin
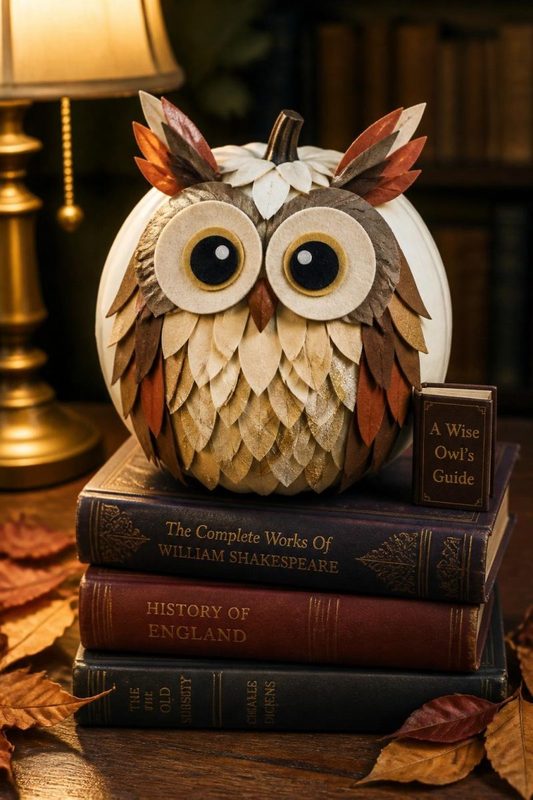
An owl pumpkin is practically made for oversized eyes.
Paint the pumpkin in a warm brown, cream, or soft gray, then build the face around two large circular eyes.
Layer a lighter shade around each eye to mimic the distinctive feather pattern found on many owls.
A small triangular beak between the eyes completes the face. From there, paint a few simple feather shapes down the sides of the pumpkin.
For a woodland-inspired display, tuck the finished owl among pinecones, autumn leaves, and small branches.
One detail I pay attention to with character pumpkins is the expression.
Slightly uneven eyes can give an owl a curious, almost surprised look that makes the decoration much livelier.
There is no need to paint individual feathers across the entire pumpkin. A handful of larger feather markings will read clearly.
Quick Tip: Use a round object as a tracing guide for the eyes. Matching circles make the owl look polished even when the rest of the artwork remains playful.
4. Bat Pumpkins
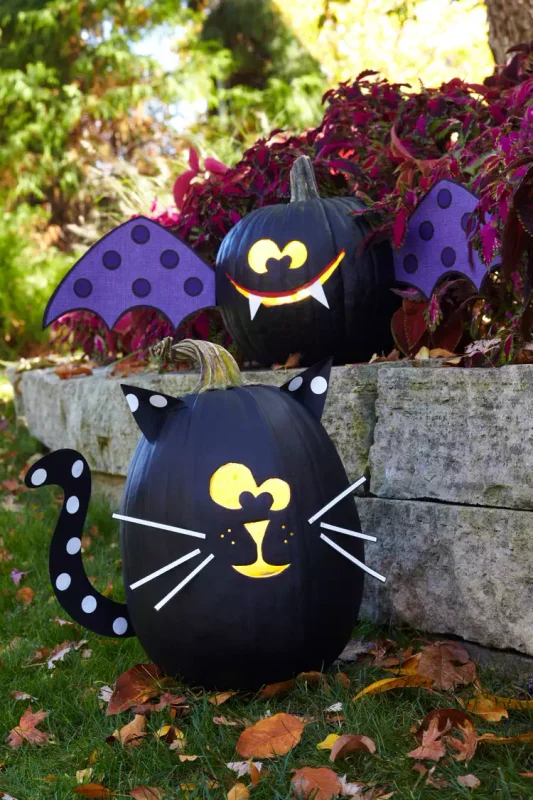
Turn a group of pumpkins into a little colony of bats for a Halloween display with plenty of personality.
Black paint gives the pumpkins their main color, but the details make the idea recognizable.
Paint large eyes, tiny fangs, and small pointed ears across the front.
For the wings, cut bat-shaped pieces from black cardstock and attach one to each side.
A metallic purple or silver paint around the eyes gives the darker pumpkins a playful twist.
Different pumpkin sizes make the colony look less uniform. Place the smallest one beside the larger pumpkins so the display resembles a family of bats.
This idea suits a porch, mantel, or Halloween party table. The wings also extend the design beyond the pumpkin itself, giving the whole arrangement a stronger silhouette.
Quick Tip: Bend the cardstock wings slightly before attaching them. The small curve gives the bats a livelier appearance.
5. Dog Pumpkin
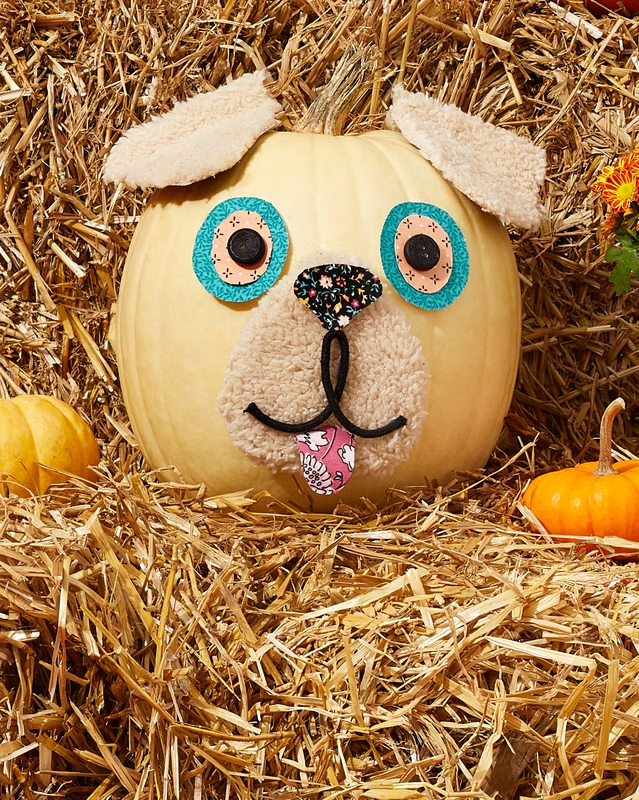
Turn your pumpkin into a favorite four-legged friend with floppy ears, a painted nose, and an unmistakably happy expression.
The breed does not need to be exact. Choose one feature that defines the dog you have in mind, such as long ears.
A cream pumpkin makes a good canvas for brown patches, while a darker base suits a black dog.
Paint the eyes first so you can position the nose and mouth around them.
For floppy ears, felt or cardstock works beautifully. Attach them near the top and let them hang along the pumpkin’s sides.
A tiny painted collar around the stem area is a fun finishing touch.
For a family display, personalize the pumpkin with your own dog’s coloring. That little connection makes the decoration feel less like a generic Halloween craft.
Quick Tip: Take a quick photo of your dog’s face for reference before painting. Pay attention to the shape of the ears and markings.
6. Sleepy Bear Pumpkin
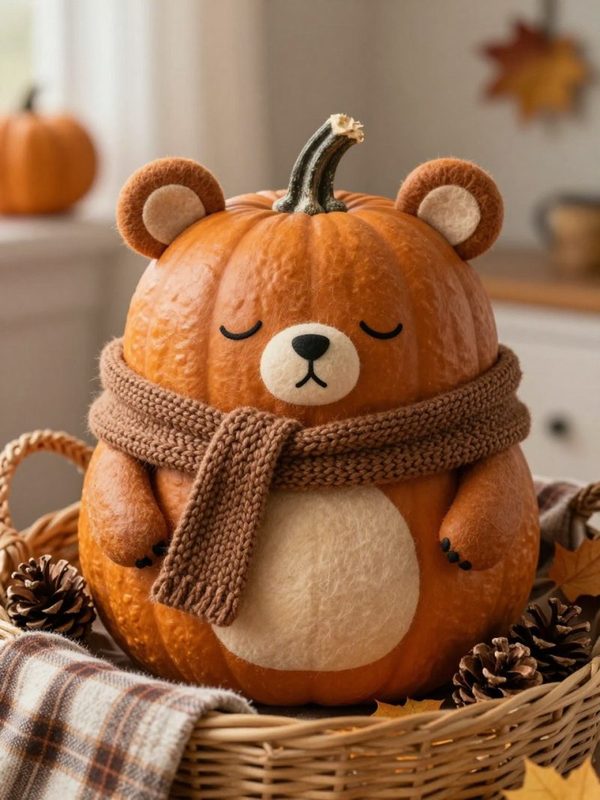
A sleepy bear pumpkin brings a softer woodland character to fall decorating.
Paint the pumpkin in warm brown or cream, then give it two rounded ears near the stem.
The face should stay simple. Closed eyes, a small oval nose, and a tiny curved mouth are enough to make the bear look peacefully asleep.
A few painted lines across the forehead suggest fur while keeping the artwork manageable for beginners.
For an extra cozy touch, wrap a small knitted scarf around the pumpkin’s base.
This design looks lovely among pinecones, dried leaves, and other woodland-inspired decorations.
The sleepy expression is the part worth getting right. Lower the eyes slightly and give them a gentle curve so the bear looks relaxed instead of surprised.
Quick Tip: Use a soft makeup sponge to dab a lighter brown around the muzzle. It gives the face a gentle variation in tone.
7. Panda Pumpkin
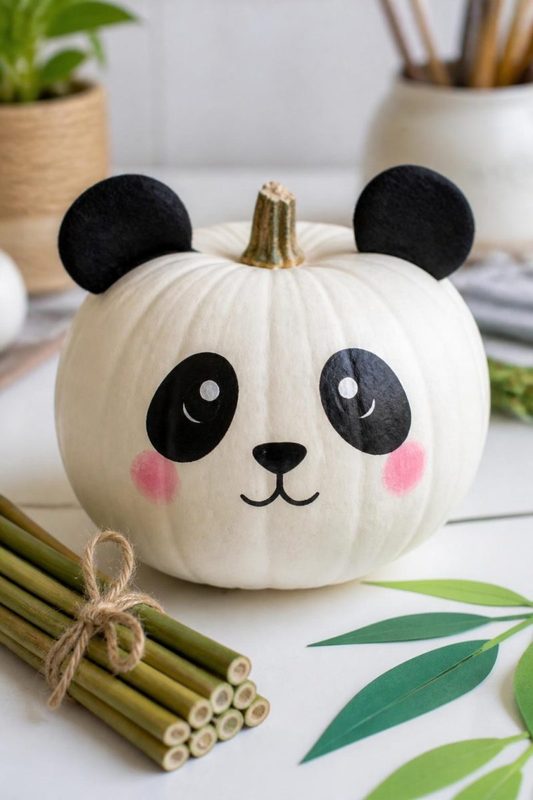
Black and white paint turn a pumpkin into an adorable panda with surprisingly little artwork.
Cover the pumpkin in white first and allow the base coat to dry.
Next, paint two large black patches around the eyes. Add rounded ears near the stem, followed by a small black nose and curved mouth.
The eye patches do not need identical shapes. Slight differences give the panda an amazing expression.
For a fun display, place bamboo leaves or faux greenery around the base of the pumpkin.
A smaller pumpkin works nicely as a baby panda beside a larger one, giving you a simple way to turn the idea into a little family scene.
On a craft table, this design is also approachable for children since the color palette is limited and the main shapes are easy to recognize.
Quick Tip: Let the white base dry completely before painting the black sections. It keeps the darker color from becoming gray and muddy.
8. Tiny Hedgehog Pumpkin
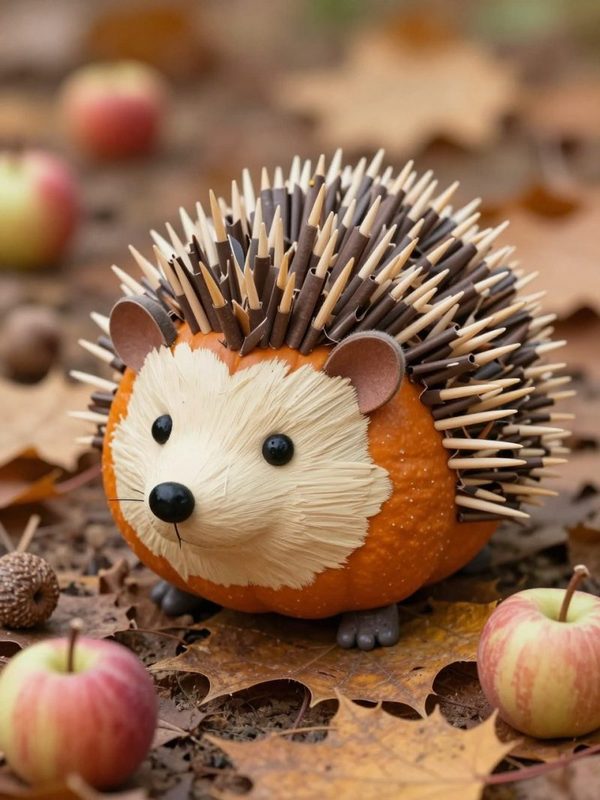
A hedgehog pumpkin brings a little woodland charm to a fall display, and the textured back makes this idea stand out.
Paint the face and belly area in a warm tan shade, leaving the rear section ready for the prickly texture.
Brown raffia, short pieces of twine, or small wooden picks can form the spines across the back.
Give the hedgehog two tiny black eyes, a round nose, and small ears near the top.
A few painted leaves around its feet make the pumpkin look as though the little creature has wandered into an autumn garden.
The proportions do not need to be perfect. A slightly oversized nose and tiny eyes actually make the character cuter.
For a tabletop display, place the hedgehog beside pinecones or miniature pumpkins so the woodland theme carries through the arrangement.
Quick Tip: Apply the textured pieces in overlapping rows. That gives the back a fuller, spiky appearance instead of leaving obvious gaps.
9. Button Spiders Pumpkin
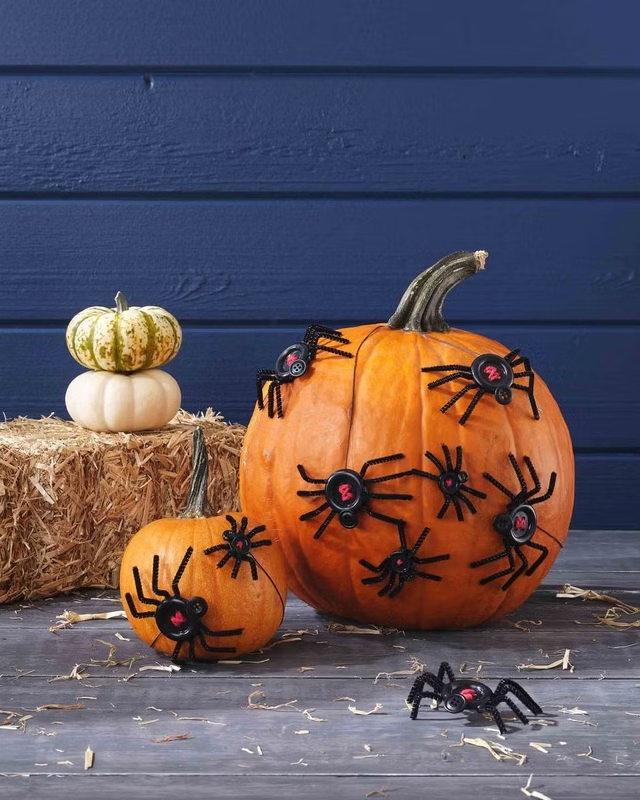
Black buttons make surprisingly charming little spiders when they are scattered across a pumpkin.
Paint the pumpkin in white, orange, purple, or another Halloween shade, then arrange black buttons across the surface.
Use larger buttons for the spider bodies and smaller ones for the heads. Thin black pipe cleaners become simple legs once cut into short pieces.
For a playful effect, let several spiders crawl upward toward the stem while one hangs from a thin thread of painted string.
This idea has a wonderful handmade quality because every spider ends up slightly different.
I’d choose buttons with a flat back for the easiest application. They sit closer to the pumpkin and are less likely to shift while the adhesive sets.
A few painted webs between the spiders tie the whole design together.
Quick Tip: Count the legs before gluing each spider down. Four short pieces on each side are easier to arrange while the button is still loose.
10. Pumpkin Horse
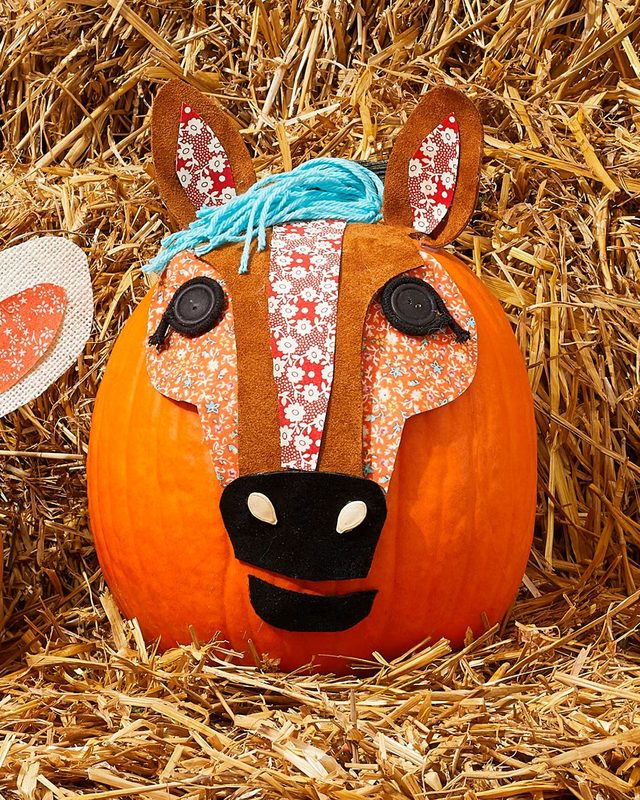
A horse-inspired pumpkin makes an unexpected choice for an animal-themed fall display.
Start with a brown, cream, gray, or black pumpkin and build the face around the front.
Paint two expressive eyes, a long muzzle, and a pair of nostrils. Then attach pointed ears near the stem using felt or sturdy cardstock.
The mane is where this design gets its character. Strips of yarn, raffia, or felt can run from the top of the pumpkin toward the back.
A small white marking down the forehead gives the horse a distinctive appearance.
For a child’s pumpkin project, personalize the colors to resemble a favorite horse or pony.
The curved shape of the pumpkin lends itself nicely to the long face, especially when the nose sits slightly below the widest point.
Quick Tip: Cut the ears from felt instead of paper if the pumpkin will sit outdoors. Felt holds its shape better in changing weather.
11. Mouse Pumpkin Carving
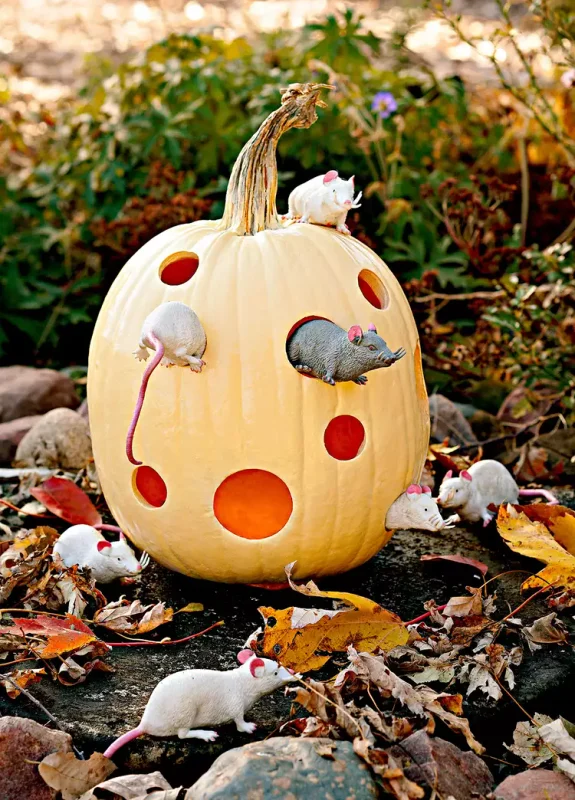
A mouse pumpkin is one of those designs where a few carefully placed details do all the work.
Carve two small round openings for the eyes, then add oversized ears near the stem.
The nose should stay tiny, with thin whiskers extending from either side. Black paint around the eyes and nose makes the facial features easier to see.
For the ears, use felt or thin craft foam in a soft gray or pink shade.
A curly wire tail attached to the back completes the character and gives the pumpkin a fun three-dimensional detail.
For a Halloween display, place a few small cheese-shaped decorations beside the mouse to turn the pumpkin into a little scene.
I’d keep the carving shallow and controlled because the mouse design depends on delicate features. Large openings could quickly overwhelm the face.
Quick Tip: Draw every opening on the pumpkin before carving. A quick layout prevents the eyes and ears from sitting too close together.
FAQs
What paint is best for decorating animal pumpkins?
Acrylic craft paint is a practical choice for most animal pumpkin designs. It dries quickly, covers well, and gives you enough control for small facial details, ears, spots, and markings.
How do I make animal pumpkin decorations last longer?
Keep decorated pumpkins away from rain, direct sunlight, and damp surfaces. For indoor displays, a clear craft sealer can protect the painted surface and reduce chipping.