15+ No Carve Halloween Pumpkin Decorating Ideas

Disclosure: This post may contain affiliate links. As an Amazon Associate, I earn a small commission from qualifying purchases at no extra cost to you. Thanks.
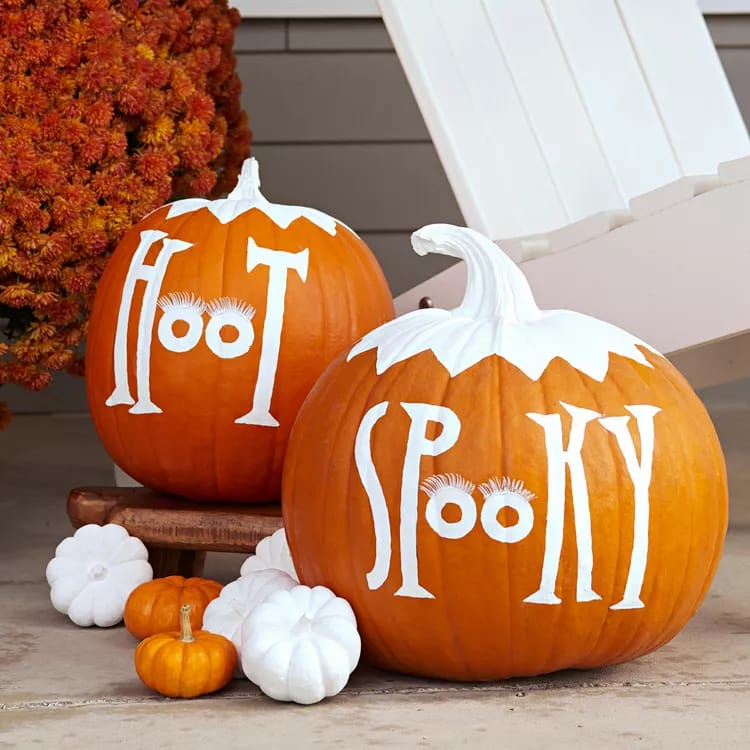
A plain pumpkin has plenty of Halloween potential, even without a single cut.
No-carve decorating lets you turn a real or faux pumpkin into a festive display without using a carving knife.
These projects suit different ages and skill levels, so everyone gets a chance to join the fun.
You can create a standout decoration for your porch or add a seasonal touch to your indoor spaces.
In this article, I’ll share 17 no-carve Halloween pumpkin decorating ideas that help create a festive display with less mess.
How To Paint Pumpkins For Halloween Without Carving
To save time, I’ve summarized essential Amazon supplies for no-carve decorating projects:
- Real or faux white pumpkin – Provides a bright base for painting.
- Acrylic paint – Adds color to your pumpkin design.
- Acrylic spray sealer – Protects the design from scuffs, moisture or fading.
- Acrylic paint markers or paint pens – Add fine details and lettering.
- Paintbrushes – Apply paint smoothly.
- Clear glossy sealant – Protects colors and adds shine.
- LED tea lights – Create a soft Halloween glow at night.
- Hot glue gun – Attaches heavier decorations.
- Craft glue or Mod Podge – Secures glitter and lightweight decorations.
- Painter’s tape – Creates clean lines and patterns.
1. Pumpkin Face with Big Eyes

Give an ordinary pumpkin a wide-eyed expression that looks like it has just spotted a ghost!
This cute Halloween design stands out on a porch, fireplace mantel, or entryway table.
Start with a white or orange pumpkin, then paint two oversized circles on the front using white acrylic paint.
Once dry, add large black pupils, positioning them slightly toward the center for a surprised expression.
Draw a small curved mouth below the eyes with a black paint marker, or paint a tiny oval for a comical open-mouth look.
For extra character, add raised eyebrows or a few freckles with smaller paint details.
Let the design dry completely before displaying your pumpkin.
For a quicker version, use oversized googly eyes instead of painting the eyes.
Stick them onto a clean, dry pumpkin, then draw a tiny mouth underneath to complete the surprised face.
Fun Tip: Angle the pupils in different directions for a silly expression, or position them close together for a curious, startled look.
2. Vintage Spider Pumpkin
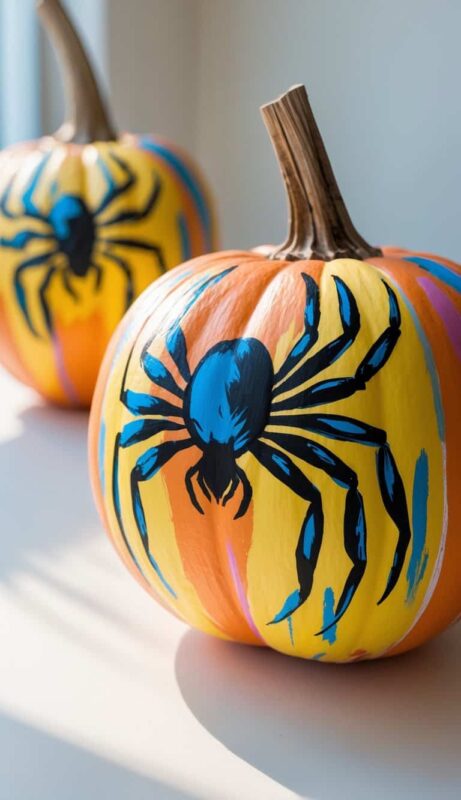
Give your Halloween display an old-fashioned spooky touch with a spider pumpkin inspired by vintage Halloween illustrations.
A black spider with long, curved legs looks striking against a cream, white, or muted orange pumpkin.
Start by sketching a large spider on the front with a pencil, keeping its round body near the center.
Paint the body black, then add eight curved legs that stretch across the pumpkin’s natural ridges.
For a vintage finish, add tiny white highlights or delicate web details around the spider.
If freehand painting feels tricky, use a vintage spider stencil to help create a clean outline before filling in the design.
Let the paint dry before placing the pumpkin on a side table, mantel, or covered porch.
3. Skeleton Pumpkin Bone Design
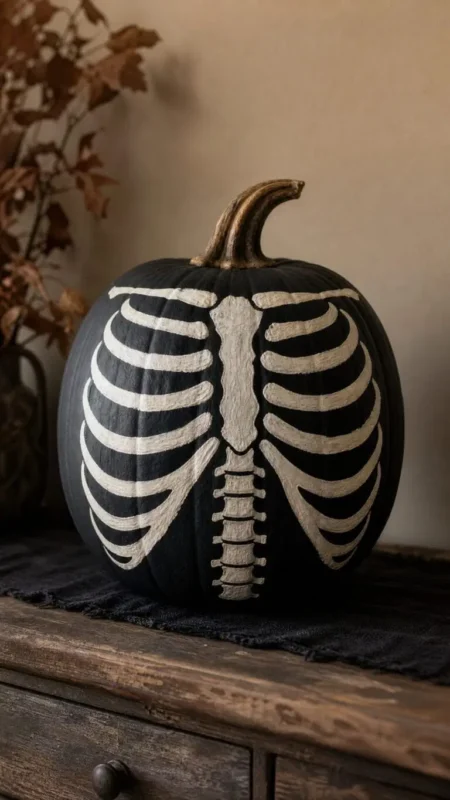
Turn a plain pumpkin into a mini skeleton with a bony design that looks right at home in a spooky Halloween display.
A white pumpkin makes an excellent starting point, although an orange one with white bones creates a striking contrast.
Sketch a simple skull near the top, then paint a narrow spine down the center of the pumpkin.
Add curved ribs on both sides, finishing with small bone shapes near the bottom.
Use black paint to fill the skull’s eye sockets and nose, then outline the bones with thin black lines for extra definition.
If you prefer a glowing effect after dark, try glow-in-the-dark acrylic paint on selected bones.
Pro Tip: Keep the bones bold and slightly spaced apart so the skeleton remains easy to recognize from across the room.
4. Smiling Jack-o’-Lantern Pumpkin
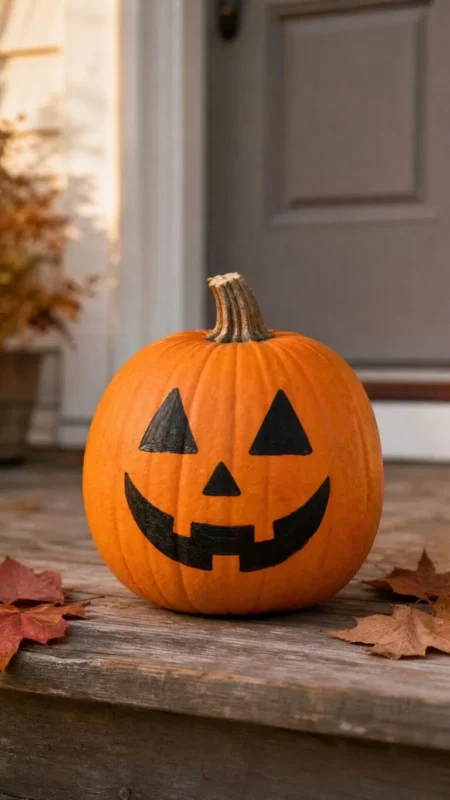
Give the classic Halloween pumpkin a cheerful makeover with a big painted grin that welcomes trick-or-treaters to your home.
Choose a bright orange pumpkin for that traditional jack-o’-lantern look, then sketch two triangular eyes near the top.
Paint the eyes black, followed by a wide smile that curves upward at both corners.
Add small square teeth along the top and bottom of the mouth, leaving black gaps between them for definition.
For a friendlier expression, make the eyes round and the smile gently curved.
A jack-o’-lantern face stencil helps create neat facial features if you prefer a guided design.
Once the paint dries, place your pumpkin beside the front door or arrange several smiling faces along your porch steps.
Fun Fact: Give each pumpkin a different smile or eye shape to create a charming little Halloween character collection.
5. Classic Black Cat Painted Pumpkin

A mysterious black cat perched on your Halloween pumpkin brings a little midnight magic to your seasonal decorations.
Start with a white or orange pumpkin, then sketch a cat’s face or full silhouette across the front.
Paint the cat black, extending two pointed ears toward the stem if you’re creating a face design.
Once the base coat dries, add bright yellow or green eyes, a tiny pink or black nose, and fine white whiskers.
For a full-body cat, paint a curved tail that follows the pumpkin’s natural shape.
You could add a small mini witch hat near the stem for an extra Halloween touch.
Best Tip: Bright eyes and a curled tail help the black cat stand out against a dark background or nighttime porch display.
6. Candy Corn Pumpkin
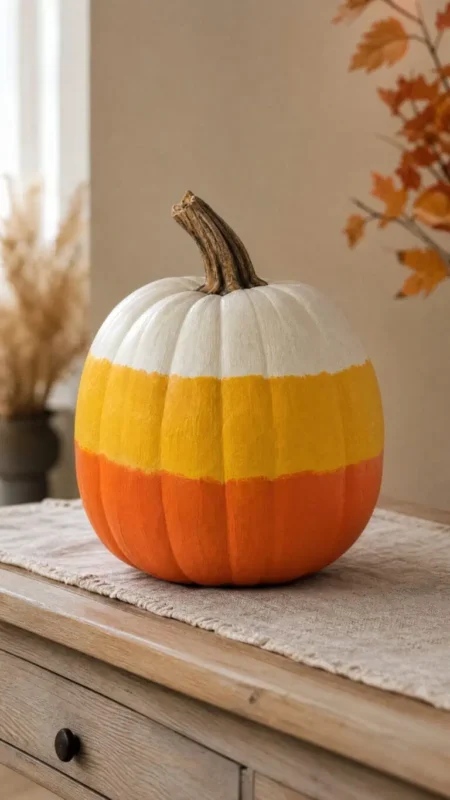
Turn a plain pumpkin into an oversized piece of Halloween candy with the familiar yellow, orange, and white stripes of candy corn.
This cheerful design looks right at home on a kitchen counter, entryway table, or fall-themed porch display.
Start by dividing the pumpkin horizontally into three sections with pencil marks or painter’s tape.
Paint the bottom section yellow, the middle orange, and the top white, allowing each color to dry before adding the next.
For a neat finish, follow the pumpkin’s natural curves as you paint, keeping the color bands wide and easy to distinguish.
A small pumpkin is ideal for this project because its rounded shape resembles a piece of candy corn.
If you want crisp color boundaries, painter’s tape helps keep the stripes tidy.
Quick Tip: Use a white pumpkin as your base to reduce the number of coats needed for the white section.
7. Pumpkin with Cobweb Patterns
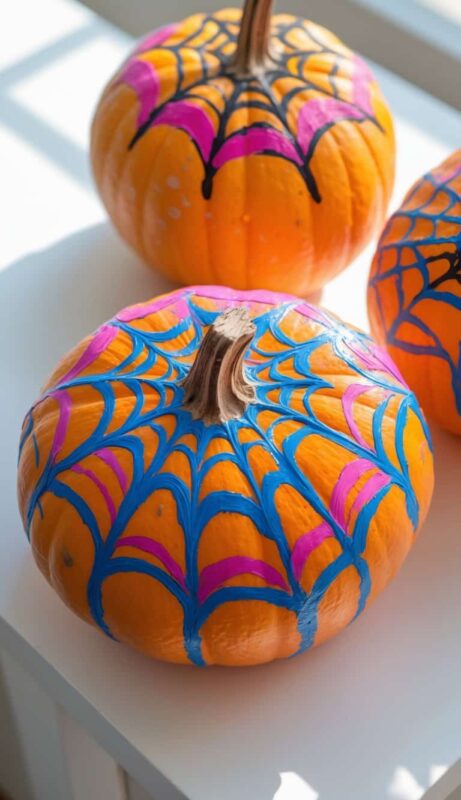
A web-covered pumpkin brings just the right amount of spooky detail to your Halloween decorations, without needing a complicated design.
Choose a white or black pumpkin for a striking background, then sketch a web pattern across the front using a pencil.
Paint thin lines that radiate outward from a central point, then connect them with curved lines to form the web.
For a classic look, use black paint on a white pumpkin; silver paint looks striking against a black surface.
Add a tiny painted spider hanging from one of the web strands for an extra creepy detail.
If you prefer a more polished pattern, try a spiderweb stencil to guide your design.
Pro Tip: Keep the web lines thin and evenly spaced so the pattern stays clear across the pumpkin’s curved surface.
8. Friendly Ghosts Pumpkins

Turn little pumpkins into a cheerful ghost family with simple white shapes and sweet expressions that feel more cute than creepy.
White pumpkins make an easy starting point, but orange pumpkins look just as charming with white ghost figures painted across the front.
Sketch two or three ghost shapes, varying their heights so they look like they are floating together.
Paint each figure white, extending the bottom edges into soft waves to suggest a drifting ghost.
Once the paint dries, add two black oval eyes and a tiny mouth to each ghost.
For a fun twist, give one ghost a surprised expression and another a wide smile.
Arrange several decorated pumpkins together for a little ghost gathering on your mantel or entryway table.
Fun Tip: Add tiny rosy cheeks with pink paint for an extra-sweet ghost design.
9. Bright Polka-Dot Painted Pumpkin
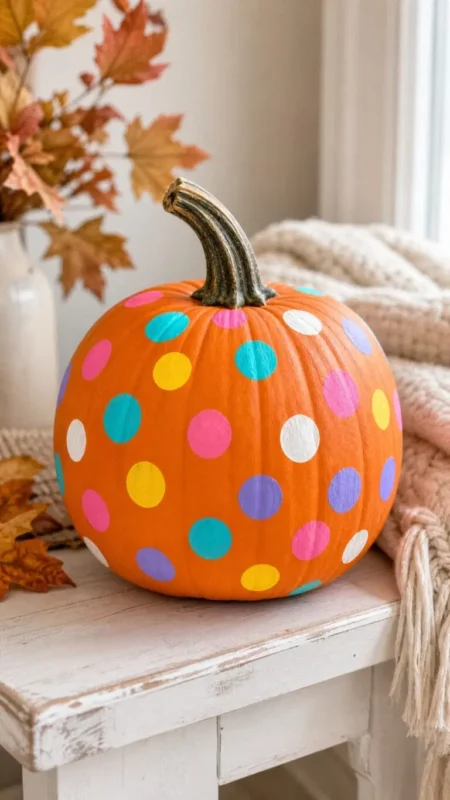
Bring a burst of color to your Halloween display with a polka-dot pumpkin covered in cheerful, oversized spots.
This design is great for anyone who wants a bold decoration without spending time sketching complicated pictures.
Start with a solid base color, such as white, black, purple, or teal, and allow it to dry completely.
Next, choose three or four contrasting paint colors for the dots.
Use a round paintbrush, the end of a pencil, or a dotting tool set to create circles across the pumpkin.
Vary the dot sizes and spacing for a lively pattern, leaving a little room between each spot so the colors stand out.
Continue around the pumpkin, turning it as you paint to cover the visible sides.
Quick Tip: Metallic gold dots against a black pumpkin create a more sophisticated look for an indoor Halloween display.
10. Rainbow Drip Pumpkin

Give your Halloween pumpkin a colorful makeover with paint that appears to drip down from the stem like a rainbow-colored waterfall.
This eye-catching design looks fantastic on a porch or shelf, particularly when displayed beside pumpkins in solid colors.
Begin with a white pumpkin so the bright shades remain vivid.
Choose several rainbow colors, then paint short, uneven streaks near the stem, allowing each streak to run downward at a different length.
For a genuine drip effect, use slightly thinned acrylic paint and rotate the pumpkin carefully so the colors travel down the sides.
Work with one color at a time to prevent the shades from blending into a muddy mixture.
If you want more control over the pattern, use a rainbow acrylic paint set with separate brushes for each color.
Quick Win: Test the paint consistency on a spare surface first; overly watery paint may run farther than you intended.
11. Simple Stars Pumpkin
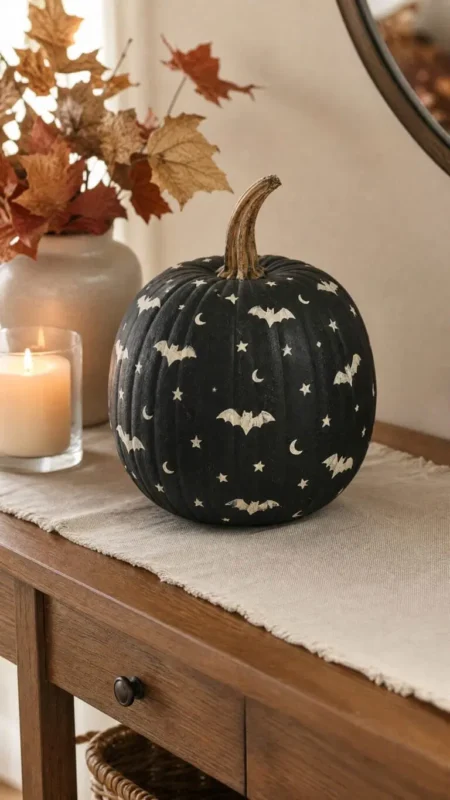
Give your Halloween decorations a little nighttime magic with a pumpkin scattered with tiny stars.
This design looks lovely on a mantel, bedside table, or porch, particularly when you choose a dark background that makes the stars stand out.
Start with a black, navy, or deep purple pumpkin, or paint a plain pumpkin in your chosen base color and let it dry.
Use a small brush or paint marker to add stars across the surface.
Mix larger five-pointed stars with tiny dots and simple sparkle shapes for a sky-inspired finish.
Gold and silver paint create a lovely contrast against dark colors, while white stars give the pumpkin a crisp, classic look.
For more precise shapes, try star-shaped stencils to keep your design consistent.
Quick Tip: Concentrate a few larger stars near the front, then scatter smaller ones around the sides for a balanced pattern.
12. Owl-Inspired Pumpkin
Turn an ordinary pumpkin into a wise little Halloween owl with oversized eyes, feather details, and a tiny beak.
A round orange, white, or brown pumpkin makes a great base for this woodland-inspired design.
Start by painting two large circles near the top of the pumpkin to create the owl’s eye area.
Add smaller circles inside them, using black paint for the pupils and white highlights to bring the eyes to life.
Paint a small yellow or orange triangle between the eyes for the beak.
Next, add short curved marks along the sides to suggest feathers, then paint two little feet near the bottom.
For extra character, attach small craft feathers near the sides with craft glue.
Craft Tip: Give your owl one raised eyebrow for a curious expression, or paint the pupils looking upward for a surprised look.
13. String Art Pumpkins
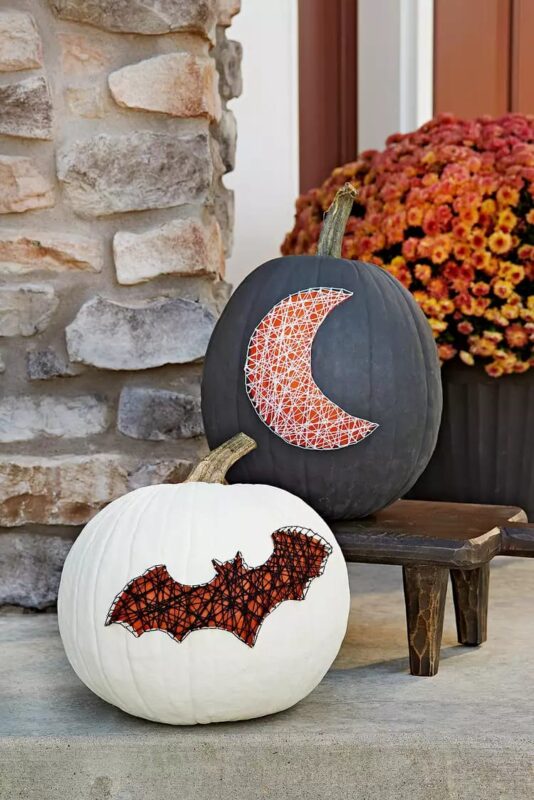
Create a textured Halloween decoration with a string art pumpkin featuring crisscrossed lines that form a web, geometric pattern, or simple star.
This project adds a handmade touch to fall displays, especially when you choose yarn in contrasting colors.
Start with a faux craft pumpkin and decide on a simple pattern, such as a spiderweb or starburst.
Mark the main points of your design with small dots, then carefully insert short craft pins into the faux pumpkin at those points if its material allows.
Tie one end of your yarn to a pin and stretch it between the remaining points, wrapping it securely around each pin to form the pattern.
Continue crossing the yarn until the design looks complete, then tuck away the loose end.
Quick Tip: Choose a contrasting yarn color, such as white on black or orange on cream, so the pattern stands out clearly.
14. Witch Hat and Moon Pumpkin

Turn a plain pumpkin into a little Halloween night scene with a crescent moon and a witch’s hat floating across its surface.
A black or deep purple pumpkin creates a dramatic backdrop, while a white pumpkin gives the design a softer, storybook look.
Start by sketching a crescent moon on one side of the pumpkin, then draw a pointed witch’s hat nearby.
Paint the moon pale yellow or metallic gold, then fill the hat with black paint.
Add a few tiny stars around the design to suggest a clear autumn night.
For a dimensional finishing touch, attach a small miniature witch hat decoration near the stem if it suits your design.
Let the paint dry before displaying your pumpkin on a mantel, entryway table, or covered porch.
Quick Tip: Arrange the moon and hat at different heights to create a more balanced nighttime scene.
15. Vampire Face Painted Pumpkin
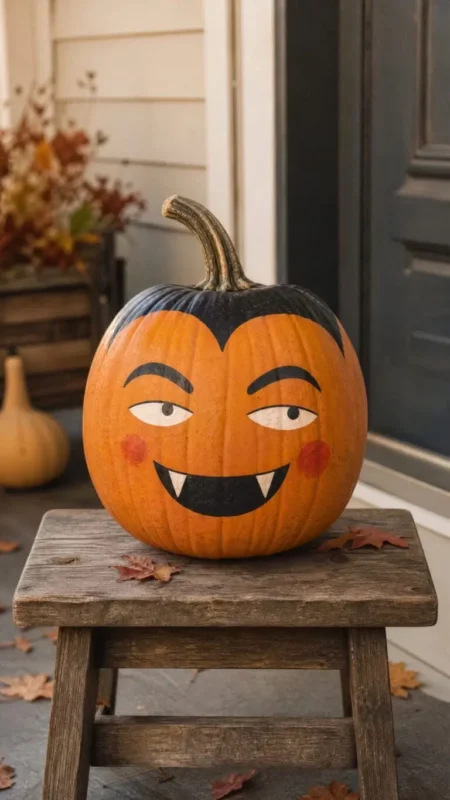
Give your Halloween display a little bite with a vampire pumpkin featuring a dramatic widow’s peak, sharp fangs, and a mischievous grin.
An orange pumpkin creates a classic Halloween look, while a white pumpkin gives the vampire a pale, spooky complexion.
Start by painting a face on the front, adding a widow’s peak along the top of the forehead.
Create two dark eyes, arched eyebrows, and a wide red mouth with two pointed white fangs.
Add a little red detail at the corners of the mouth for a freshly fed vampire look, keeping the marks small for a cleaner finish.
For extra character, paint a black bow tie below the face or add a tiny cape shape along the sides.
Fun Tip: Give your vampire one raised eyebrow and a crooked smile to create a cheeky expression instead of a frightening one.
16. Glittery Bat Silhouette Pumpkin
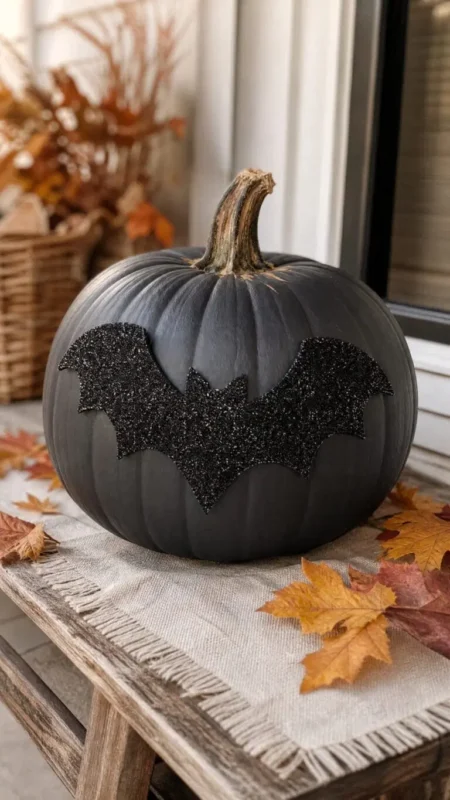
Add a little sparkle to your Halloween display with a glittery bat silhouette flying across a pumpkin’s surface.
A white, silver, or pale purple pumpkin makes the dark bat shape stand out, while a black pumpkin creates a dramatic background for a gold or silver bat.
Sketch a bat silhouette with wide wings, pointed ears, and a small body.
Paint the shape black, then apply glitter to the wet paint or use craft adhesive to secure the glitter after the base coat dries.
For a crisp outline, place a bat silhouette stencil against the pumpkin before filling in the design.
Once everything is dry, gently remove loose glitter and display the pumpkin where it catches the light.
Quick Tip: Keep the bat’s outline simple and bold so its wings remain recognizable against the pumpkin’s curved surface.
Frequently Asked Questions
How Long Do Painted Pumpkins Last Indoors?
Painted pumpkins usually last one to three weeks indoors, depending on how fresh they are and the temperature and humidity in your home.
To help them last longer, keep them in a cool, dry spot away from direct sunlight and heat.
Can I Paint Artificial Pumpkins Instead of Real Ones?
Yes, artificial pumpkins made from foam, plastic, or resin can be painted. Acrylic, spray, and chalk paints are popular choices.
Are Painted Pumpkins Safe to Use Around Food?
Painted pumpkins aren’t necessarily food-safe, even when you use non-toxic paint.
Avoid placing food directly on a painted pumpkin. Instead, use a separate tray to keep food from coming into contact with the paint.
How Should I Store Painted Pumpkins After Halloween?
Keep painted pumpkins in a cool, dry place away from sunlight and moisture.
Store them in ventilated crates, cardboard boxes, or on open shelves rather than in airtight containers to reduce the risk of mold.
Can Children Safely Participate in Pumpkin Painting?
Yes, pumpkin painting is a fun activity for kids when adults supervise. They should use washable, non-toxic paints and age-appropriate supplies.
Wrapping UP!
Painted pumpkins are an easy, mess-free way to decorate for Halloween.
With the right paint, a clean surface, and a protective sealer, your designs can last throughout the season.
Beginners can try simple ghosts, candy-apple colors, or easy patterns, while more experienced artists can experiment with florals, plaid, or leopard print.
Let each layer dry completely before displaying your pumpkins indoors or on a covered porch for a colorful, personalized Halloween look.