15 Best Classroom Thanksgiving Bulletin Board Ideas

Disclosure: This post may contain affiliate links. As an Amazon Associate, I earn a small commission from qualifying purchases at no extra cost to you. Thanks.
I have a soft spot for classroom decorations that tell a story, especially when little hands help create them.
Thanksgiving is the perfect excuse to let students get crafty and share what makes them grateful.
A bulletin board full of their work brings a personal touch to the classroom.
It also gives children a chance to see their ideas proudly displayed for everyone to enjoy.
For your next display inspo, I’ve rounded up 15 classroom Thanksgiving bulletin board ideas to help you get started.
In a hurry? You can choose the best thanksgiving bulletin board here on Amazon
Creative Themes for a Thanksgiving Bulletin Board
Some creative themes to inspire your Thanksgiving bulletin board include:
- “Thankful Tree” – Create a paper tree with colorful leaves where students write what they are thankful for.
- “Turkey of Thanks” – Feature a large turkey with individual feathers where each student shares something they appreciate.
- “Harvest of Blessings” – Decorate a cornucopia with paper fruits and vegetables, each representing a blessing in a student’s life.
- “Grateful Hearts” – Cut out paper hearts and invite students to write what they are grateful for before adding them to the board.
- “Pilgrim Voyage” – Illustrate the Pilgrims’ journey with student-written facts about Thanksgiving history displayed across the board.
I gathered 7 essential Amazon supplies that gets you started with your Thanksgiving bulletin board projects;
Thanksgiving bulletin Board Ideas For Class
1. “We Are Thankful For…” Feather Writing Wall
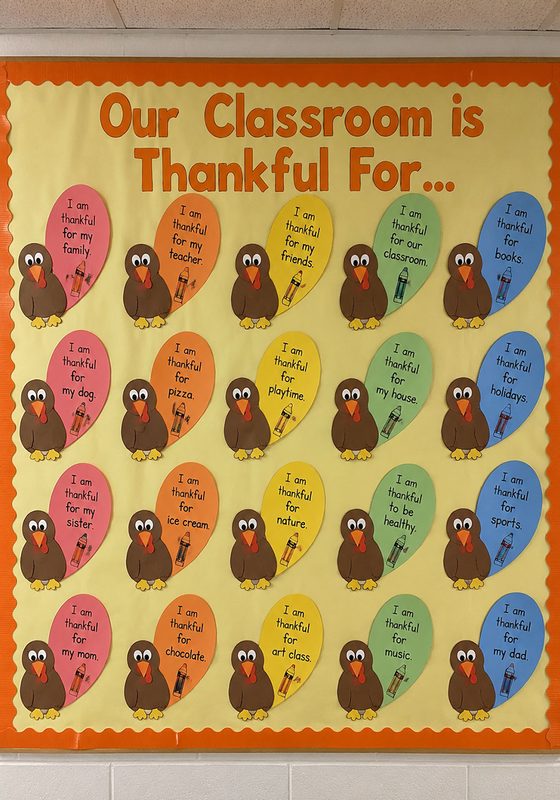
Turn your classroom wall into a colorful collection of gratitude with a feather writing display.
Each student gets a paper feather to decorate with a short message about something they appreciate, from family members to a favorite book.
Arrange the feathers around a turkey cutout or beneath a large “We Are Thankful For…” heading.
The finished board celebrates every student’s voice and gives classmates a chance to discover what matters to one another.
Materials You Need
- Colored construction paper
- Large poster board
- Washable markers
- Scissors
- Glue sticks
- Painter’s tape
How to Make It
- Cut feather shapes from different colors of construction paper.
- Write “We Are Thankful For…” on a large sheet of poster board.
- Draw or attach a turkey body beneath the heading.
- Give each student one paper feather.
- Ask students to write one thing they appreciate on their feathers.
- Let students decorate their feathers with patterns, colors, or small drawings.
- Arrange the completed feathers around the turkey, then attach them to the wall.
Pro Tip: Add a few blank feathers beside the display so students can contribute new messages throughout November.
2. Blessed and Thankful
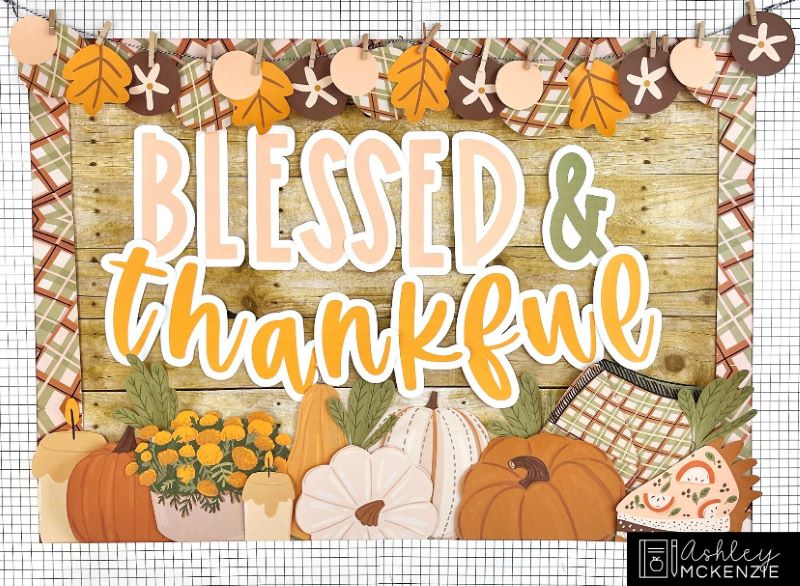
Give your classroom a cheerful Thanksgiving update with a “Blessed and Thankful” board filled with student contributions.
Colorful paper leaves, pumpkins, or handprints provide space for children to write about the experiences they appreciate.
I’d choose one main shape for a coordinated display, then let students personalize their pieces with drawings and colorful lettering.
The finished board celebrates gratitude in a way that suits different ages, from preschoolers who draw pictures to older students who write short messages.
Materials You Need
- Colored construction paper
- Large poster board
- Washable markers
- Glue sticks
- Scissors
- Removable adhesive strips
How to Make It
- Cover the bulletin board with poster paper in a fall color, such as orange, cream, or brown.
- Cut out paper leaves, pumpkins, or handprints, choosing one shape to keep the design consistent.
- Write “Blessed and Thankful” in large letters across the top of the board.
- Give each student a paper shape and ask them to write or draw something they appreciate.
- Arrange the finished pieces around the heading, then attach them to the board.
Pro Tip: Offer younger students picture examples of gratitude topics, such as family, pets, or favorite classroom activities, to help them get started.
3. Grateful Little Gobblers Photo Board
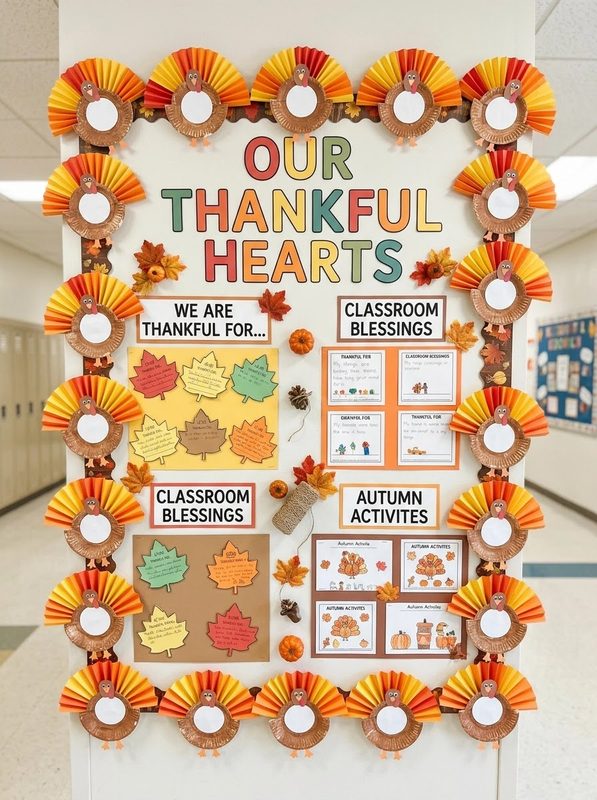
Turn your classroom into a gallery with a “Grateful Little Gobblers” board featuring each student’s photo.
Paper turkeys give every child a spot in the display, while a short gratitude message adds a personal touch.
Younger students might dictate their answers for an adult to write, while older children write their own messages beside their pictures.
This idea celebrates the students themselves, creating a memorable classroom display that families will enjoy seeing during November.
Materials You Need
- Printed student photos
- Brown construction paper
- Colored paper
- Washable markers
- Glue sticks
- Scissors
- Removable adhesive strips
How to Make It
- Print a photo of each student and trim the pictures to a similar size.
- Cut turkey bodies from brown paper, then prepare colorful feathers, beaks, and wattles.
- Attach each student’s photo to a turkey body and add the paper features.
- Ask each child to share one thing they’re thankful for, then write the response on a feather or small caption card.
- Add the title “Grateful Little Gobblers” above the display and arrange the finished turkeys underneath.
Pro Tip: Use copies of student photos instead of original prints, and follow your school’s rules for displaying children’s pictures.
4. Gratitude Wall
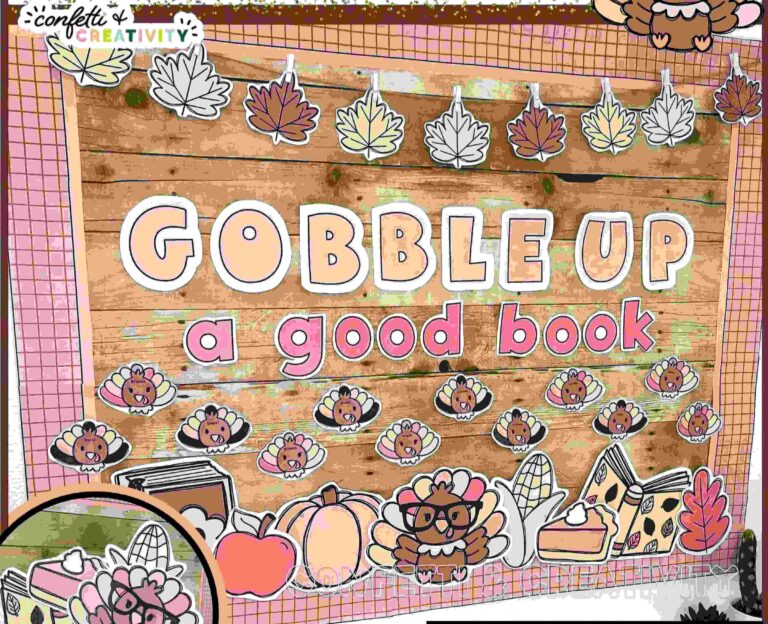
Give students a place to share what matters to them with a classroom gratitude wall that grows throughout November.
Unlike a fixed bulletin board, this display invites new contributions whenever children think of something they appreciate.
Paper notes shaped like leaves, hearts, or simple rectangles keep the activity easy to manage with supplies already found in most classrooms.
The finished wall becomes a collection of student voices, offering fresh conversation starters about everyday moments worth appreciating.
Materials You Need
- Sticky notes
- Markers or colored pencils
- Letter cutouts
- Painter’s tape or removable adhesive
How to Make It
- Choose an accessible wall section and place the heading where students can easily see it.
- Set out sticky notes or small paper cards with markers nearby.
- Ask each student to write or draw one thing they appreciate, helping younger children as needed.
- Arrange the first contributions beneath the heading, leaving open space for future notes.
- Invite students to add messages during the month, and periodically group similar notes together for easy reading.
Pro Tip: Avoid including private family details in public messages; remind students to choose something they’re comfortable sharing with the class.
5. “Grateful Hearts Gather Here” Turkey Wall
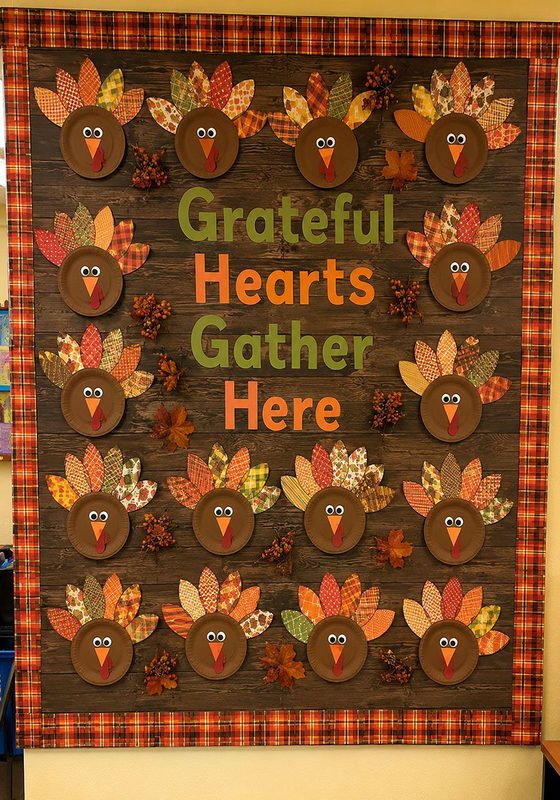
A large paper turkey surrounded by student-made hearts gives this Thanksgiving display a clear message of classroom togetherness.
The heading “Grateful Hearts Gather Here” sets the theme, while each heart carries a student’s name.
Choose bright fall colors for a traditional seasonal look, or use your classroom colors to coordinate with the existing decorations.
The finished display brings individual contributions into one shared design.
This gives every student a visible place in the classroom community.
Materials You Need
- Brown construction paper
- Colored construction paper
- Poster board
- Washable markers
- Glue sticks
- Scissors
- Removable adhesive strips
How to Make It
- Cut a large turkey body from brown paper, then add its head, beak, wattle, and feet.
- Create colorful tail feathers and arrange them behind the body to form a wide turkey shape.
- Cut out one paper heart for each student and write “Grateful Hearts Gather Here” across the top of the display.
- Have students write their names and one thing they appreciate on their hearts, adding small drawings if they wish.
- Arrange the hearts around the turkey, then attach each piece securely to the wall.
Pro Tip: Use large hearts for younger students who need room for drawings, and smaller ones for older students writing short messages.
6. Our Class Is Sweet as Pie
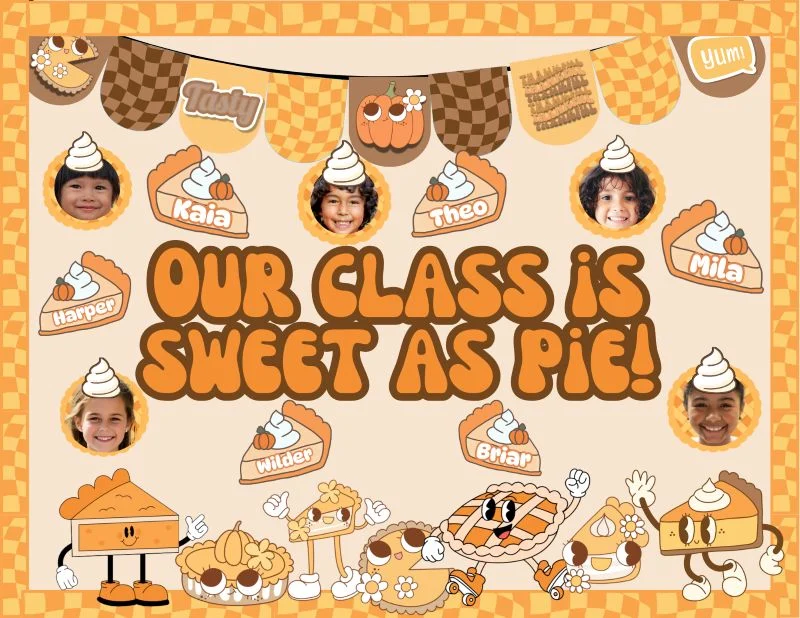
A pie-themed bulletin board brings a little Thanksgiving humor to your classroom while celebrating what makes each student special.
Create a large paper pie with colorful slices, giving every child a section to decorate with their name.
Use a gingham background or simple fall colors to make the display resemble a homemade Thanksgiving dessert.
The finished board celebrates your class as a sweet bunch, with every student contributing a slice to the design.
Materials You Need
- Brown construction paper
- Red, orange, yellow, and cream construction paper
- Gingham bulletin board paper
- Washable markers
- Scissors
- Glue sticks
- Removable adhesive strips
How to Make It
- Cut a large circle from brown construction paper to form the pie crust, then divide it into slices.
- Cut smaller colored paper triangles to represent different pie fillings, such as pumpkin, apple, or cherry.
- Write “Our Class Is Sweet as Pie” across the top of the board.
- Give each student a paper slice to decorate with their name, a drawing, or a short message.
- Arrange the slices inside the pie crust, then attach the completed design to the bulletin board.
Pro Tip: Add a scalloped paper border around the pie crust to resemble a fluted pastry edge.
7. Give Thanks Every Day Plaid Accordion Turkey
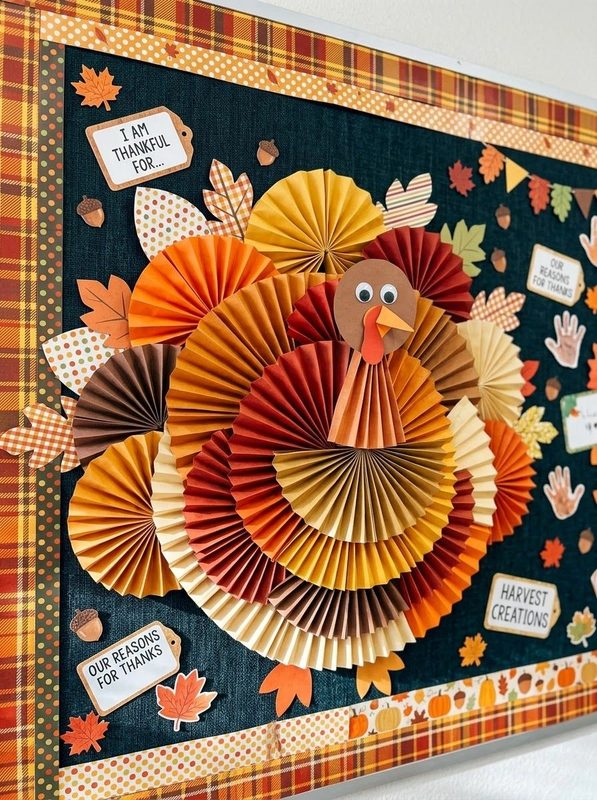
An accordion-fold turkey brings dimension to your Thanksgiving bulletin board with its fan-shaped tail and classic plaid pattern.
Use plaid paper for the feathers, then let students write short gratitude messages on individual tail sections.
The folded paper adds texture to the display, giving the turkey a more three-dimensional appearance than a flat paper cutout.
Pair the turkey with a bold “Give Thanks Every Day” heading for a seasonal message that stands out in the classroom.
Materials You Need
- Red and black buffalo plaid scrapbook paper
- Brown construction paper
- Orange and yellow construction paper
- Washable markers
- Scissors
- Glue sticks
- Double-sided tape
- Removable adhesive strips
How to Make It
- Cut several long paper strips from plaid scrapbook paper, keeping them similar in width.
- Fold each strip back and forth in an accordion pattern, then press the folds firmly.
- Join the folded strips at their ends to form a fan-shaped turkey tail.
- Cut a turkey body from brown paper and add an orange beak, a red wattle, and simple eyes.
- Attach the accordion tail behind the turkey body, then add a “Give Thanks Every Day” heading.
- Mount the turkey on the wall and add short gratitude messages around it.
Pro Tip: Use lightweight scrapbook paper so the accordion folds hold their shape without pulling away from the wall.
8. A Thankful Quilt
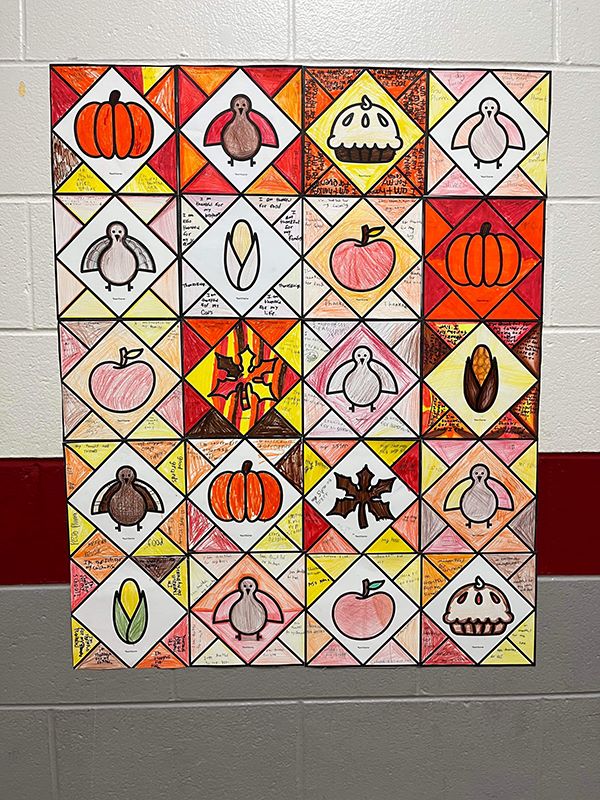
A paper quilt turns your classroom bulletin board into a patchwork of student voices, with each square contributing to one larger design.
Give every child a square to decorate with a drawing, name, or short message about gratitude.
Mix autumn colors with simple patterns to capture the look of a traditional quilt without requiring sewing skills.
Once assembled, the display celebrates each student’s contribution as part of a shared classroom creation.
Materials You Need
- Colored construction paper or cardstock
- Patterned scrapbook paper
- Ruler
- Pencils
- Paper trimmer
- Glue sticks
- Removable adhesive strips
How to Make It
- Cut construction paper into equal-sized squares, preparing one for each student.
- Give each student a square to decorate with a gratitude message, drawing, or personal pattern.
- Cut additional patterned squares to fill gaps or create a border around the quilt.
- Arrange the squares in rows on a flat surface, alternating colors and patterns until the layout looks cohesive.
- Add the heading “A Thankful Quilt” above the design, then attach the squares to the bulletin board in order.
Pro Tip: Lay out every square before mounting the display so you can adjust the colors and spacing easily.
9. Gratitude Mugs
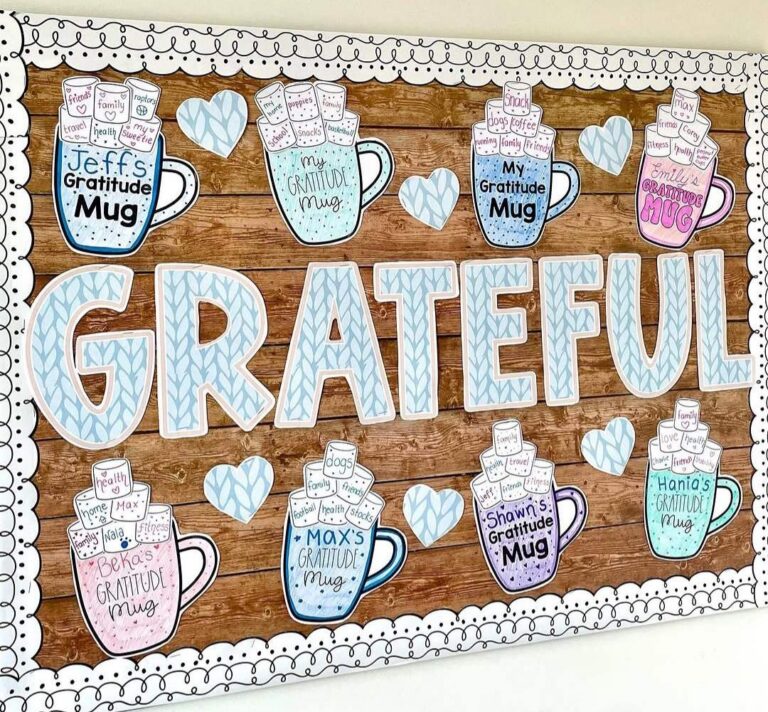
Turn paper coffee mugs into a cheerful gratitude display inspired by the cozy drinks people enjoy during the fall season.
Each mug holds a student’s message about something they appreciate, from a favorite teacher to a special family tradition.
Add paper steam curls, decorative sleeves, or tiny heart details to give the cups individual character.
The finished board resembles a collection of warm drinks, with every mug sharing a little reminder of gratitude.
Materials You Need
- Cream, brown, and colored construction paper
- Cup-shaped paper templates
- Washable markers
- Scissors
- Glue sticks
- Removable adhesive strips
How to Make It
- Cut mug shapes from construction paper, using a template to keep the cups similar in size.
- Cut small handles and optional paper sleeves, then attach them to each mug.
- Give every student a mug to decorate with a gratitude message or small drawing.
- Add a “Gratitude Mugs” heading and cut paper steam curls to fill the space above the cups.
- Arrange the mugs in rows or across a large paper shelf, then mount the completed display.
Pro Tip: Use light-colored paper for the mugs so students’ handwriting remains easy to read from a distance.
10. So Very Thankful
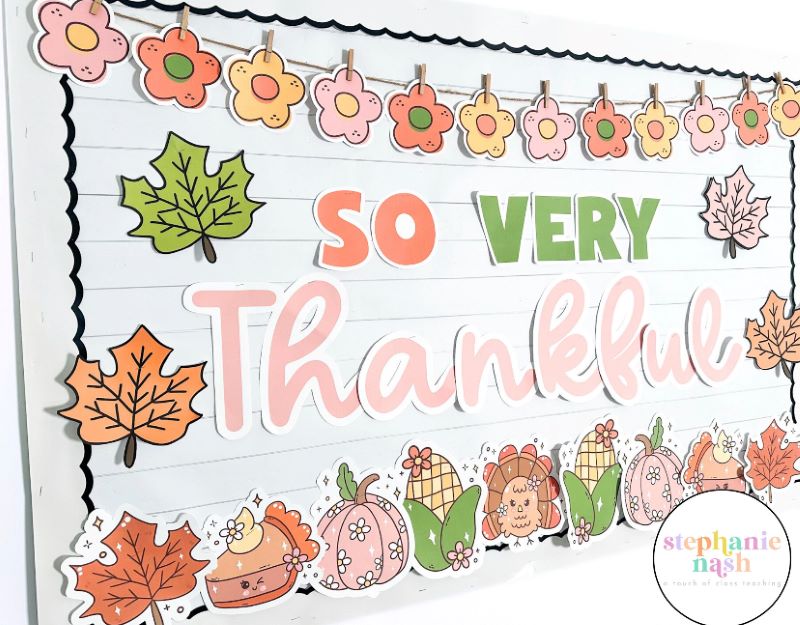
A “So Very Thankful” bulletin board puts student messages at the center of your Thanksgiving classroom decorations.
Cut large letters for the heading, then surround them with paper leaves carrying short notes about what students appreciate.
Choose a simple background so the words remain easy to read, even from the opposite side of the classroom.
The display offers a meaningful way to celebrate gratitude while giving every student a chance to contribute a personal message.
Materials You Need
- Large letter cutouts or colored cardstock for the heading
- Construction paper for leaves
- Washable markers
- Scissors
- Glue sticks
- Removable adhesive strips
How to Make It
- Arrange the letters to spell “So Very Thankful” across the top of the bulletin board.
- Cut leaf shapes from autumn-colored construction paper, preparing enough for each student.
- Ask students to write one thing they appreciate on a leaf, adding a small drawing if they prefer.
- Place the leaves around the heading, mixing colors to create a full seasonal display.
- Attach the pieces to the board and check that every message remains visible.
Pro Tip: Use a different leaf color for each classroom group to make the display easier to organize.
11. Give Thanks Every Day
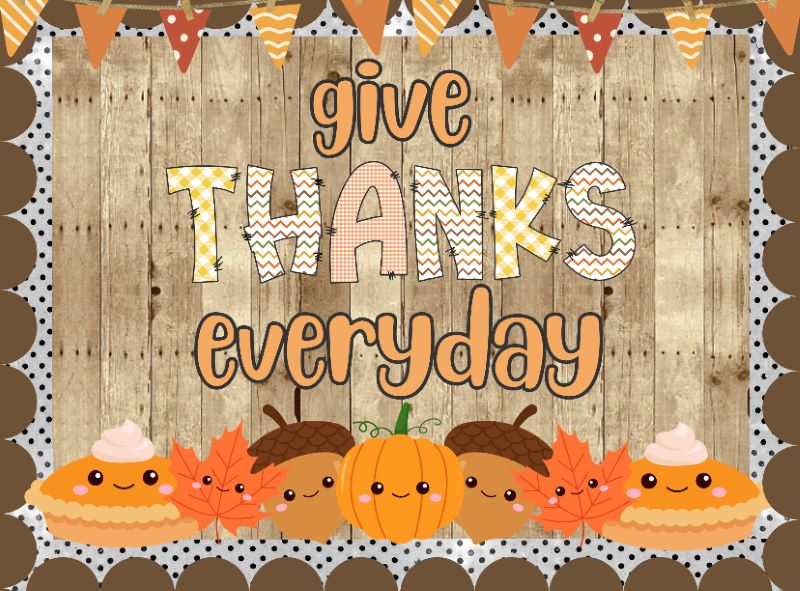
A daily gratitude board gives students a reason to pause and notice the good things in their lives throughout November.
Create a large heading surrounded by paper cards where children write one thing they appreciate each day.
Unlike a display completed in one lesson, this board changes as students add new thoughts and discover what their classmates value.
It also provides a simple classroom routine that encourages positive reflection during the busy weeks before Thanksgiving.
Materials You Need
- Sticky notes or small index cards
- Colored paper
- Washable markers or colored pencils
- Decorative washi tape
- Removable adhesive
How to Make It
- Place a large “Give Thanks Every Day” heading at the top of a designated classroom wall.
- Set out sticky notes or index cards where students can easily reach them.
- Invite students to write or draw one thing they appreciate each day.
- Ask students to add their notes beneath the heading, grouping them by date if desired.
- Review a few contributions during morning meetings and leave the board open for new messages throughout November.
Pro Tip: Keep a small basket of cards beside the display so students can add messages without interrupting lessons.
12. It’s All Gravy, Baby!
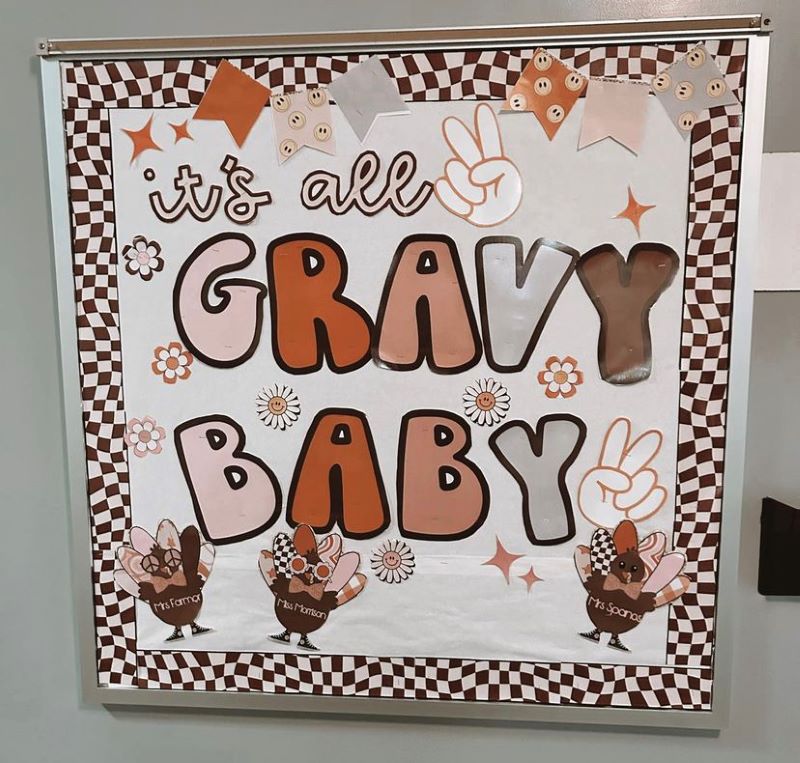
Give your classroom a dash of holiday humor with an “It’s All Gravy, Baby!” bulletin board inspired by everyone’s favorite holiday sauce.
A large paper gravy boat or bowl makes a fun centerpiece, surrounded by student-made plates, spoons, or little gravy cups.
Each student could write something they’re thankful for on a paper food item.
The playful wording adds personality to your November decorations and gives students a fun way to join the celebration.
Materials You Need
- Brown construction paper
- Cream and tan construction paper
- Orange paper
- Washable markers
- Scissors
- Glue sticks
- Removable adhesive strips
How to Make It
- Cut a large gravy boat or serving bowl from brown construction paper to serve as the main display piece.
- Create paper plates, gravy cups, or spoons in different sizes, using cream and tan paper for a coordinated look.
- Write “It’s All Gravy, Baby!” in large letters above the centerpiece.
- Ask students to write one thing they appreciate on a paper plate or gravy cup, then decorate their pieces.
- Arrange the student contributions around the gravy boat and attach the pieces to the bulletin board.
Pro Tip: Add a few paper steam curls above the gravy boat to make the centerpiece stand out.
13. Look Whoooo’s Thankful!
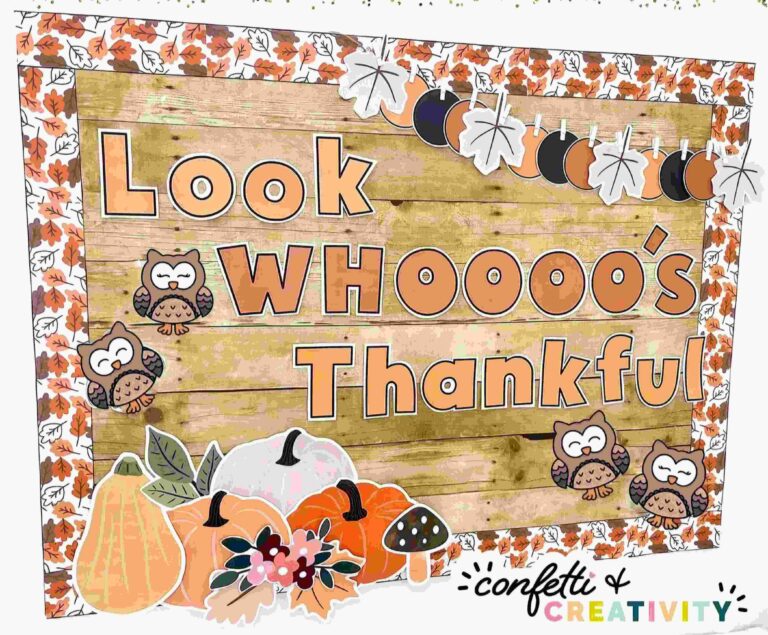
Bring a little woodland fun to your Thanksgiving bulletin board with a group of wide-eyed paper owls.
Give each owl a different expression or feather pattern, then add a gratitude message to its body.
A tree branch made from brown paper gives the owls a place to perch to create a scene that suits the fall season.
The display celebrates your students’ individuality while turning a simple gratitude activity into a memorable classroom scene.
Materials You Need
- Brown construction paper for the tree branch
- Colored construction paper for owl bodies and wings
- White and black paper for eyes
- Washable markers
- Scissors
- Glue sticks
- Removable adhesive strips
How to Make It
- Cut a wide tree branch from brown paper and attach it across the bulletin board.
- Cut owl bodies, wings, and small feather details from assorted construction paper.
- Add large eyes, beaks, and simple patterns to give each owl its own personality.
- Write “Look Whoooo’s Thankful!” above the branch, leaving enough room for the owls.
- Invite each student to add their name or a gratitude message to an owl, then arrange the owls along the branch.
Pro Tip: Use different body colors and eye expressions to help every owl stand out in the finished display.
14. Thanksgiving Parade
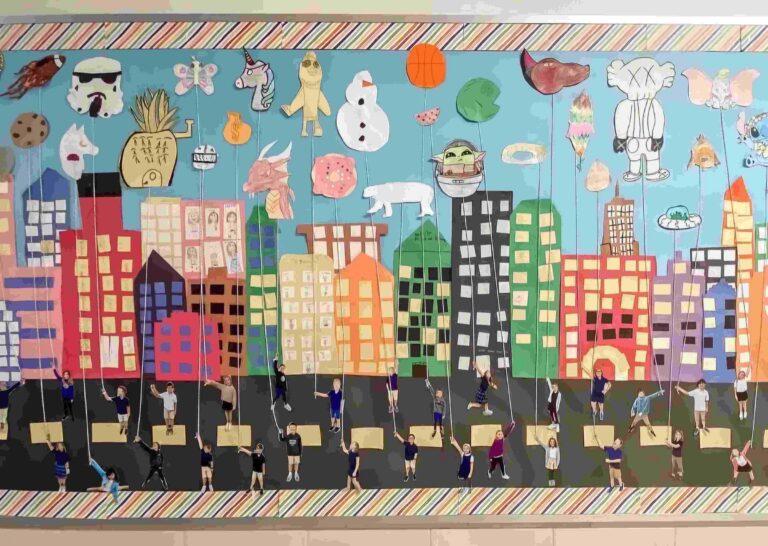
Bring the excitement of a holiday parade into your classroom with a bulletin board full of student-created floats.
Paper balloons, marching turkeys, and tiny parade banners create the look of a celebration moving across the wall.
Invite students to design their own parade entries, adding a short message about something they appreciate.
The finished display gives children plenty of room to contribute their own creative ideas.
Materials You Need
- Colored construction paper
- Poster board for parade banners
- Washable markers
- Scissors
- Glue sticks
- Decorative paper streamers
- Removable adhesive strips
How to Make It
- Cover the bulletin board with blue paper to create a simple background for the parade.
- Cut out paper floats, balloons, turkeys, and marching characters in different colors.
- Create a large “Thanksgiving Parade” banner and place it above the scene.
- Ask students to decorate a parade character or float with a gratitude message or festive pattern.
- Arrange the pieces in a horizontal line to suggest a moving parade, then secure them to the board.
Pro Tip: Add paper confetti or short streamer shapes between the parade entries to fill empty spaces.
15. Give Thanks Turkey
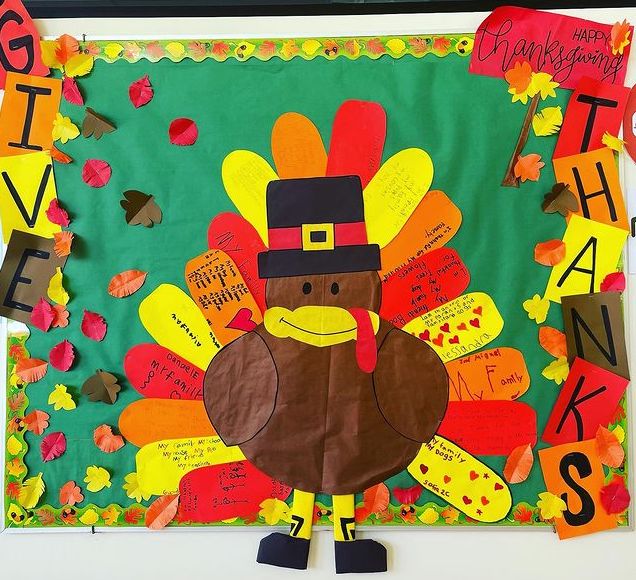
A classic paper turkey becomes a meaningful classroom display when each feather carries a student’s message of gratitude.
Use bright fall colors for the tail, then place the turkey in the center of the bulletin board.
Students can write about a person, activity, or small moment they appreciate on their individual feathers.
The finished design keeps the Thanksgiving theme recognizable while giving every child a clear place to contribute to the class display.
Materials You Need
- Brown construction paper for the turkey body
- Red, orange, yellow, and green construction paper for the feathers
- White paper for the eyes
- Washable markers
- Scissors
- Glue sticks
- Removable adhesive strips
How to Make It
- Cut a large turkey body from brown construction paper, then add the head, beak, wattle, and feet.
- Prepare colorful paper feathers, cutting enough for each student to contribute one.
- Add a “Give Thanks” heading above the turkey and position the body in the center of the board.
- Ask each student to write or draw one thing they appreciate on a feather.
- Arrange the feathers in a fan behind the turkey body, then attach the completed design to the wall.
Pro Tip: Write student messages in dark markers so the words remain easy to read against bright paper feathers.
Frequently Asked Questions
How Can I Involve Students in Creating a Thanksgiving Bulletin Board?
Get students involved by giving them creative tasks that contribute to the final display.
- Invite students to write what they’re thankful for on paper leaves, turkey feathers, or other seasonal cutouts.
- Let students create Thanksgiving artwork, such as turkeys, Pilgrims, or holiday scenes, to decorate the board.
- Organize a collaborative art project where each student contributes a piece to a larger picture, such as a giant turkey or fall puzzle.
- Assign different responsibilities, including coloring shapes, cutting decorations, or designing the bulletin board border.
How Do I Make My Thanksgiving Bulletin Board Educational and Fun?
Combine seasonal decorations with activities that encourage students to learn, write, and participate.
- Display Thanksgiving trivia questions and interesting historical facts for students to explore.
- Add interactive features, such as lift-up flaps or pockets containing Thanksgiving facts.
- Invite students to write short poems or paragraphs about gratitude, then display their work.
- Create a gratitude wall where students and teachers share things they appreciate throughout November.
- Include QR codes linking to age-appropriate videos or websites about Thanksgiving history.
How Long Do DIY Door Crafts Usually Take to Complete?
Many projects take about 15 to 20 minutes to put together once the pieces are ready.
For crafts involving students, such as handprint turkey feathers, allow around 10 minutes for the classroom activity and another 10 minutes for the teacher to assemble the display afterward.
What Materials Should I Use for a Thanksgiving Bulletin Board?
Use construction paper, cardstock, markers, scissors, glue sticks, bulletin board borders, and removable adhesive strips. Add seasonal decorations to match your theme.
Do Fire Codes Restrict What I Can Put on My Door?
Yes, fire codes and school policies may restrict door decorations. Keep safety signs, windows, handles, and exits clear, and check your school’s guidelines before decorating.