13 Fun DIY Christmas Tree Garland Ideas Worth Trying
Disclosure: This post may contain affiliate links. As an Amazon Associate, I earn a small commission from qualifying purchases at no extra cost to you. Thanks.
Some of my favorite Christmas decorations are the ones made by hand.
A simple garland has a way of turning ordinary craft materials into a lovely Christmas tree decoration.
In this case, I prefer pieces with a personal touch.
This holiday season, I’m giving homemade garlands their own place on the tree.
These 11 DIY Christmas tree garland ideas feature creative designs worth trying.
Heads up: Best selling Christmas tree Garland I found on Amazon:
How To Decorate Christmas Tree With Handmade Garlands
1. Fluffy Pom-Pom Garland

A fluffy pom-pom garland is a cheerful way to decorate your Christmas tree with handmade details.
Choose several yarn colors to give the strand a playful holiday look.
Red, white, and green create a classic combination, while pastel shades offer a softer style.
You can even alternate thick and tiny pom-poms for extra variety.
Drape the finished garland loosely across the branches so each fluffy piece remains visible among the ornaments.
Supplies Needed:
- Yarn in several colors
- Pom-pom maker or cardboard circles
- Sharp scissors
- Strong thread
- Large tapestry needle
How to Make It:
- Wrap yarn around your pom-pom maker or cardboard circles until you have a thick layer.
- Tie the yarn tightly at the center, then cut through the loops on both sides.
- Trim the loose strands to form a neat, fluffy pom-pom.
- Repeat with your chosen yarn colors until you have enough pom-poms.
- Thread your tapestry needle with strong thread and pass it through each pom-pom.
- Space the pom-poms evenly, then tie the ends securely.
Craft Hack: Mix large and small pom-poms along the same strand for a playful garland with varied texture.
2. Popcorn and Cranberry Garland
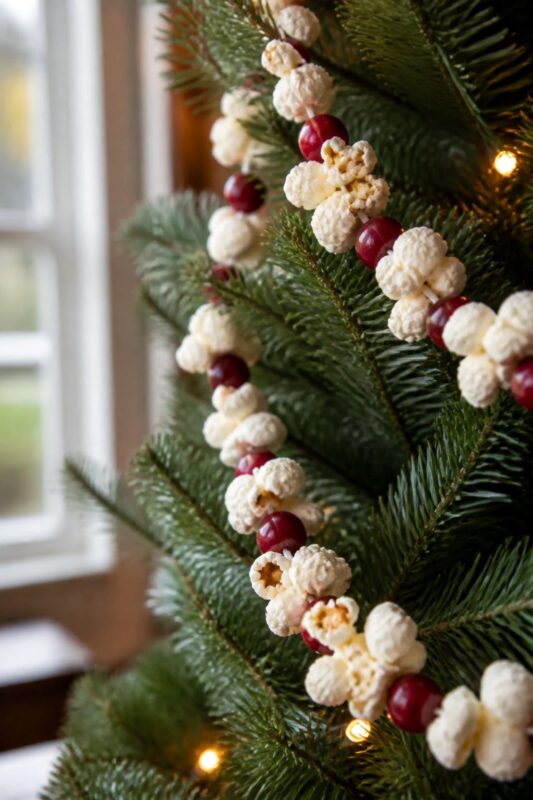
Popcorn and cranberry garlands have a lovely old-fashioned charm that takes me back to traditional Christmas decorating.
The white popcorn and bright red berries create a simple festive pattern against green tree branches.
I prefer this combination on a natural tree with warm white lights and wooden ornaments.
The finished strand looks lovely draped loosely across the branches, with each red and white section easy to spot.
Materials Needed:
- Plain popped popcorn
- Fresh firm cranberries
- Waxed dental floss
- Large sewing needle
- Scissors
- Small bowl
How to Make It:
- Prepare your popcorn and allow it to cool completely before use.
- Cut a long piece of waxed dental floss and thread your sewing needle.
- Tie a knot at the end to secure the first piece.
- Carefully thread one cranberry onto the floss, followed by a popcorn piece.
- Continue alternating the two until the garland reaches your preferred length.
- Tie a secure knot at the other end and trim the excess floss.
Quick Tip: Use firm cranberries and fresh popcorn, then hang the garland shortly before Christmas since these natural materials do not last indefinitely.
3. Jingle Bell and Bead Garland
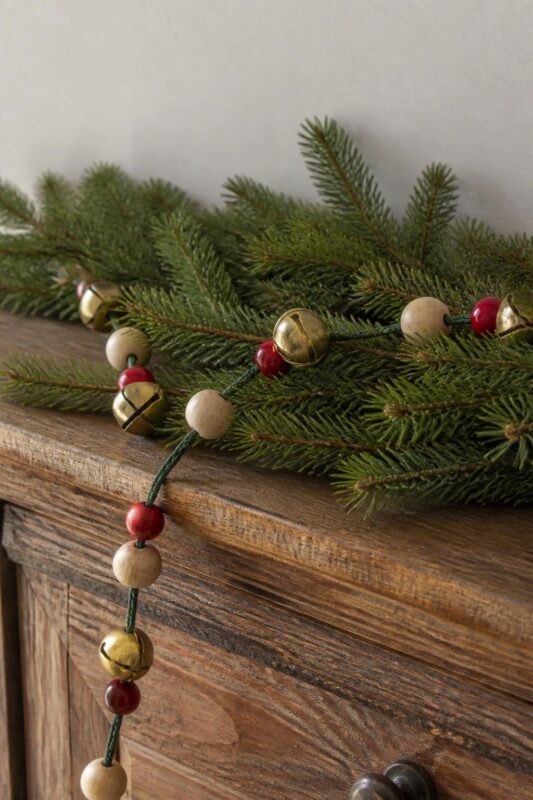
Give your Christmas tree a cheerful country touch with a garland of jingle bells and wooden beads.
The little bells add a festive sound whenever someone passes near the branches.
Natural wooden beads break up the metallic shine and give the strand a rustic look.
Gold or brass bells pair nicely with unfinished wood, while painted beads introduce a pop of Christmas color.
Alternate the pieces in a simple pattern for a handmade decoration that looks lovely across green branches.
Materials Needed:
- Jingle bells
- Wooden beads
- Strong cord
- Thin floral wire, optional
- Scissors
- Paintbrush
How to Make It:
- Cut your cord to the desired garland length, leaving extra room for knots.
- Paint some wooden beads in your preferred colors and let them dry completely.
- Tie a secure knot at one end of the cord.
- Thread a wooden bead followed by a jingle bell onto the cord.
- Repeat the pattern until the strand reaches your desired length.
- Secure the final pieces with a firm knot and trim the excess cord.
Pro Tip: Mix different bell sizes to give the garland a more interesting look and a lovely variety of festive sounds.
4. Orange Sliced Garland

Dried orange slices give your Christmas tree a lovely natural decoration with a warm, citrus-inspired look.
Their golden color stands out against green branches and pairs nicely with wooden ornaments.
I love this idea for a rustic Christmas theme, particularly when the tree has warm white lights.
The finished garland has a simple homemade charm and fills the room with a gentle citrus scent during preparation.
Supplies Needed:
- Fresh oranges
- Sharp knife
- Baking tray
- Parchment paper
- Strong thread
- Large sewing needle
How to Make It:
- Slice the oranges into thin, even rounds.
- Pat each slice with paper towels to remove excess juice.
- Arrange the slices on a parchment-lined baking tray.
- Bake at a low temperature (around 200°F or 95°C), turning occasionally until dry.
- Allow the slices to cool completely.
- Thread each slice through the flesh near the top and arrange them along the string.
Decorating Hack: Add a few cinnamon sticks between the orange slices for a lovely traditional Christmas scent.
5. Scandinavian Scalloped Wood Bead Garland

A scalloped wood bead garland is a lovely choice for a simple Scandinavian Christmas tree.
Its repeating curves give the branches a delicate decorative detail without taking attention away from the ornaments.
Natural wooden beads keep the look warm and understated.
Whitewashed beads introduce a lighter finish that pairs nicely with Nordic-inspired decorations.
The design looks lovely on a green tree, particularly when paired with handmade paper ornaments and warm lights.
Supplies Needed:
- Wooden beads in two sizes
- Strong beading cord
- Scissors
- White paint, optional
How to Make It:
- Paint some wooden beads white if you prefer a two-tone design, then let them dry.
- Cut your cord to the desired garland length.
- Thread one larger bead onto the cord.
- Add two smaller beads, followed by another large bead.
- Repeat the pattern to form a scalloped effect along the strand.
- Secure both ends with firm knots.
Styling Trick: Alternate natural and whitewashed beads to give the scalloped pattern a little more definition.
6. Musical Flowers DIY Garland
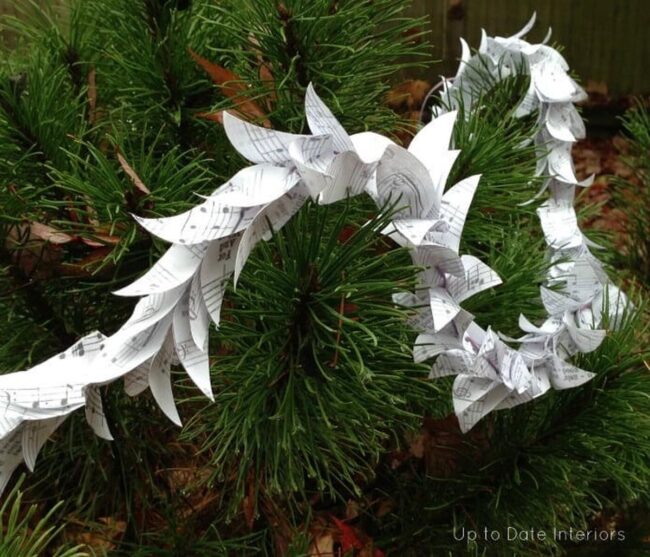
Turn old sheet music into delicate paper flowers for a Christmas tree garland with a vintage touch.
The printed notes and lyrics give each flower an interesting detail that ordinary craft paper lacks.
This idea is lovely for a music-themed tree or a display with nostalgic decorations.
Use pages from an old songbook to keep the flowers within one consistent style.
Once assembled, the paper blooms form a charming strand that looks lovely across the branches.
Materials Needed:
- Old sheet music
- Scissors
- Strong thread
- Large sewing needle
- Glue stick
How to Make It:
- Cut the sheet music into several strips of equal width.
- Fold each strip into an accordion shape.
- Join the two ends with glue to form a circular flower.
- Press the center gently so the folded paper spreads into a flower shape.
- Allow the glue to dry, then repeat until you have enough flowers.
- Carefully thread the flowers through their centers and space them along the string.
Creative Tip: Add a small gold paper circle to the center of each flower for a festive finishing detail.
7. Merry Christmas Banner
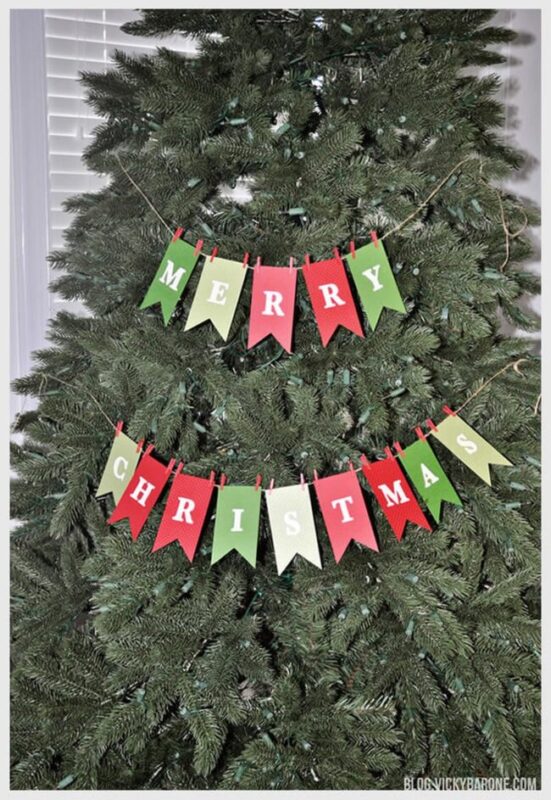
Give your Christmas tree a cheerful message with a handmade Merry Christmas banner garland.
This decoration adds a playful touch and looks lovely across the front branches.
Choose traditional red and green paper for a classic holiday display, or use kraft cardstock for a rustic finish.
The individual letters stand out nicely against green foliage when the tree has simple ornaments.
Supplies Needed:
- Red, green, or kraft cardstock
- Letter stencils or alphabet stickers
- Scissors
- Hole punch
- Jute twine
- Glue stick
How to Make It:
- Cut your cardstock into equal-sized triangles or small rectangular flags.
- Use alphabet stickers or stencils to spell out MERRY CHRISTMAS.
- Punch two small holes near the top corners of each flag.
- Cut a length of jute twine to your preferred garland size.
- Thread the flags onto the twine in the correct order.
- Space the letters evenly and secure the ends with small knots.
Fun Fact: Add a tiny star or snowflake to each end of the banner for a more festive finish.
8. No-Sew Crocheted Paper-Style Christmas Garland

Give ordinary paper a crochet-inspired appearance with this clever no-sew Christmas garland.
The linked loops resemble delicate handmade lace and introduce an interesting detail across the tree branches.
Use white paper for a snowy effect or choose kraft paper for a natural, rustic look.
This craft is a lovely alternative to traditional tinsel and requires no crochet skills.
Supplies Needed:
- Lightweight cardstock or craft paper
- Scissors
- Ruler
- Glue stick
How to Make It:
- Cut your paper into long strips of equal width.
- Form the first strip into a loop and secure the ends with glue.
- Pass a second strip through the first loop.
- Join its ends to form another connected loop.
- Continue the process until the garland reaches your desired length.
- Allow the glue to dry before draping the finished chain across your tree.
Top Trick: Cut the strips into scalloped or wavy edges before you assemble them for a lace-like finish.
9. Faux Popcorn Garland

A faux popcorn garland gives your Christmas tree the classic look of an old-fashioned popcorn strand.
Air-dry clay makes a safer crafting alternative to expanding spray insulation, with each piece shaped to resemble a fluffy popcorn kernel.
Use white clay for a natural popcorn appearance, then string the finished pieces along cotton thread.
The result is a charming handmade decoration that pairs beautifully with traditional Christmas ornaments.
Supplies Needed:
- White air-dry clay
- Strong cotton thread
- Large sewing needle
- Scissors
- White acrylic paint (optional)
How to Make It:
- Pinch off small portions of air-dry clay.
- Shape each piece into an irregular popcorn-like form.
- Place the pieces on a flat surface and leave them to dry according to the manufacturer’s instructions.
- Apply a little white acrylic paint if needed, then let the pieces dry completely.
- Thread the needle with cotton thread and carefully pass it through each clay piece.
- Space the pieces along the thread, then knot both ends to secure the garland.
Safety Tip: Keep the finished garland away from open flames and hot tree lights, and check that every clay piece is completely dry before hanging it.
10. Paper Snowman with Scarf Wire Garland

Tiny paper snowmen make a playful Christmas tree garland with a cheerful winter theme.
Each snowman gets a little scarf made from colorful paper, giving the strand a lovely handmade character.
White cardstock keeps the figures crisp, while red scarves introduce traditional Christmas colors.
A flexible craft wire holds the snowmen together and makes it easy to drape the garland around the branches.
Supplies Needed:
- White cardstock
- Red and green colored paper
- Black and orange markers
- Thin craft wire
- Scissors
- Glue stick
- Hole punch
How to Make It:
- Draw small snowman shapes on white cardstock and cut them out.
- Use black marker to add eyes, buttons, and a smiling mouth.
- Draw a small orange carrot nose on each snowman.
- Cut narrow strips of colored paper for the scarves and glue one around each snowman’s neck.
- Punch a small hole near the top of each figure.
- Thread the snowmen onto craft wire, leaving a little space between them.
- Twist the wire ends into small loops to keep the figures in place.
Quick Win: Add tiny paper hats to a few snowmen for extra character and a more playful garland.
11. Beautiful Ruffled Burlap Garland

Ruffled burlap gives your Christmas tree a lovely farmhouse decoration with plenty of texture.
The gathered fabric forms soft folds along the strand, bringing a warm rustic touch to the branches.
Natural burlap keeps the look simple, while red-edged or white burlap introduces a festive finish.
This garland pairs nicely with wooden ornaments and traditional Christmas decorations hence a lovely choice for a country-inspired tree.
Supplies Needed:
- Burlap ribbon
- Strong twine or thin rope
- Large sewing needle
- Scissors
- Floral wire or small zip ties
How to Make It:
- Cut the burlap ribbon to your preferred garland length.
- Thread a large needle with strong twine and tie a knot at the end.
- Run a loose stitch along the center of the burlap ribbon.
- Gently pull the twine to gather the fabric into ruffles.
- Continue gathering until the garland reaches your desired length.
- Secure the ends with knots and attach small pieces of floral wire to help hold the shape.
- Fluff the ruffles before arranging the garland across the tree.
Styling Trick: Alternate natural burlap with a narrow red ribbon for a classic farmhouse Christmas look.
12. Santa’s Gift Sack Christmas Countdown Garland

Turn the days leading up to Christmas into a fun decorating feature with miniature Santa gift sacks.
Each little sack holds a number, giving your family a cheerful countdown to the big day.
Use red fabric for a traditional Santa-inspired design, then add white trim and tiny drawstrings for the finishing touches.
Hang the numbered sacks along a long ribbon or twine strand, ready for a daily treat.
Supplies Needed:
- Small red fabric pieces or mini drawstring bags
- White felt or cotton trim
- Black number stickers or fabric markers
- Red or white ribbon
- Twine
- Fabric glue or needle and thread
- Mini wooden clips
How to Make It:
- Cut red fabric into small rectangles and fold each piece into a pouch.
- Sew or glue the sides together, leaving the top open.
- Attach white felt or cotton trim around each opening.
- Add numbers from 1 to 24 using stickers or a fabric marker.
- Fill each sack with a small treat, note, or Christmas activity.
- Tie a short ribbon around each pouch to close it.
- Attach the sacks to a long piece of twine using mini wooden clips.
Quick Win: Add a tiny handwritten Christmas activity to a few sacks, such as decorating cookies to make the countdown more memorable.
Frequently Asked Questions
1. What materials can I use to make a DIY Christmas tree garland?
Popular materials include yarn, popcorn, cranberries, paper, wooden beads, paper, burlap, dried orange slices. Choose supplies that complement your Christmas tree theme.
2. How long should a Christmas tree garland be?
The ideal length depends on your tree’s height and fullness. Measure the tree before crafting, then allow extra length for loose draping around the branches.
3. How do you attach homemade garland to a Christmas tree?
Drape the garland loosely around the branches, securing it with floral wire, small ornament hooks, or discreet twist ties. Avoid pulling it too tightly, as this may flatten delicate decorations.